✆ Call us | ✉ Email us Home / Blog
During the next several days we will be performing a scheduled infrastructure upgrade.
This upgrade should be transparent to the end users and it will allow us to support significantly more RainMachines as well as decrease latency when accessing your sprinkler remotely. Should you experience problems when trying to remotely access the RainMachine, please let us know by calling or submitting a support trouble request.
There is no action required on your side. This scheduled infrastructure update and testing should end on 12/15/2017.
Thank you,
Rainmachine Support Team.
We are pleased to release the updates for RainMachine 4.4.101 iOS and 4.2.0 Android mobile applications.
This update release included speed improvements, bug fixes and new features as listed below:
- Simplified Program settings screen.
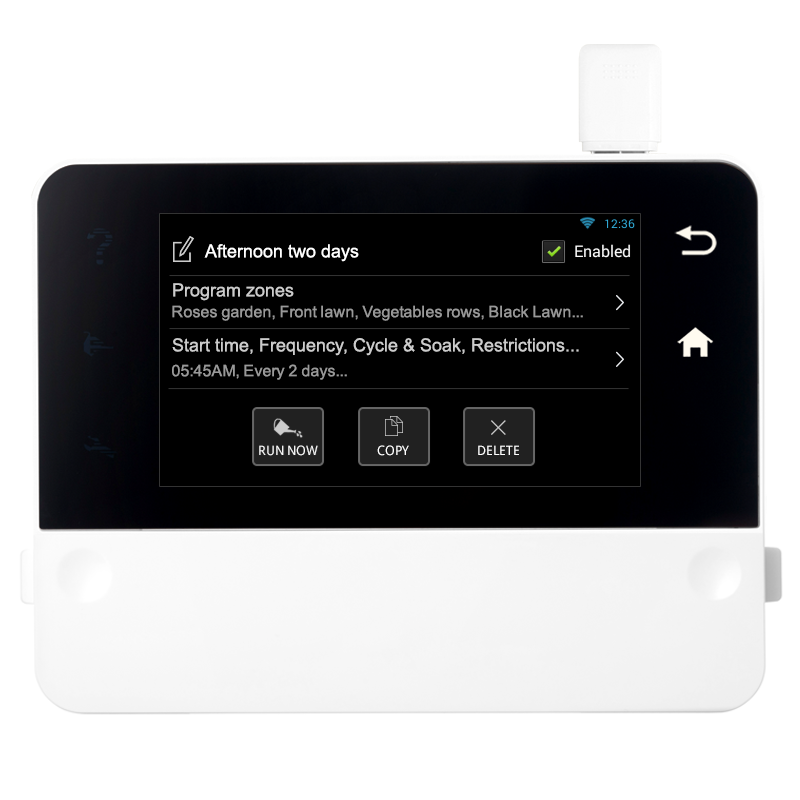
- Removed the upper right "EDIT" button from Zones/Programs screen. To edit a zone or a program simply tap on its name.
- Choose to Deactivate/Activate a program when you tap on its name.
- Suggested program zone times are detailed when the program frequency is "Selected Days"
- Added a pulse frame animation when a zone/program is currently running.
- Change the Zone/Program Start button position to the left or right from the iOS phone/tablet settings - RainMachine iOS app or from "Settings" - "System Settings" - "Advanced Settings" - "Interface Settings" - RainMachine Android app.
- Added new push notifications options: "Short detect on valve connector" and "Reboot during watering event" enabled by default.
- The Rain Sensor testing mode in sensor screen; separate settings entry for rain sensor.
- Increased the size of the bottom screen notification bar.
- Increased the size of touch area in program and zones screen.
- Show info about remote or local access for the RainMachines listed on Devices list.
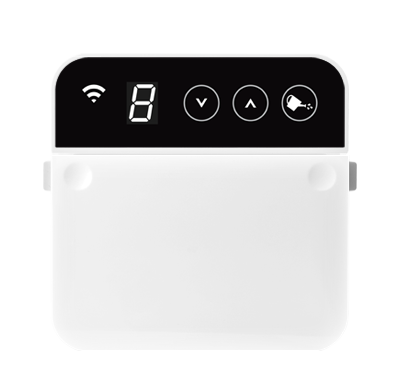
- “Touch program to run” option for RainMachine Mini-8 and choose the desired program to run when "P" is showing on the digit display.
- Fix time scheduled and time watered duration fields.
- Speed improvements and many bug fixes.
Over the course of a decade, the U.S. Environmental Protection Agency’s (EPA’s) WaterSense program has helped transform water efficiency from a drop in the bucket to more than 2.1 trillion gallons of water saved through 2016. That is more than the amount of water used by all U.S. households for 75 days!
Source epa.gov, for more information, read http://www.epa.gov/watersense/watersense-current-summer-2017.
We are proud to contribute to EPA's WaterSense goals, by being an important participant in EPA's WaterSense program. Our RainMachines are EPA certified and provide an average of 40%-60% savings based on location. For information on our RainMachine water savings calculator, please visit www.rainmachine.com and scroll towards the bottom of the page. Also, by using your RainMachine app you can check real-time statistics on your water usage and water savings.
We are honored to be part of this effort and we are attaching recognition letter received from the EPA WaterSense:
"With the attached certificate, WaterSense® thanks you for reporting 2016 annual data for Green Electronics LLC. Your annual data helps the U.S. Environmental Protection Agency track WaterSense’s progress and achievements, and your feedback helps us improve the program. This year, WaterSense is celebrating more than two trillion gallons of water saved since 2006 thanks to partners like you. We greatly appreciate your continued support."
EPA WaterSense Certificate of Appreciation for Green Electronics LLC
If there is an API there is a way. If there is local networking connection there must be a way. Unlike all the others controllers, the Rainmachine makes itself discoverable to local web browsers or apps without ever needing a cloud connection. Because RainMachine is running on a powerful platform, using open standards such as Bonjour the RainMachine makes itself discoverable, not only by iPhone or Android Apps but also by web browsers such as Safari or Mozilla.
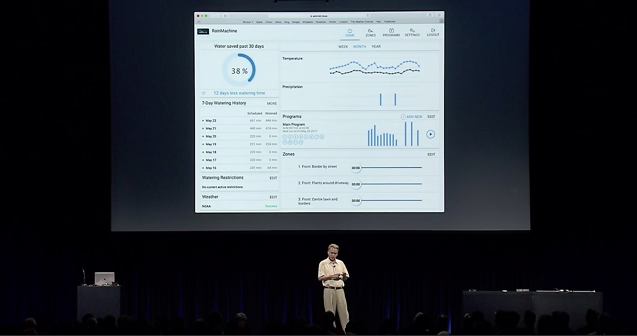
Stuart Cheshire presenting "Advances in Networking session, part 2" - © 2017 Apple WWDC
"RainMachine it has Wi-Fi with an embedded Web server Advertised with Bonjour. Compared to trying to program your garden sprinklers with a 2 digit LCD display and the Plus/Minus buttons, this is such a glorious experience to see it all on my big IMAC screen at the same time." said Apple's Stuart Cheshire at Apple's WWDC 2017, Advances in Networking session, part 2.
RainMachine is excited to release an updated suite of Apps for both iOS and Android.
We’ve been working hard for months to get this ready for you and now the apps are available for download today!
Among many new features and bug fixes, one of the most important features of this release is speed improvement (up to 4x faster) when loading the dashboard statistics remotely or locally.
For those that have not accessed the App since last season: we introduced Zone pictures functionality for all RainMachine users (including RainMachine Touch (2013) 1st Gen users!) where you can take pictures from your camera as well as photos album. This is the 1st step we are talking into a more immersive gardening experience (more to come soon).
Also, hidden in the Preference screen you will find Bonjour functionality*. This is a unique feature other irrigation controllers can't host due to their cloud dependent architecture. We believe that if you own the device, you should be able to discover from any device or any browser. More Bonjour surprises to be released soon but for now, you can just point your Safari browser.
Discover your RainMachine on a Mac, using the Safari web browser (Other browsers such as Mozilla Firefox have similar functionality).
1. Go to Preferences → Advanced and make sure that both Bonjour options are turned on.
2. Launch a new window (⌘N).
3. Check the “View” menu to make sure “Show Favorites Bar” is turned on (⇧⌘B).
4. In the Favorites Bar at the top of the new window, click the “Bonjour ⌄” button.
5. Select the desired device from the list that appears.
Note: * Bonjour functionality is available for 2nd gen RainMachine devices.
What's new:
- Show remote devices as offline instead of hiding them from the Devices screen.
- Remove Weather data switch for RainMachine Touch (2013) 1st generation devices.
- Bonjour service option in advanced system settings.
- Each graph on dashboard now has a loading spinner.
- Show new program and zone layouts for first generation sprinklers.
What's fixed:
- Faster UI loading.
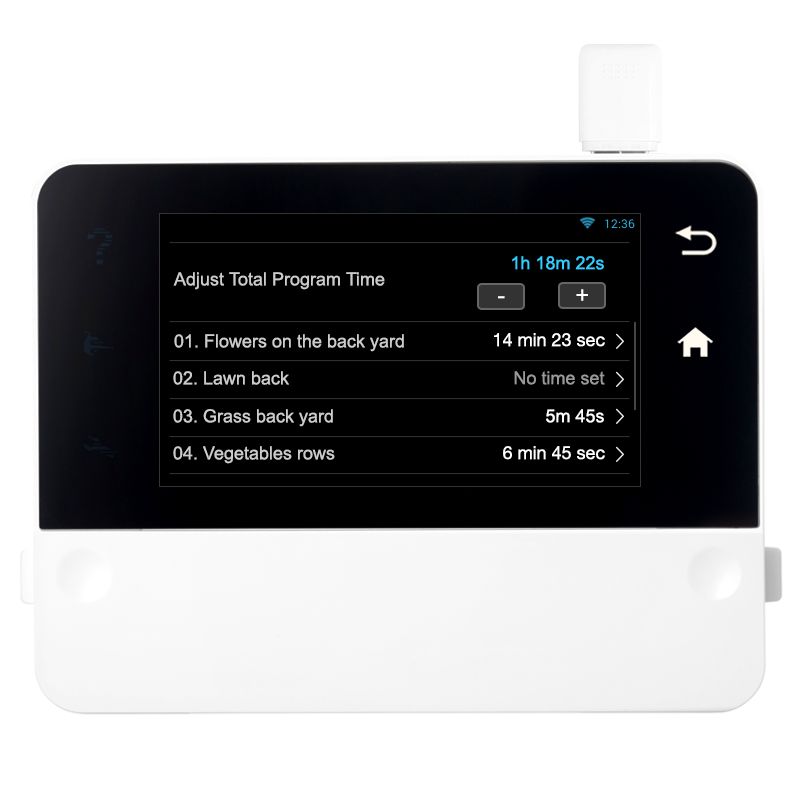
- Fix program total watering time calculation.
- Removed unused weather parsers.
- Watering history export: use “;” as separator.
- Freezing when entering long wifi passwords.
- Show the correct weather icons in the dashboard.
- Removed limit for max precipitation.
- Do not allow selecting another tab during Mini-8 setup.
- Stability fixes.
- Other fixes and UI enhancements.
What's new:
- Show remote devices as offline instead of hiding them from the Devices screen.
- Hide edit actions for zone photos for Demo RainMachine.
- Remove Weather data switch for RainMachine first generation.
What's fixed:
- Fix watering history bugs happening on some particular devices.
- Fix launch bug happening on some particular devices.
- Fix photo saving of zones.
- Fix for showing monthly and yearly dashboard data.
- Show the correct weather icons in the dashboard.
- Show the correct water saved amount in the dashboard.
- Use ";" as separator for watering history CSV when the device uses the metric system.
- Improve setup behaviour on some devices that have the Auto-network switch hidden.
- Internal improvements.
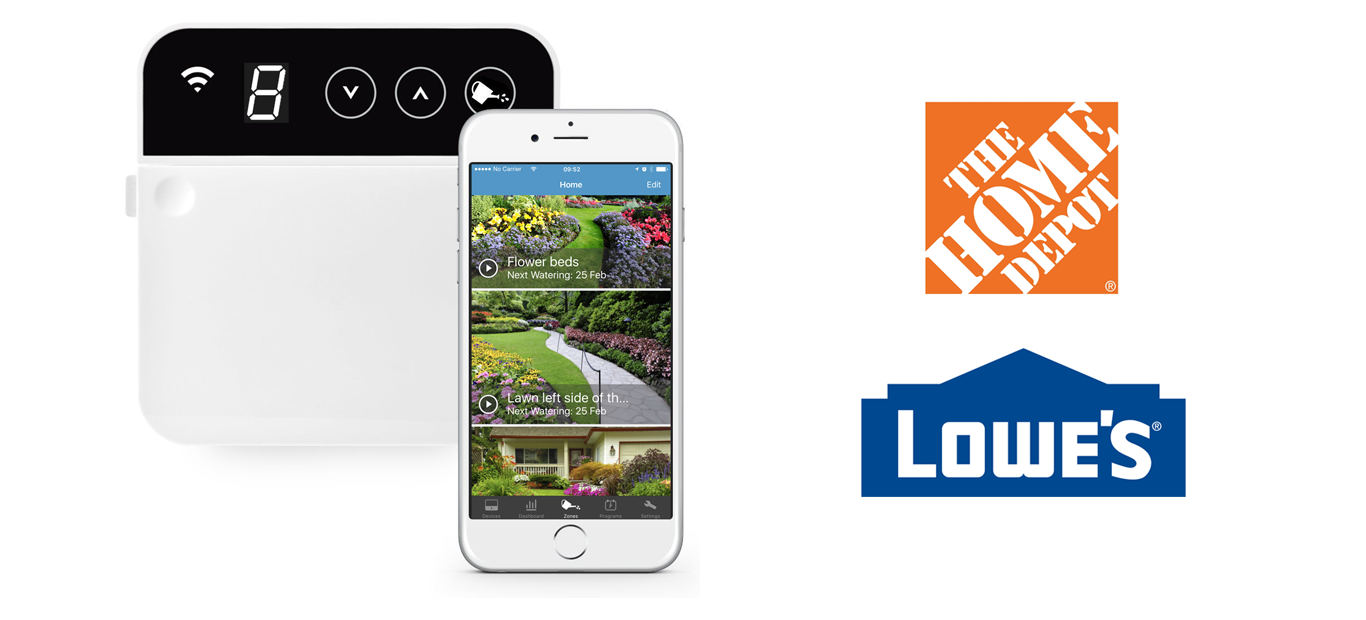
The RainMachnine Mini-8 2nd gen is now available at Home Depot and Lowe's. Please visit Home Depot and Lowe's websites and search for RainMachine.
The RainMachine Mini-8 2nd gen is also available at Amazon.com, NewEgg as well as our web store with a retail price of ranging from $159. The RainMachine Mini-8 is EPA Watersense certified. Some Water Agencies might provide rebates up to the full cost of the unit. Check with your local water agency for participation in EPA's WaterSense program.
Starting with our latest versions of iOS (v4.3.105) and Android (v.4.1.6) RainMachine mobile apps we introduce Mobile Push Notifications to all our users.
RainMachine mobile push notifications are silent short messages reminders of activities or events that your RainMachine device reports, even when you're not actively using the RainMachine mobile application.
Note: If you prefer sound or vibrations you can change the notifications settings under your mobile device settings.
First step - You must be sure that the mobile operating system allow Notifications from the RainMachine app. To do that open "Settings" on your mobile devices and search for "Notification" option and enable it. Note: Keep in mind that the RainMachine mobile push notifications are not sent during the "Do Not Disturb" interval. Second step - the RainMachine mobile app Push Notifications settings are strongly related to your remote access account. Without it, you can't receive them. Please make sure your RainMachine device has remote access account set and valid. Then open the RainMachine mobile app and go to "Settings" -> "Notifications". In this screen you can enable/disable specific notifications you want or not to receive.
Starting with the new versions of iOS and Android mobile applications, the "Notifications" are enabled by default. This will apply to all your RainMachine devices you may have listed on "Devices" screen and associated to a remote access account. The "New Firmware Update" notification is ON by default.
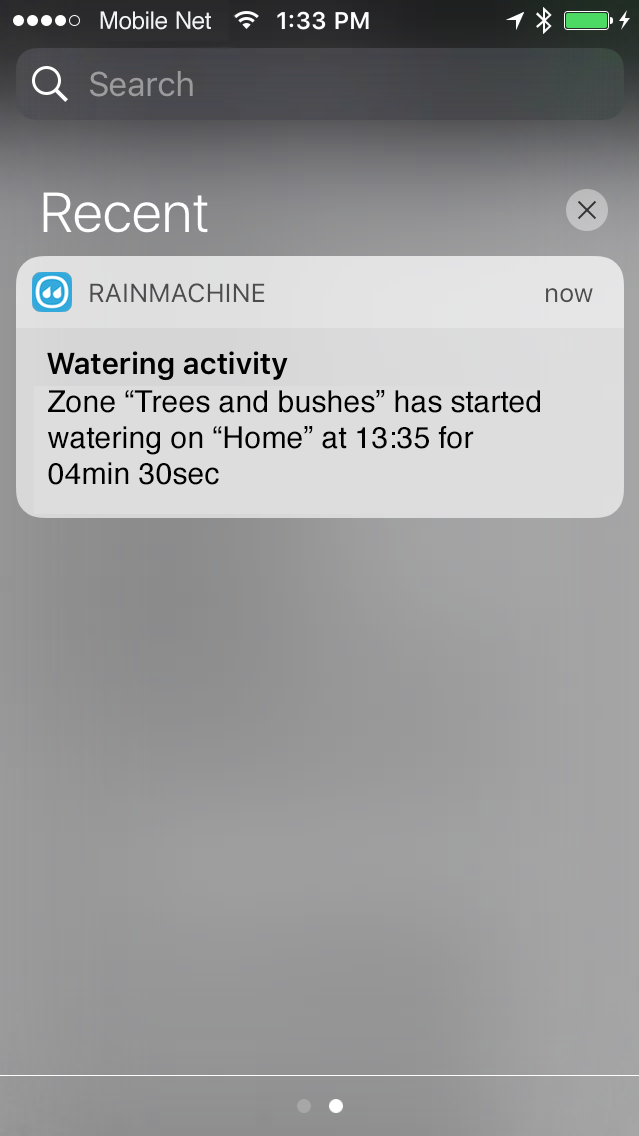
- On Apple iOS RainMachine mobile push notifications appear on the iPhone screen (when in sleep mode the screen will open for a few seconds), under "Recent" Notification Center messages list swiping down from the top of the screen, or as a banner or alert. This behavior can be changed under iPhone "Settings" - "Notifications". Below an example of how a RainMachine watering activity of a zone is shown under "Recent" Notification Center messages list. Tap on it and the RainMachine application will open.
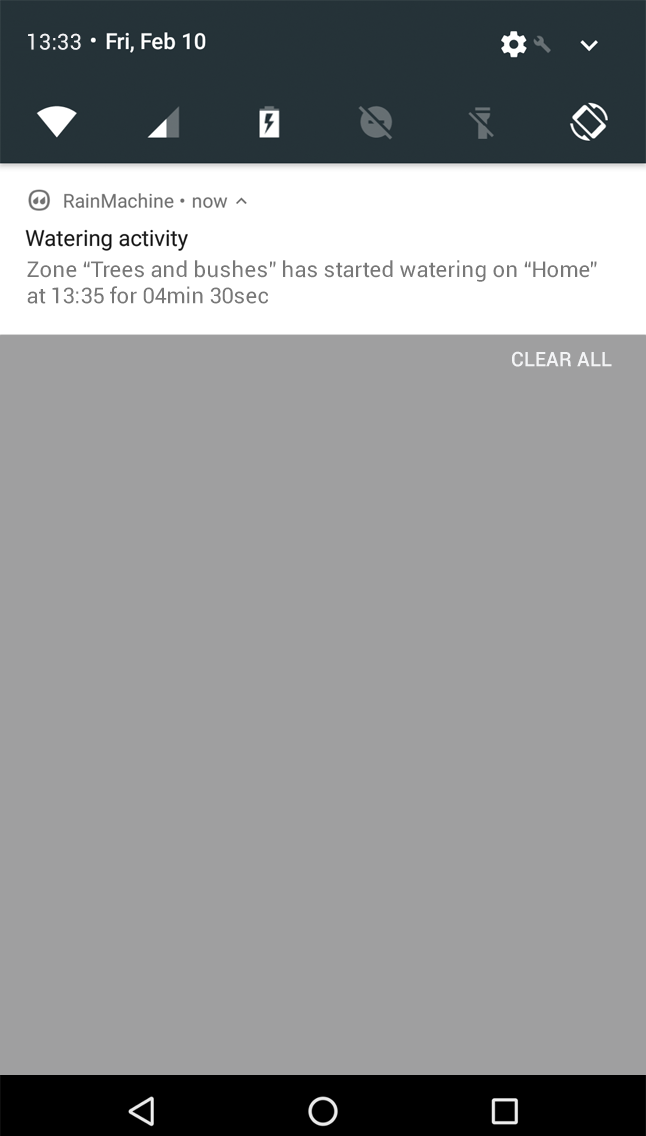
- On Android devices, the push notifications appear in the top status bar. To view them, simply swipe down from the status bar. Below an example of how a RainMachine watering activity of a zone is shown under Android notifications list. Tap on it and the RainMachine application will open.
Depending of mobile operating system the push notification show:
By default, without any other intervention, all users will be notified when a "New Firmware Update" is available for their RainMachine devices. The available notifications are:
The new Mobile Push Notifications feature available with our latest versions of iOS (v4.3.105) and Android (v.4.1.6) RainMachine mobile apps, will bring silent reminders on your mobile device screen that will keep you up to date with your RainMachine activities as they happen.
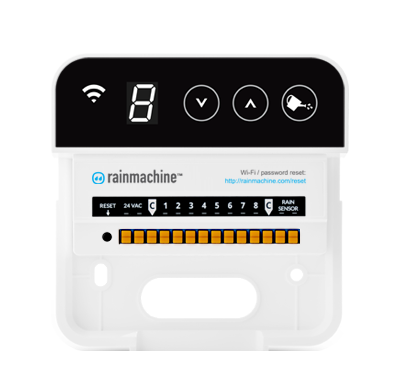
We are proud to announce our 2nd gen RainMachine Mini-8. Built on our award winning platform, the RainMachine Mini-8 is a powerful controller that offers the same functionality as the RainMachine Touch HD series without the color screen. The RainMachine Mini-8 is available to purchase on our website will be available nation-wide retail distribution on last week of February 2017.
The RainMachine Mini-8 along with our new iOS, Android clients is 2x to 5x faster than its predecessor. Everything is faster, from screen loading times to responsiveness to any commands. Since last year we also introduced a slew of new functions, for a detailed change log follow this link. Among many new features, the RainMachine Mini-8 is now capable of processing multiple weather sources ensuring increased accuracy and availability. The setup process was streamlined, resulting in a quick installation process that takes less than 5 minutes.
Alongside iOS and Android clients, the RainMachine Mini-8 has a simple and elegant web browser interface that can be accessed locally as well as remotely. It is important to mention that all our RainMachines have been designed to operate locally and remotely, thus eliminating the the need for cloud access when the devices are operated from home.
The RainMachine Mini-8 valve drive has been improved to handle larger peak currents. This helps driving older valve systems with stubborn and rusted solenoids. Hardware assist for Short Circuit and OverCurrent measurements are now implemented in hardware. We added a 2nd layer of hardware watchdog circuity to ensure that valves always start. In case of a over-current situation the RainMachine Mini-8 will retry 3 more times, this feature is especially helpful when valves get stuck as they often do: By implementing the retry mechanism, the debris is often times dislodged by automatic retries, eliminating need for maintenance. Operating temperature has also been improved, allowing the RainMachine Mini-8 to withstand high temperatures (up to 140F).
The RainMachine Mini-8 is now available for purchase for $159 at our web store. Will also be available for purchase at Home Depot, Lowe's and Amazon (with Amazon Prime) after February 15, 2017.
This version is available for all RainMachine devices (except for the 1st generation RainMachines Touch sold in between 2013-2014) and includes all features available on the v4.0.844 firmware update released on 12/20/2016 described here on our blog as "2017 Features" articles and other improvements and fixes.
To learn more about this new firmware update v4.0.851 release, follow this link
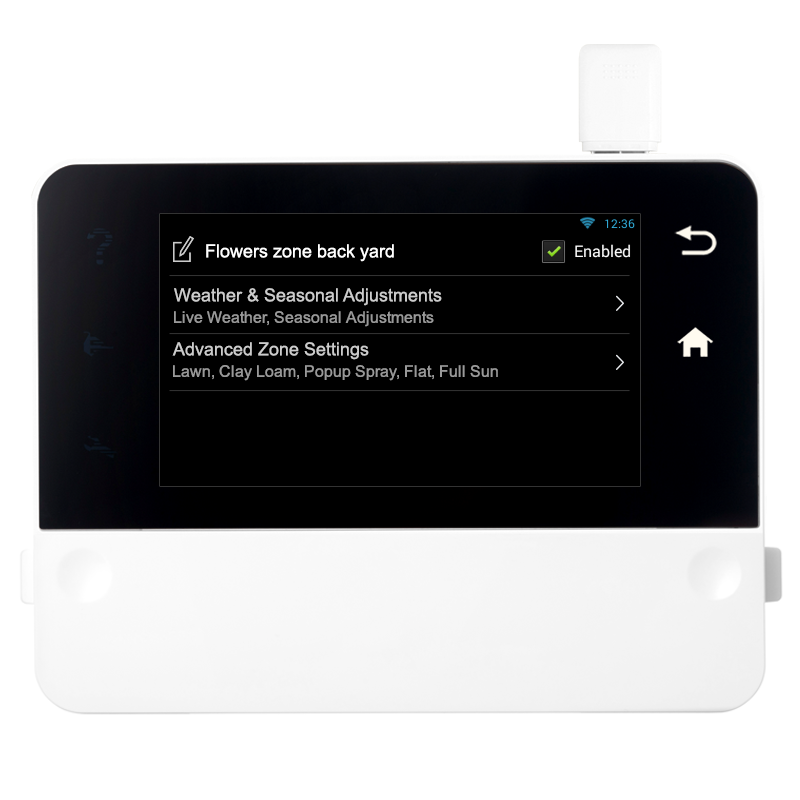
The RainMachine has the ability to use seasonal weather trends instead of live weather data if weather data is off, unreachable, or you prefer to follow seasonal trends over the weather service's predictions. The "Seasonal Data" is specific to the location you set, and has recorded conditions on a daily basis. The seasonal trends are based on 10 years of daily recorded weather data for your location, making it a good alternative to "Live Weather".
Switching between the two option is easy. Simply go to your zone’s settings and enable/disable either option. Leaving both on is the "default" and the RainMachine will always use Live Weather data if it is enabled before the seasonal data. In case of an internet outage, the RainMachine will automatically switch over "Seasonal Data".
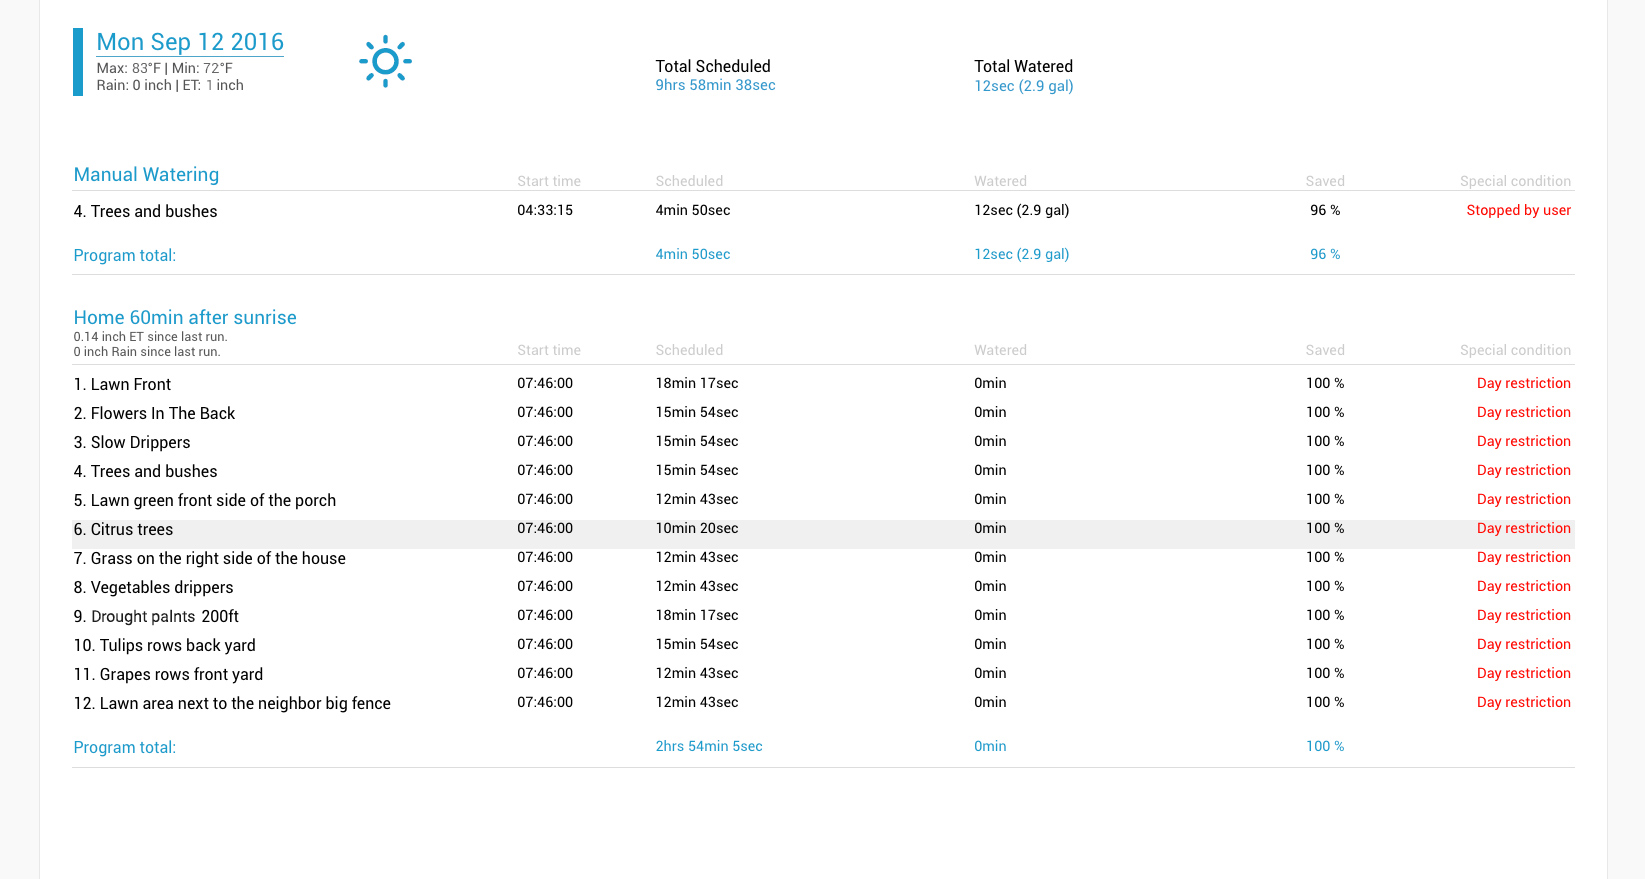
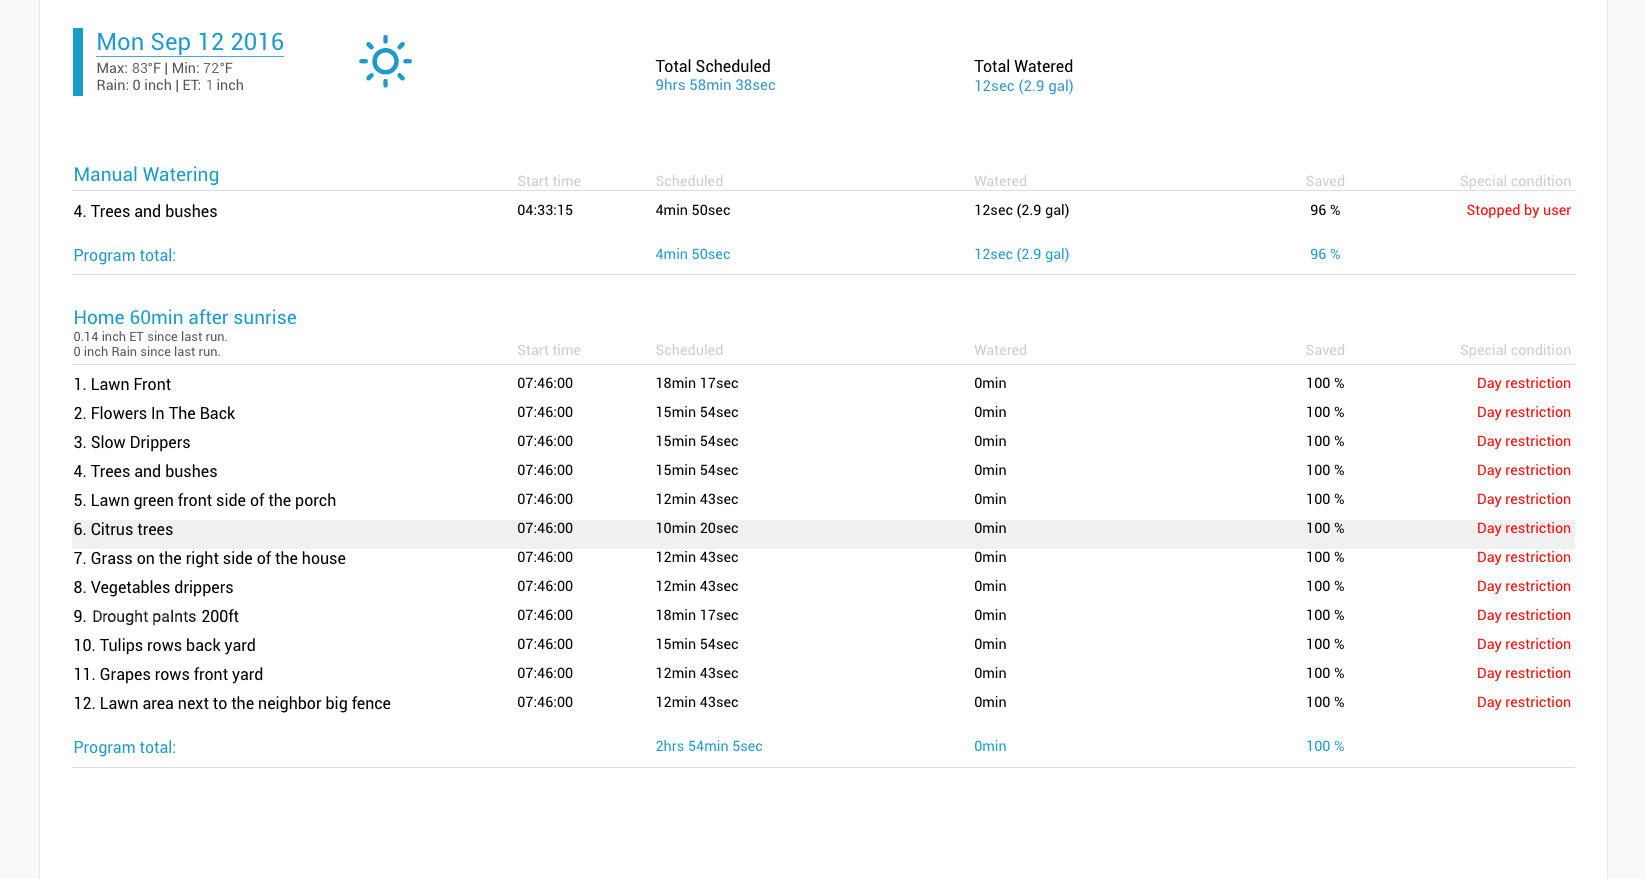
Redesigned "Watering History" day logs for faster reading, at a glance, including the day name and full date, weather forecast icon, maximum and minimum temperatures, Rain and EvapoTranspiration amount, inline with "Total Scheduled" and "Total Watered" times for the entire day.
Each program log shows:
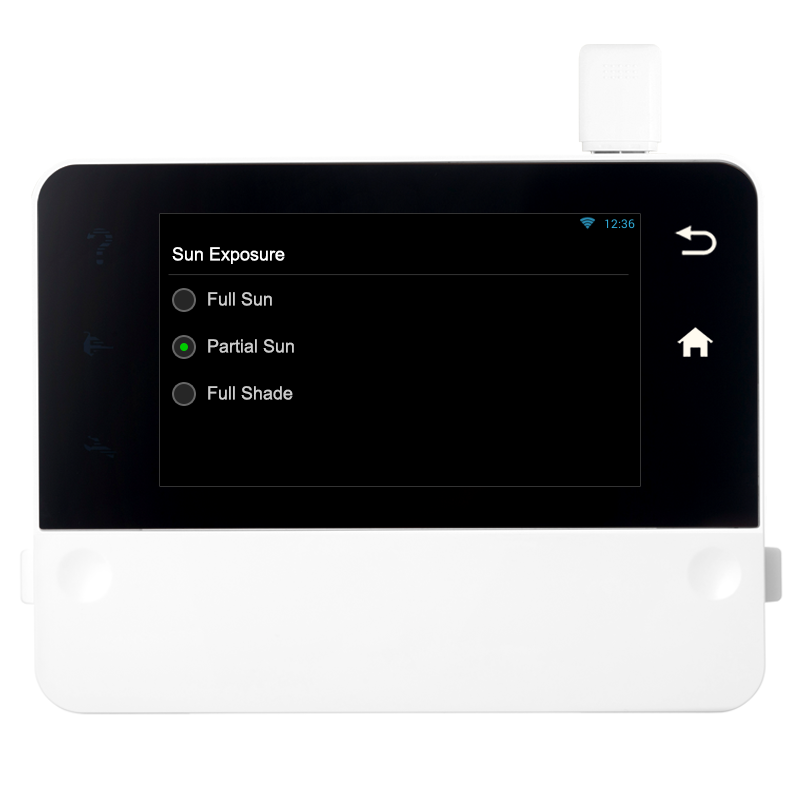
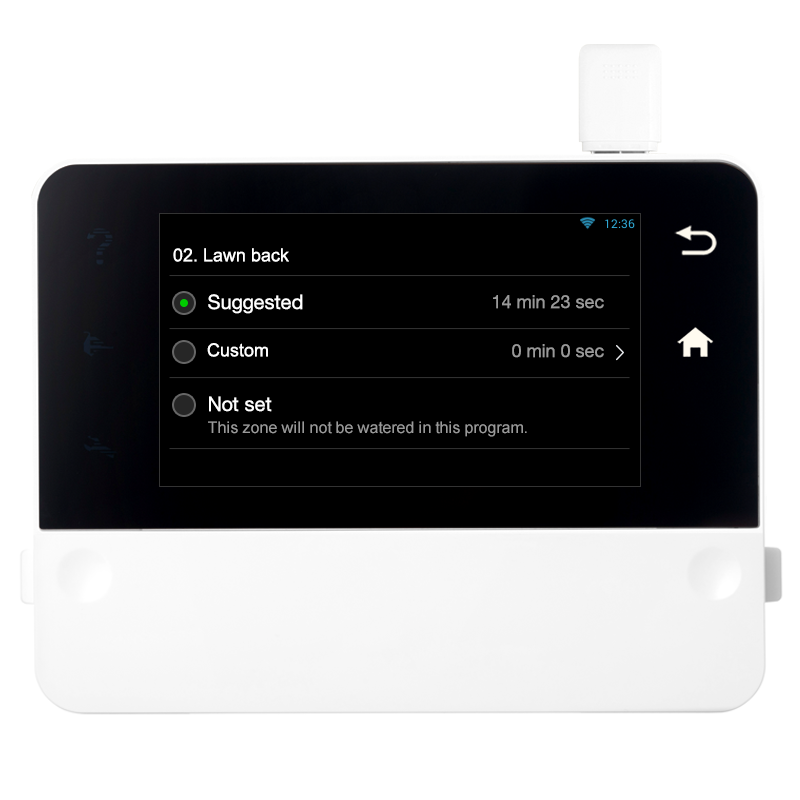
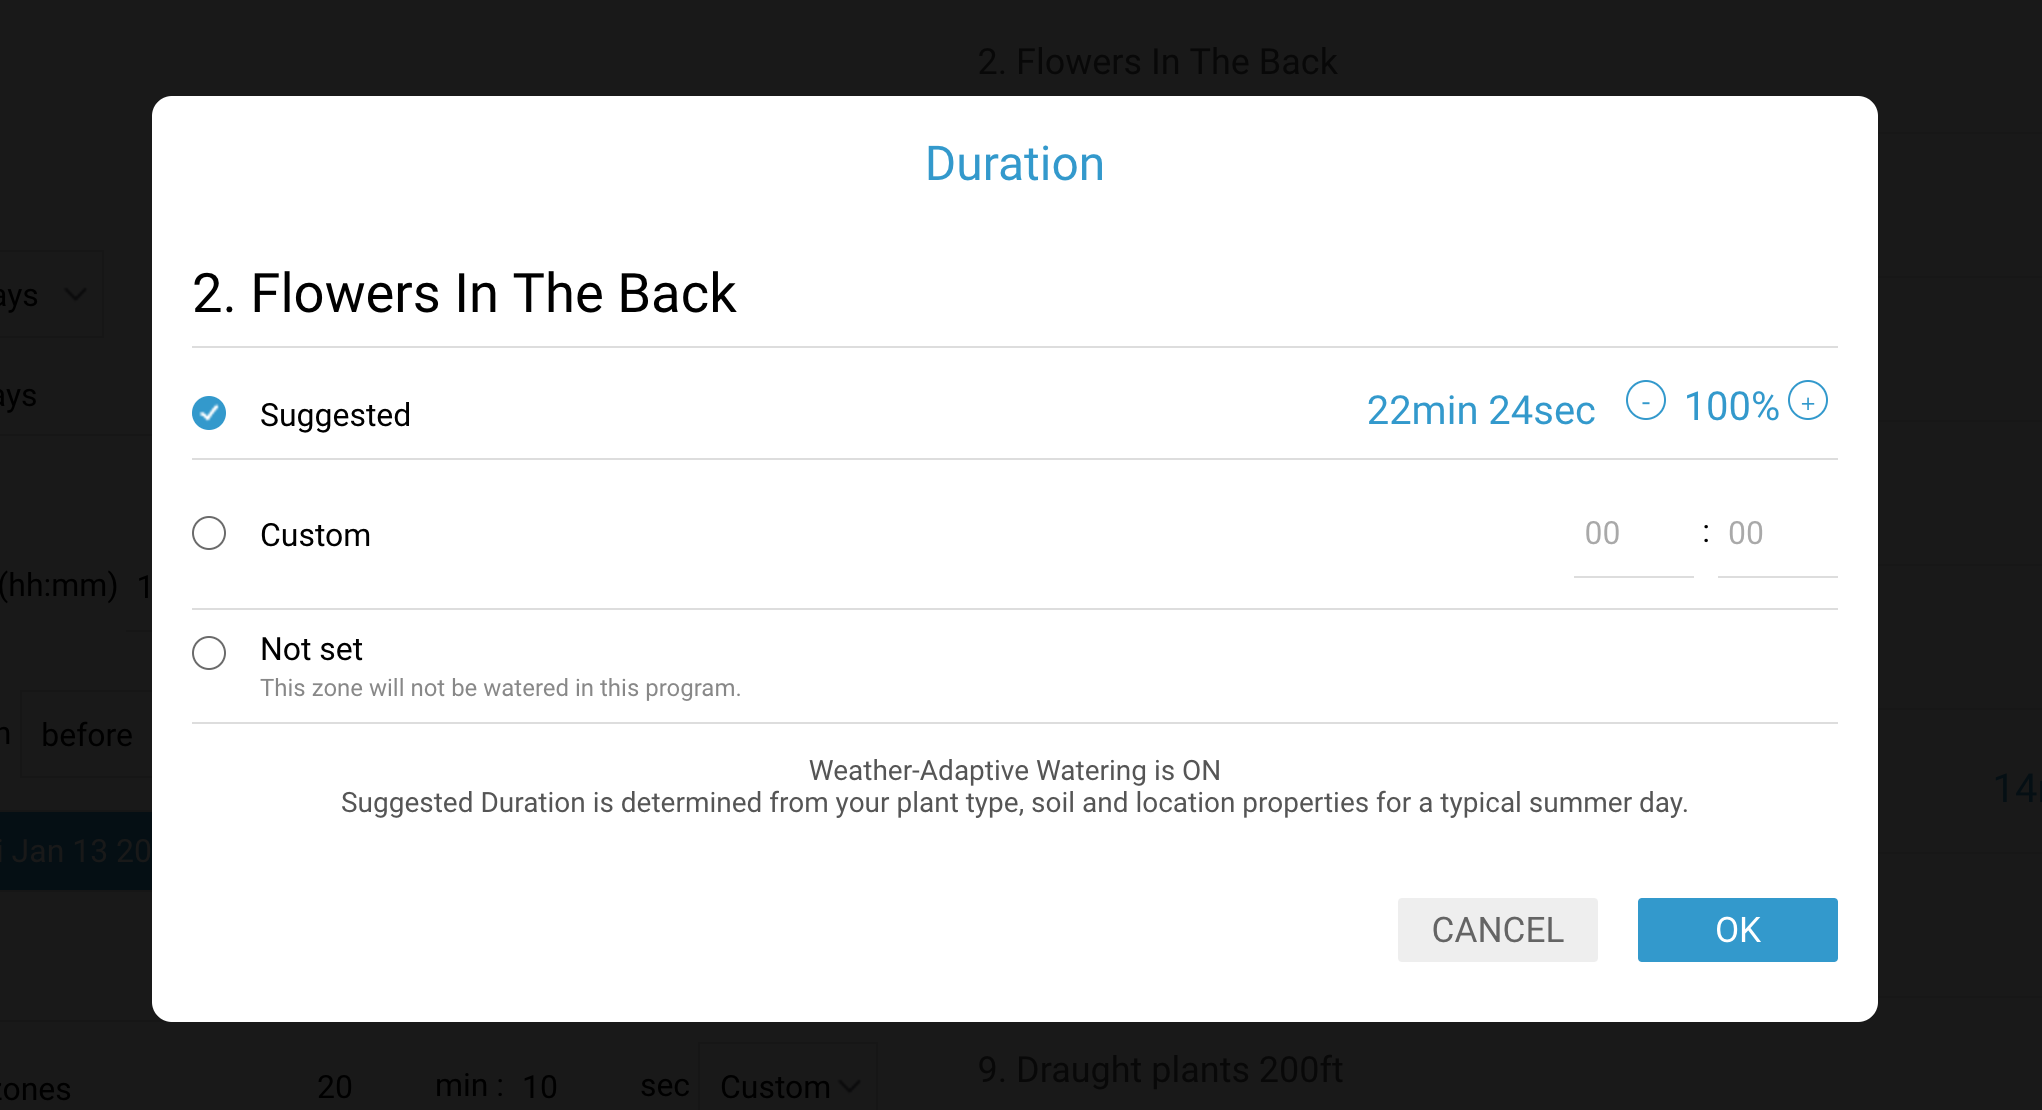
The RainMachine will now take the attributes from zone properties (sun exposure, soil type, sprinkler head type, etc), and use them to calculate a Suggested Watering Time. This means that if you are unsure of how long you should set to water your plants for, you can simply choose “Suggested” and immediately have an accurate estimation set for you.
Note: This estimate is calculated for an average summer day, the RainMachine will then adjust this value depending on weather.
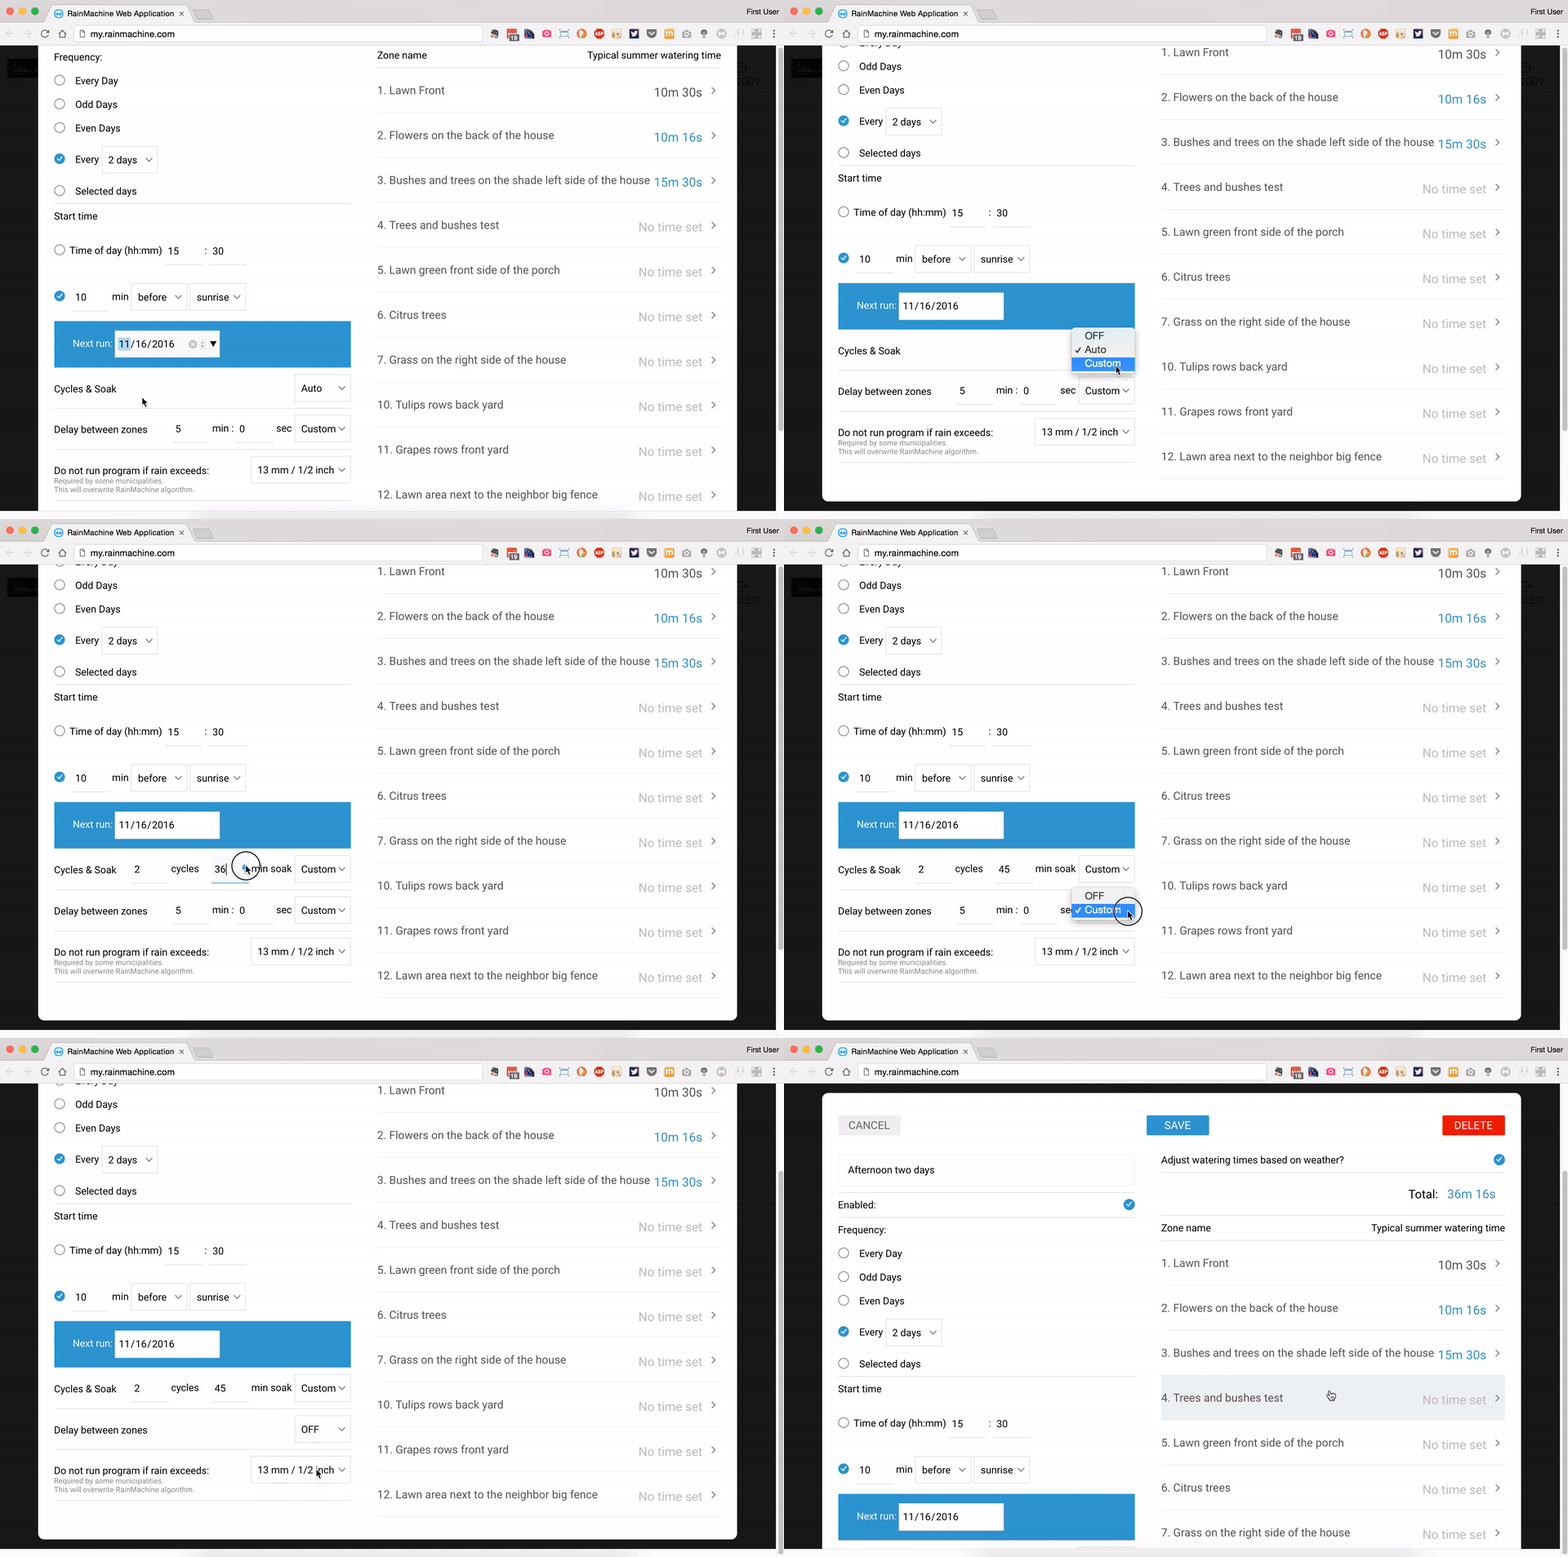
Cycle and Soak has been updated too with our new automatic setting, which decides the number of cycles for your program based on a complex balancing algorithm. Basically, the RainMachine automatically sets the “cycle” times to be equivalent to the “soak” times so the RainMachine is never idle while soaking.
To learn more check out our knowledgebase article about cycle and soak.
to be continued...
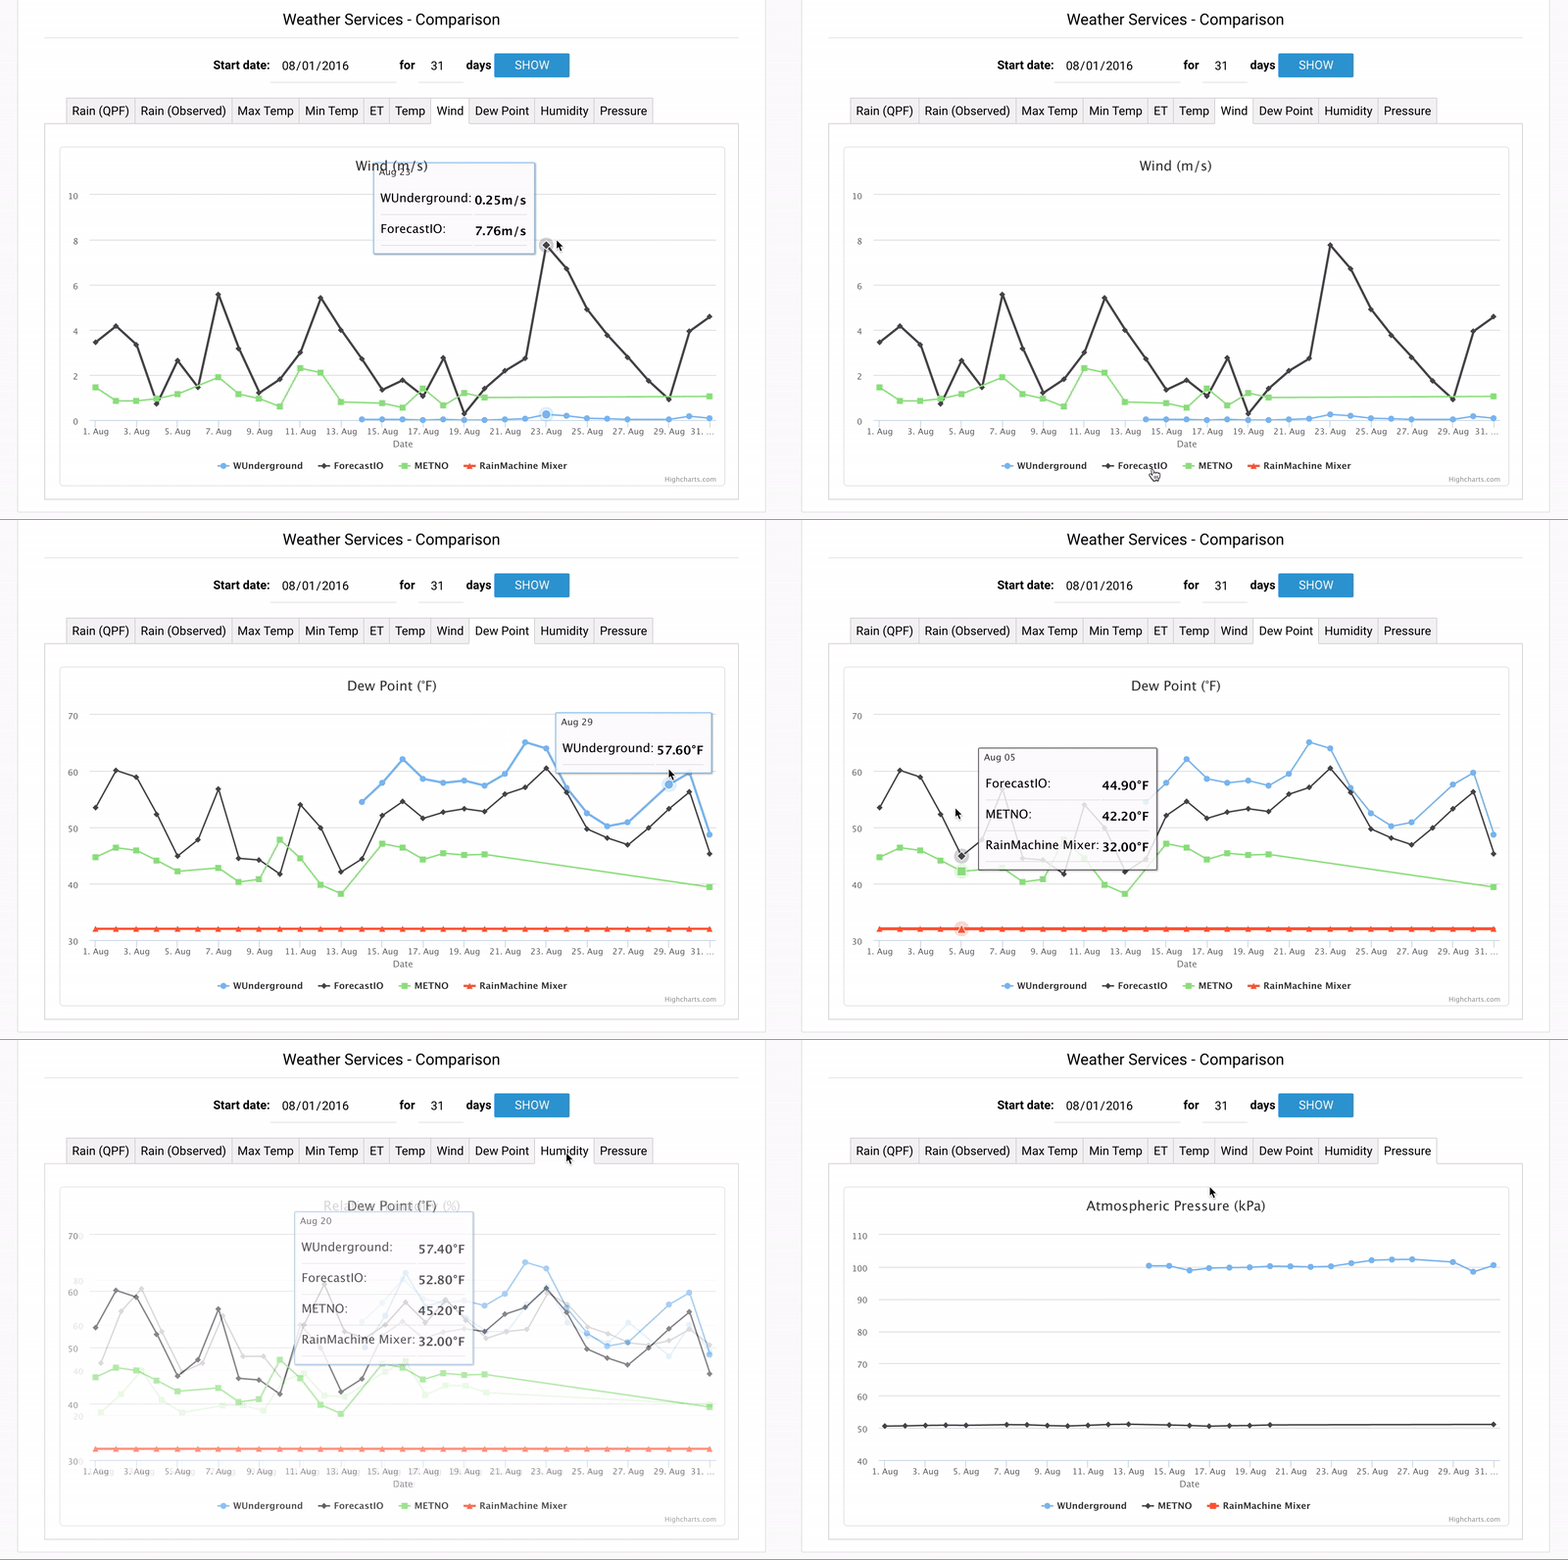
RainMachine has always provided the user with lots of useful data from rainfall and temperature levels to amount of water saved. The goal of this software release is to have information transparency so that you can better understand and program the RainMachine to best fit the needs of your yard. Here is how we display new data elements for weather service comparison graphs, including Dew Point, Humidity, and Pressure.
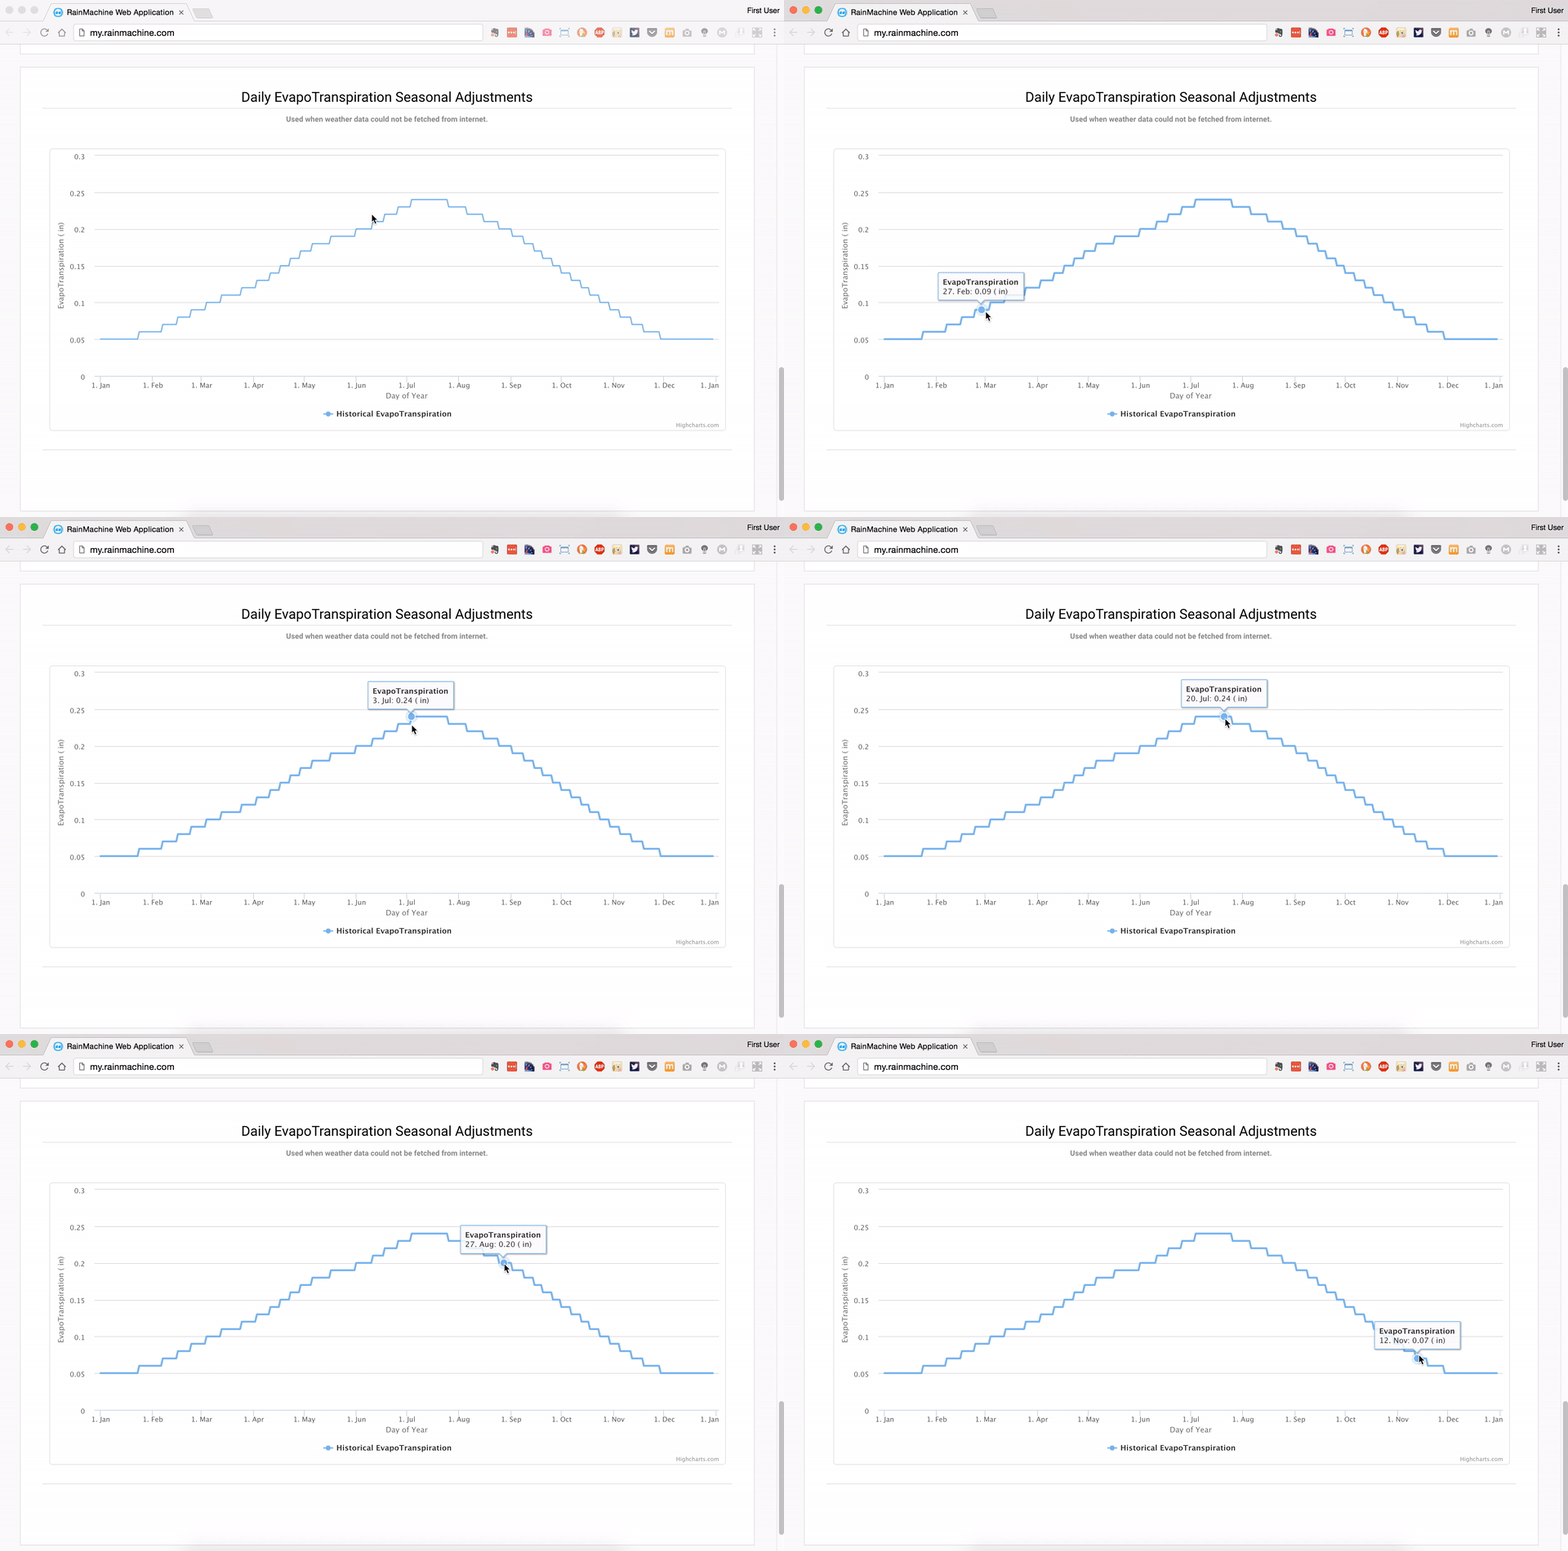
Below is the seasonal adjustments graph, which shows you an average of 10 years of historical water need for your exact address, courtesy of NOAA. Should weather data be unavailable (or you want to averages instead of live weather), you can set the RainMachine to use this data for your water calculations. This is not just another standard 'bell curve', it is actual weather for your location averaged for a period of 10 years!
With these new ways of seeing data, you can really dive into a wealth of new information and fine tune weather on your device.
to be continued...
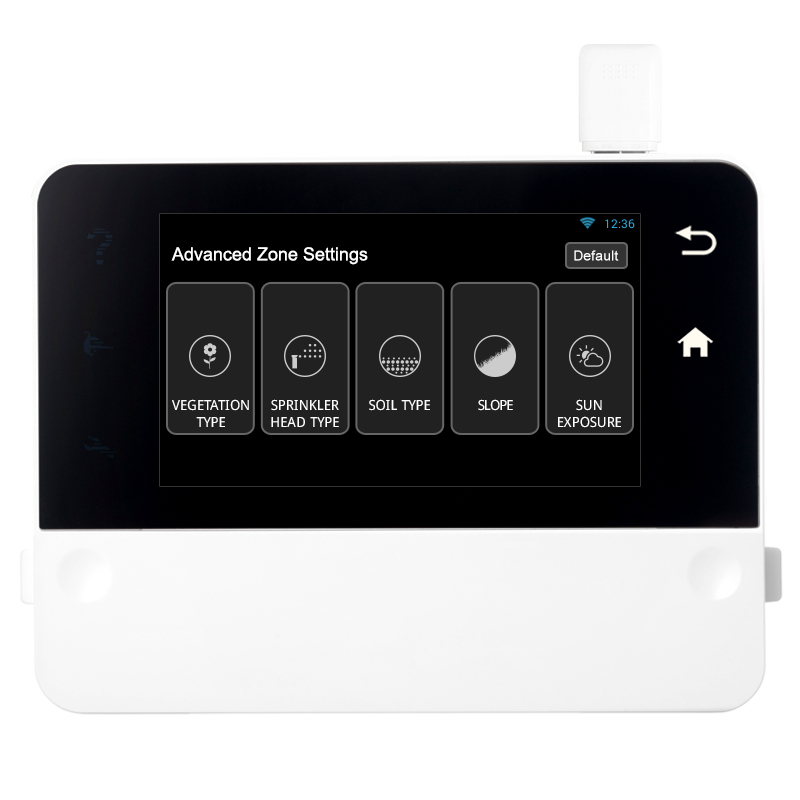
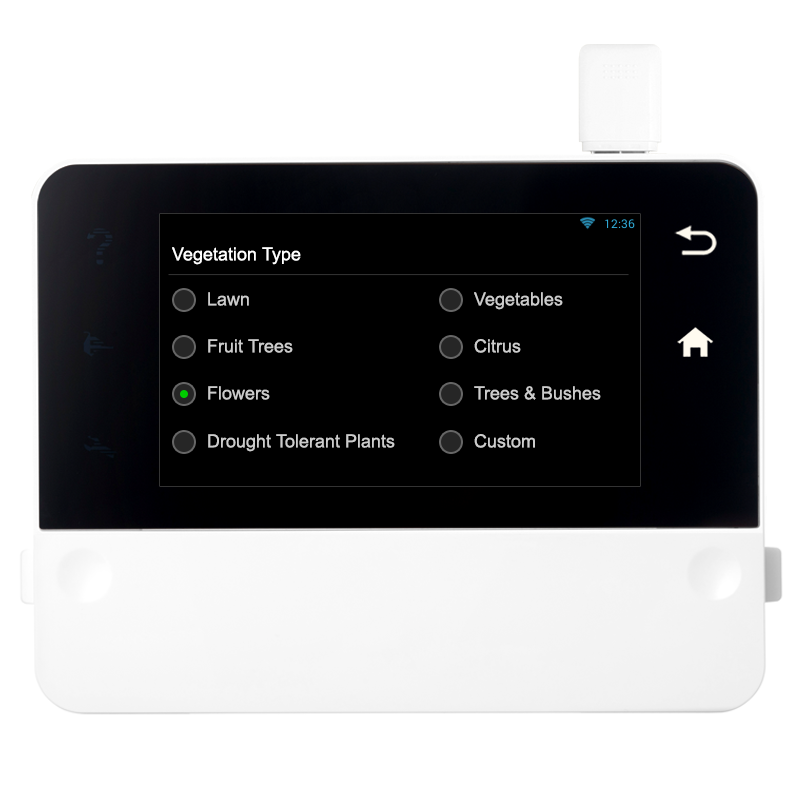
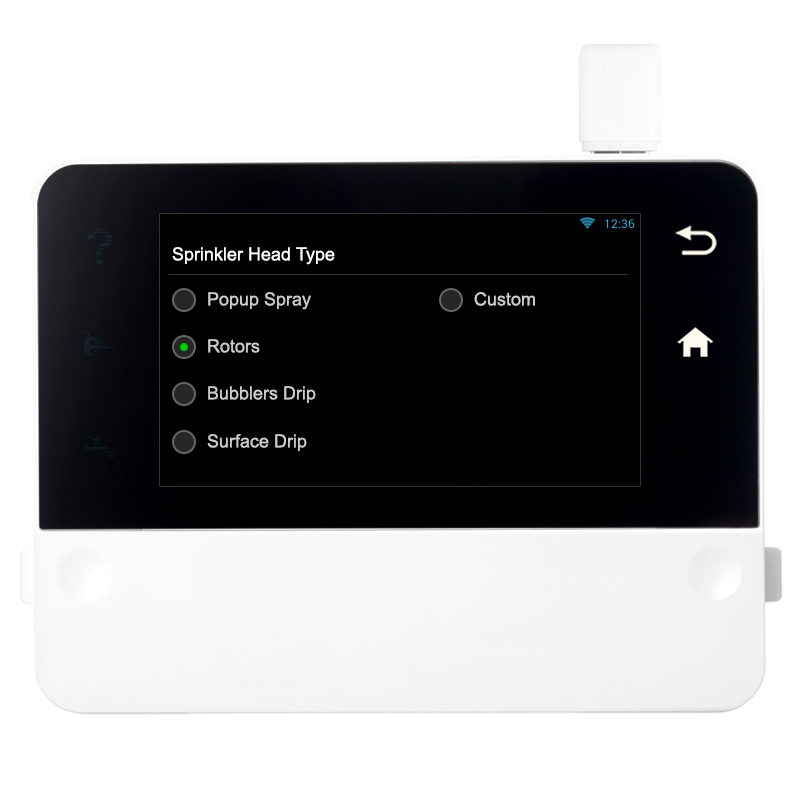
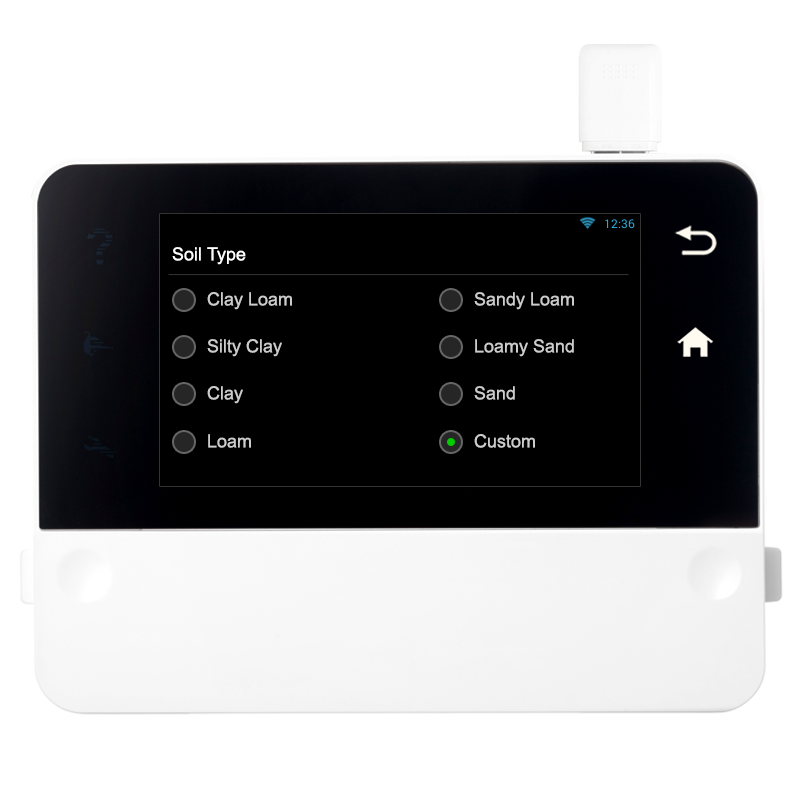
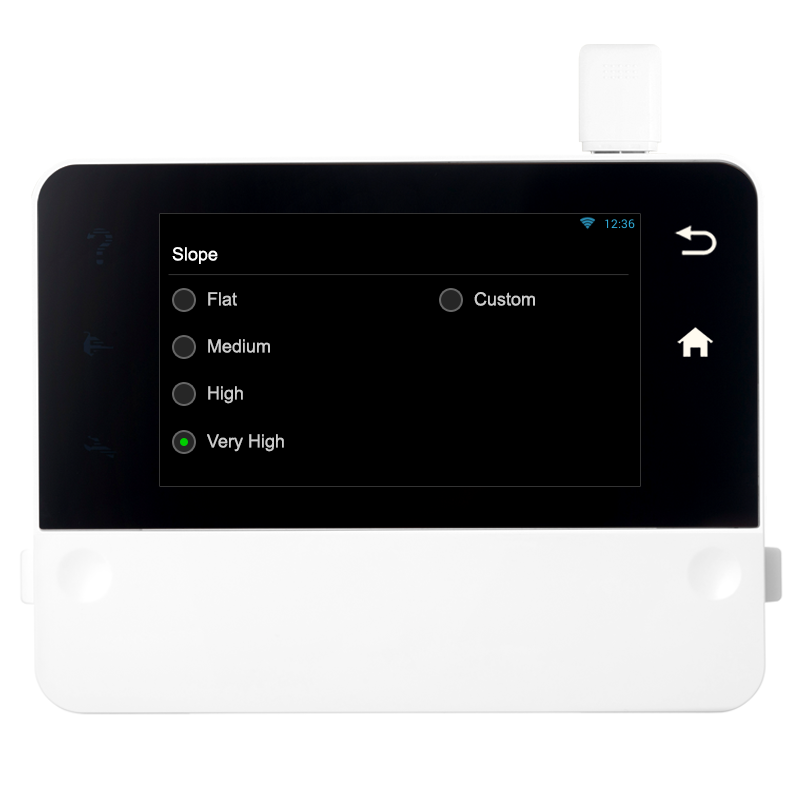
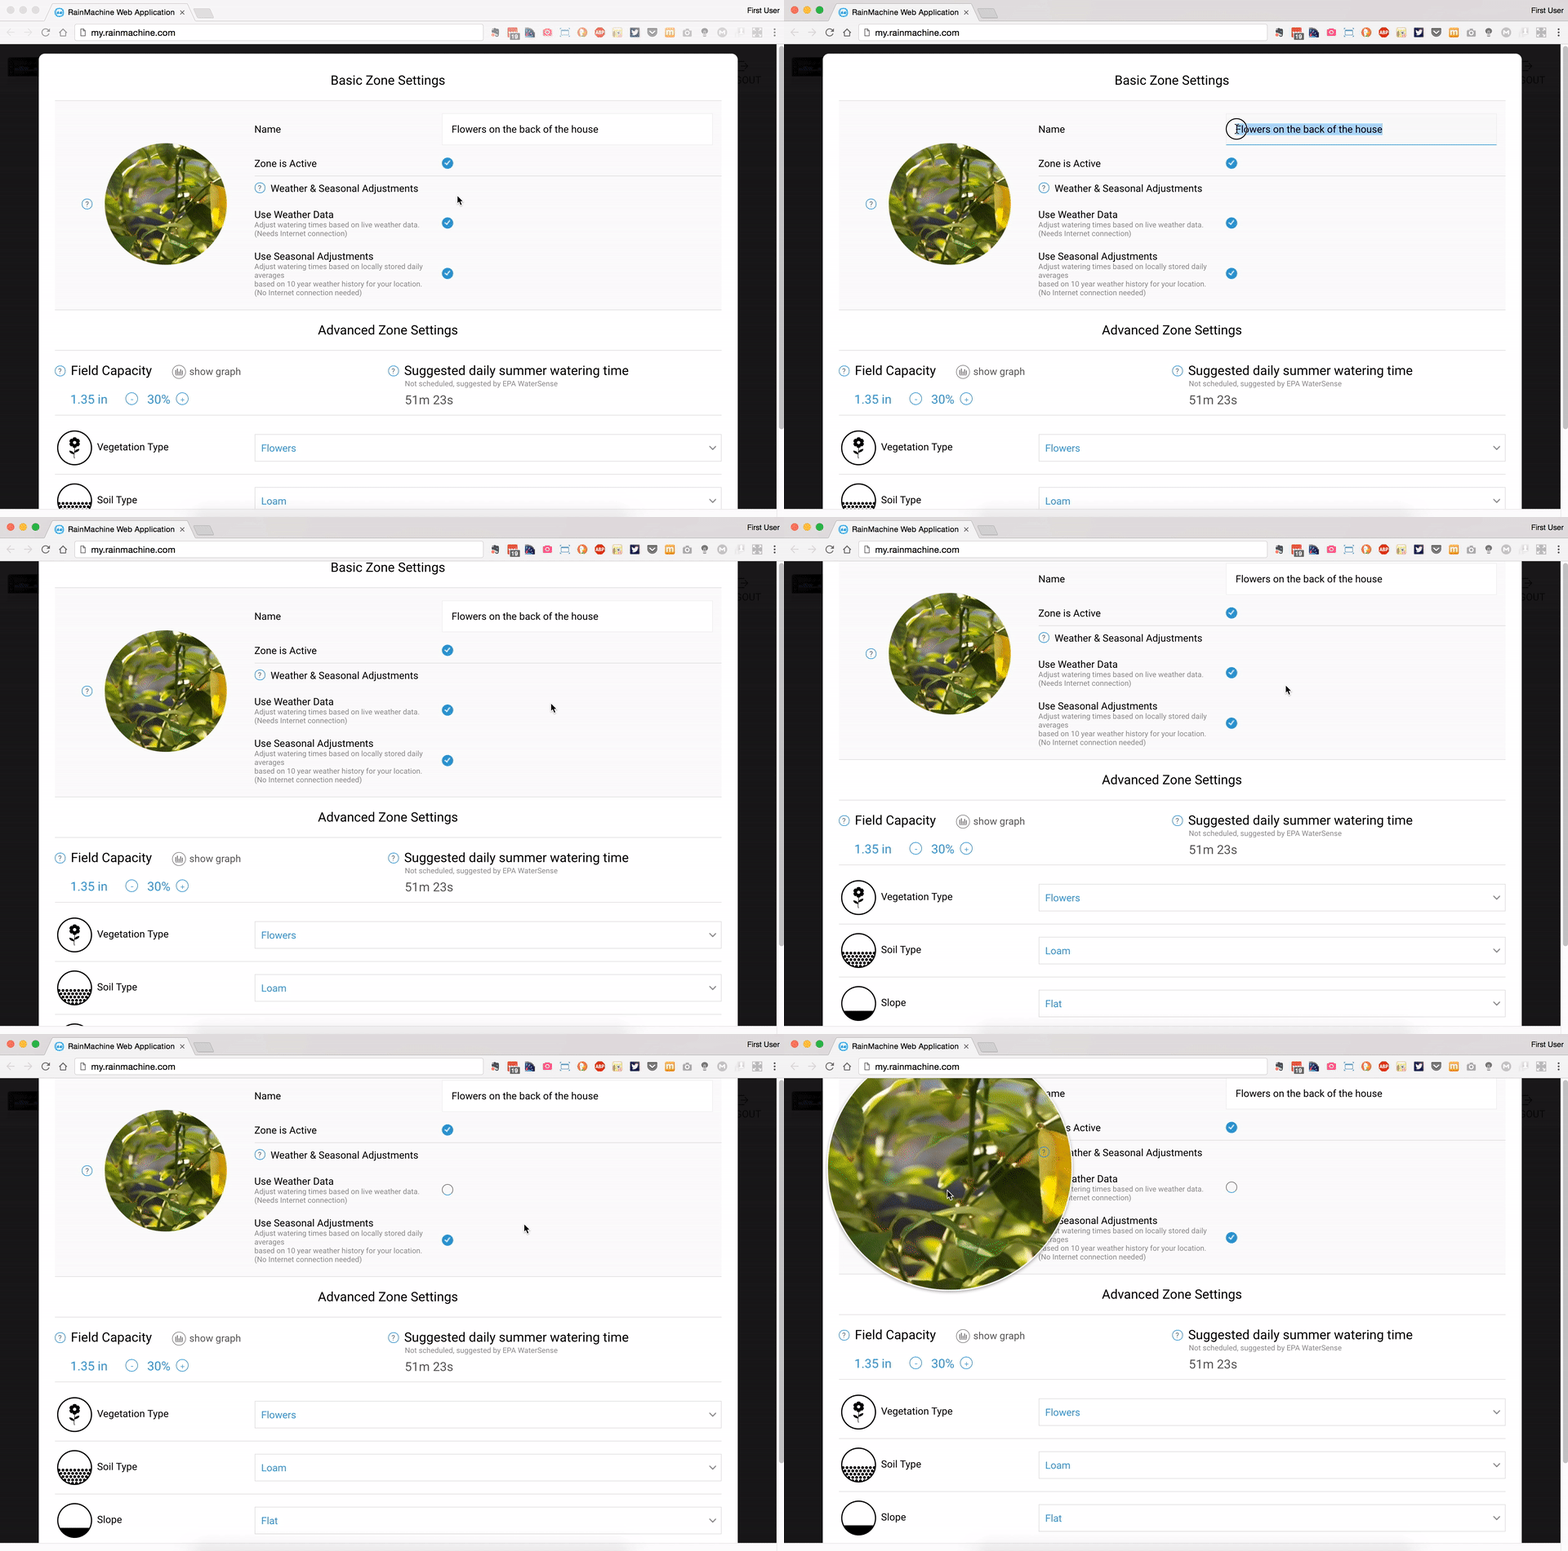
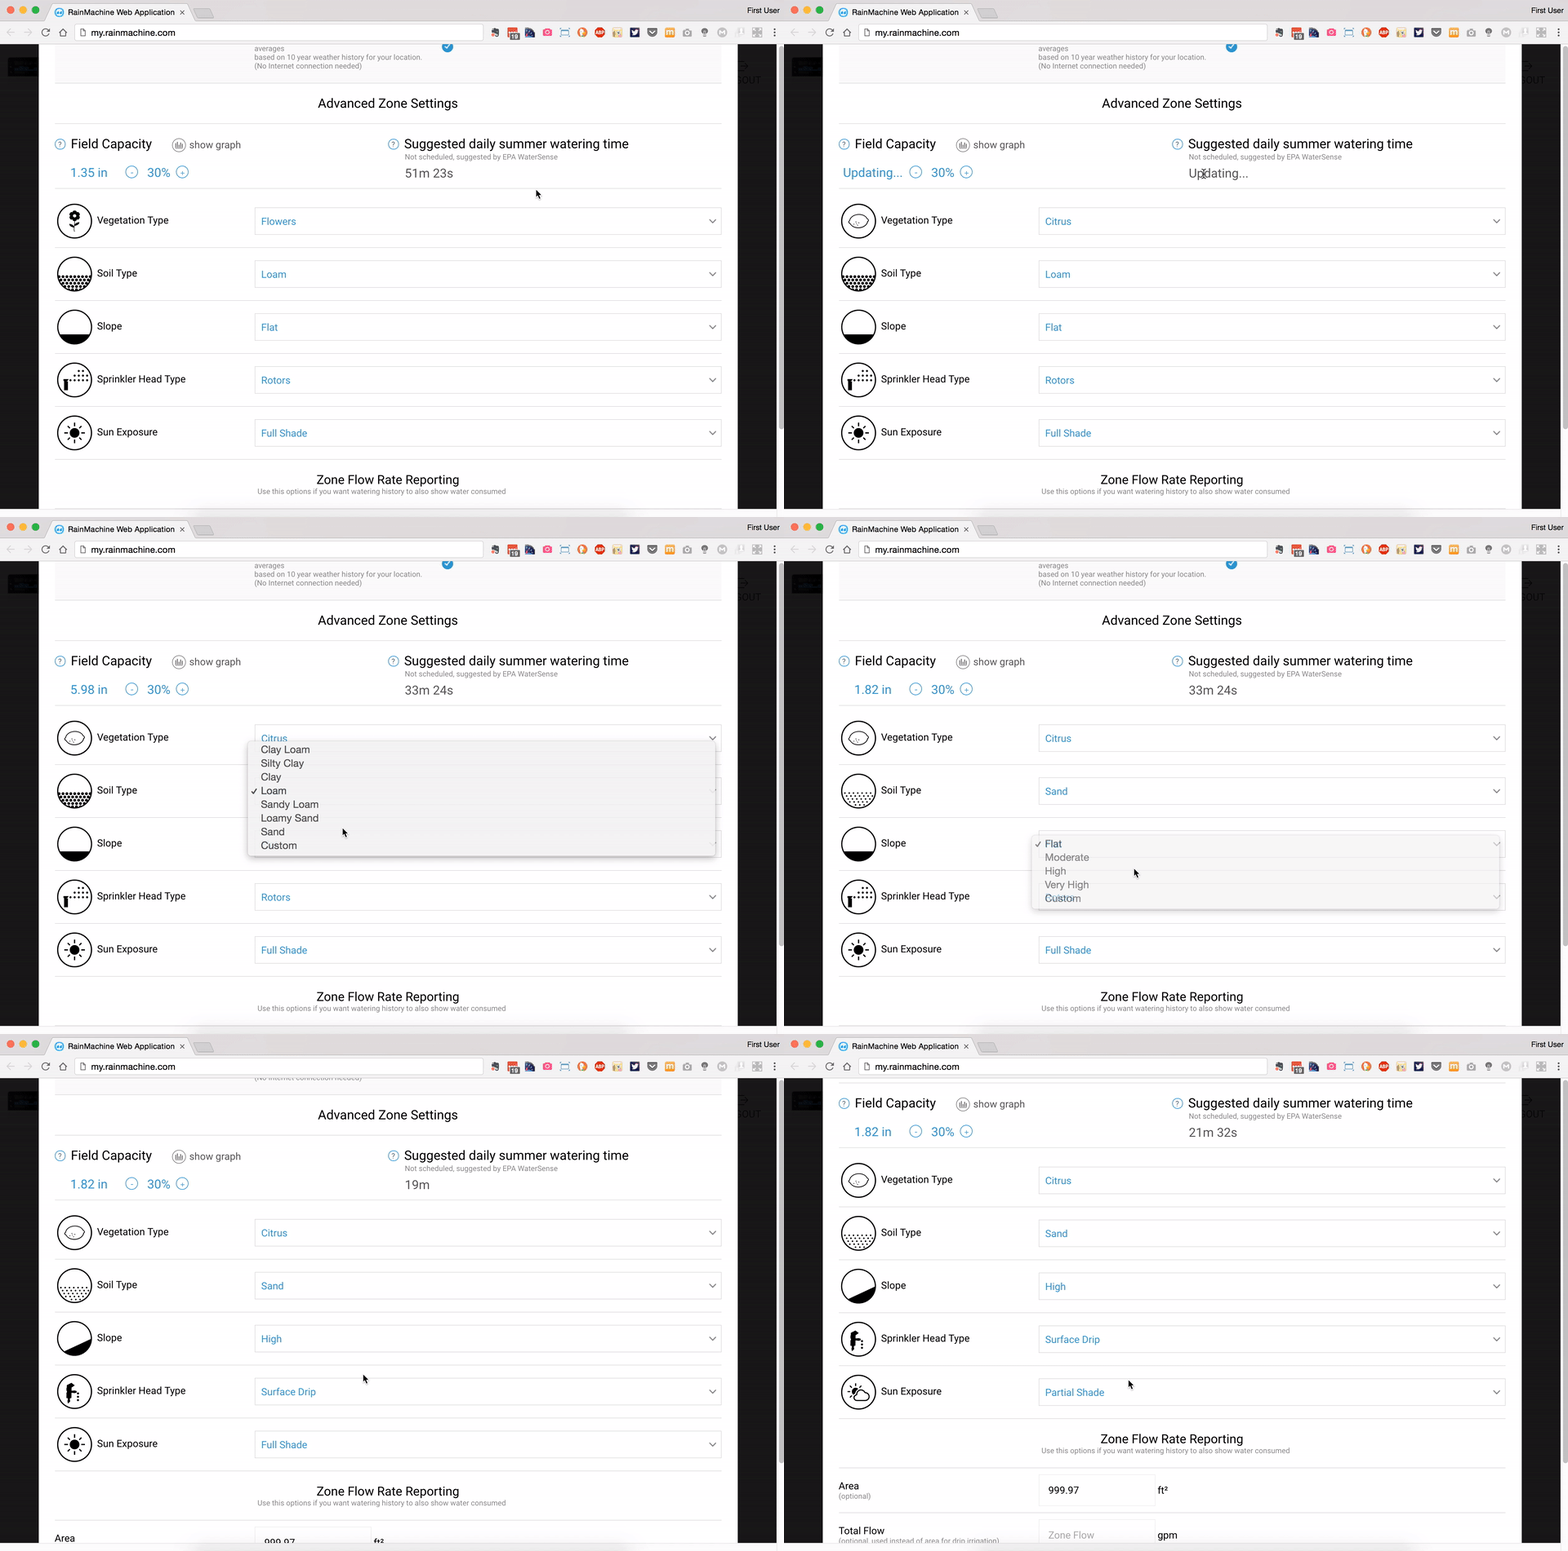
Zones are now highly customisable (via Advaced Zones Settings), allowing you to set Soil and Vegetation type, Sun Exposure, Slope, and Sprinkler Head type to be input by the user with easy pull-down menus.
Example of Advanced Zone Settings from the web interface.
NOTE: Similar views available on the iOS and Android applications.
The advanced zone settings are important parameters that influence Field Capacity and Suggested Daily Summer Watering Time which directly impacts water consumption. Furthermore, the Field Capacity can be easily tuned in 10% steps by pressing the +/- buttons in the Field Capacity section.
We also introduced the Zone Flow Rate Reporting options where you can easily define the zone area and total flow for each zone. Use these options if you want watering history to also include water consumed statistics in gallons. See Quantity of Water Saved.
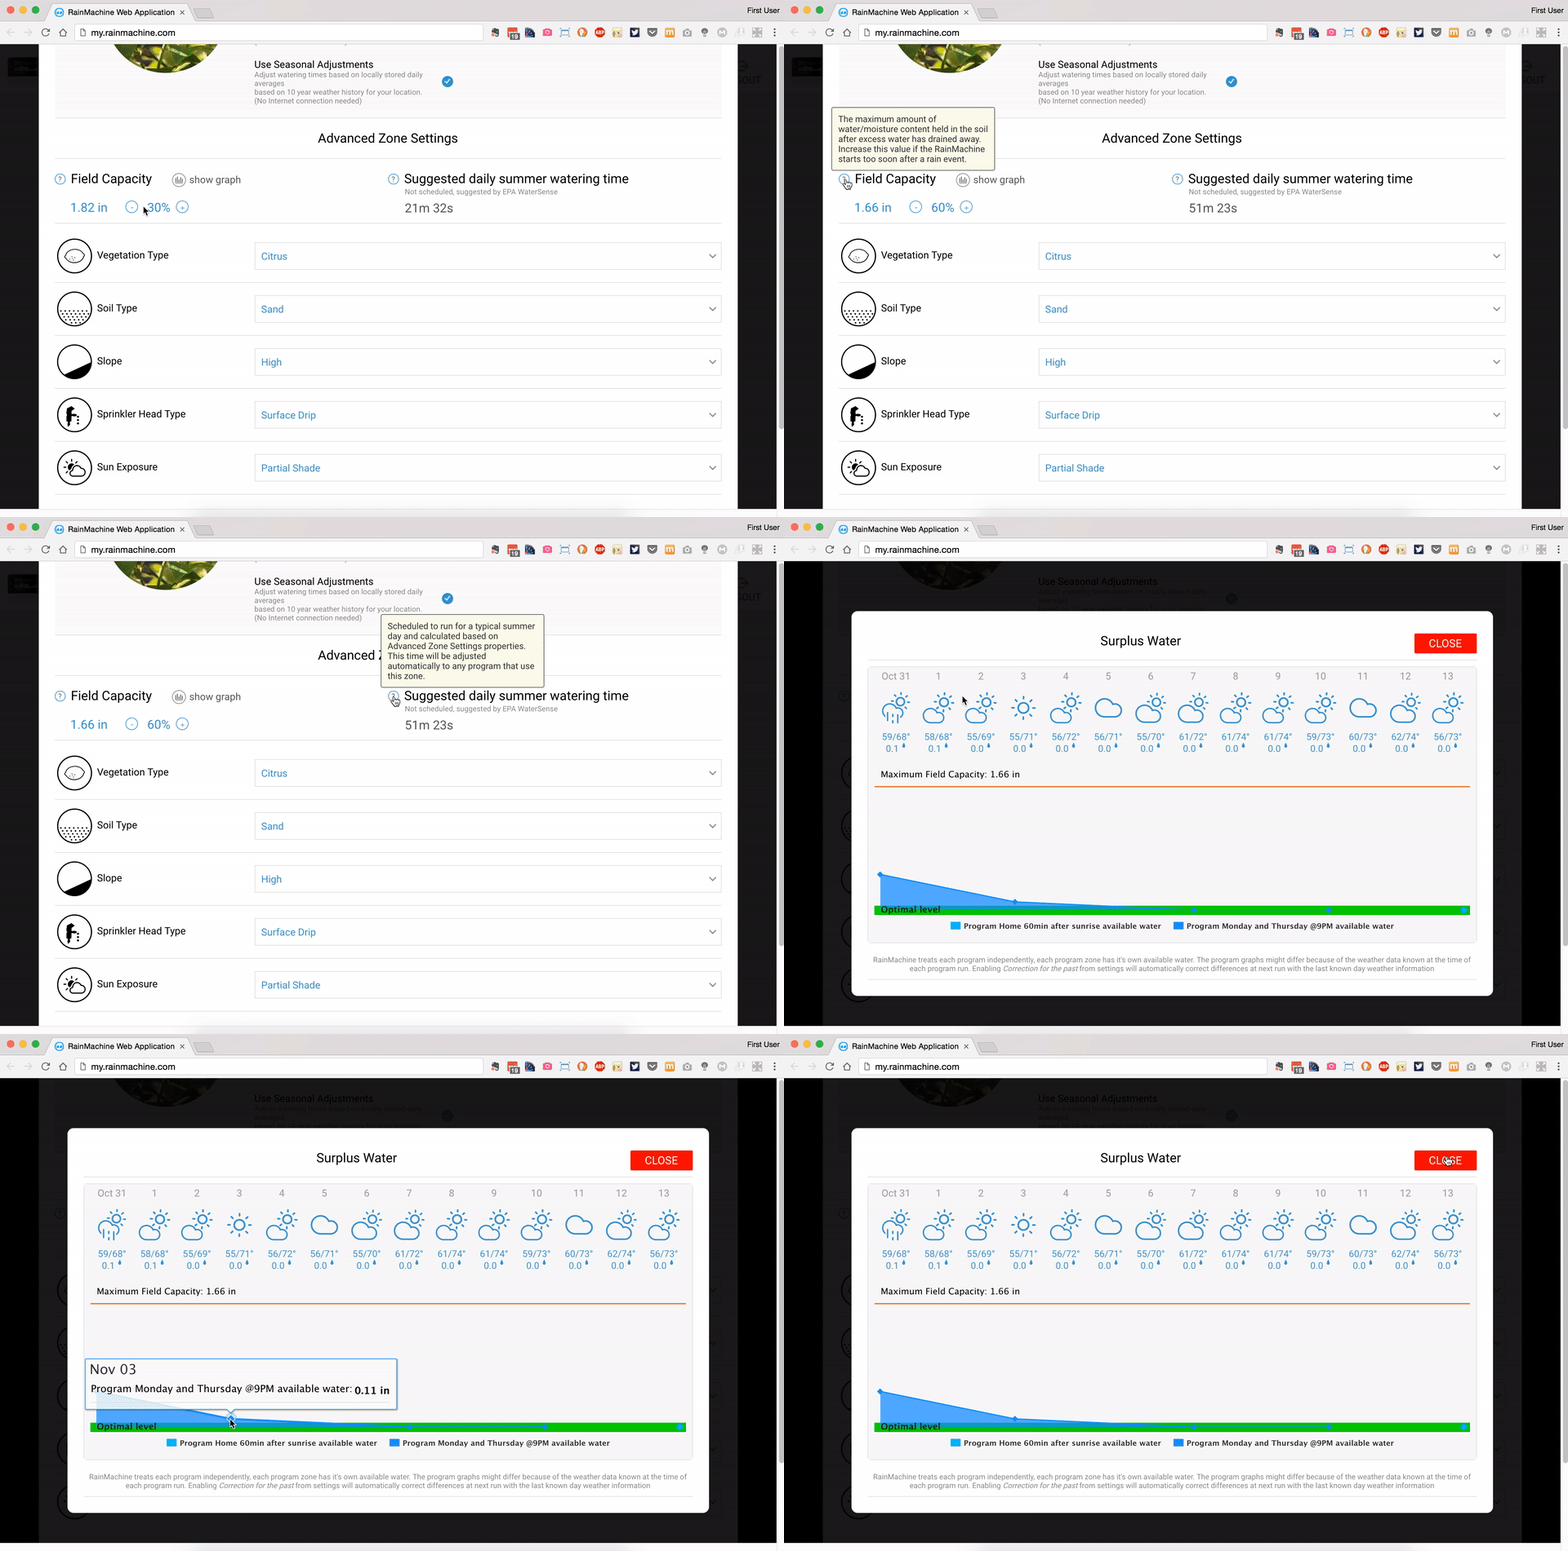
To visualize Surplus Water (surplus water is the amount of water stored in ground after a rain) click on the “show graph” button and the Surplus Water graph will show up.
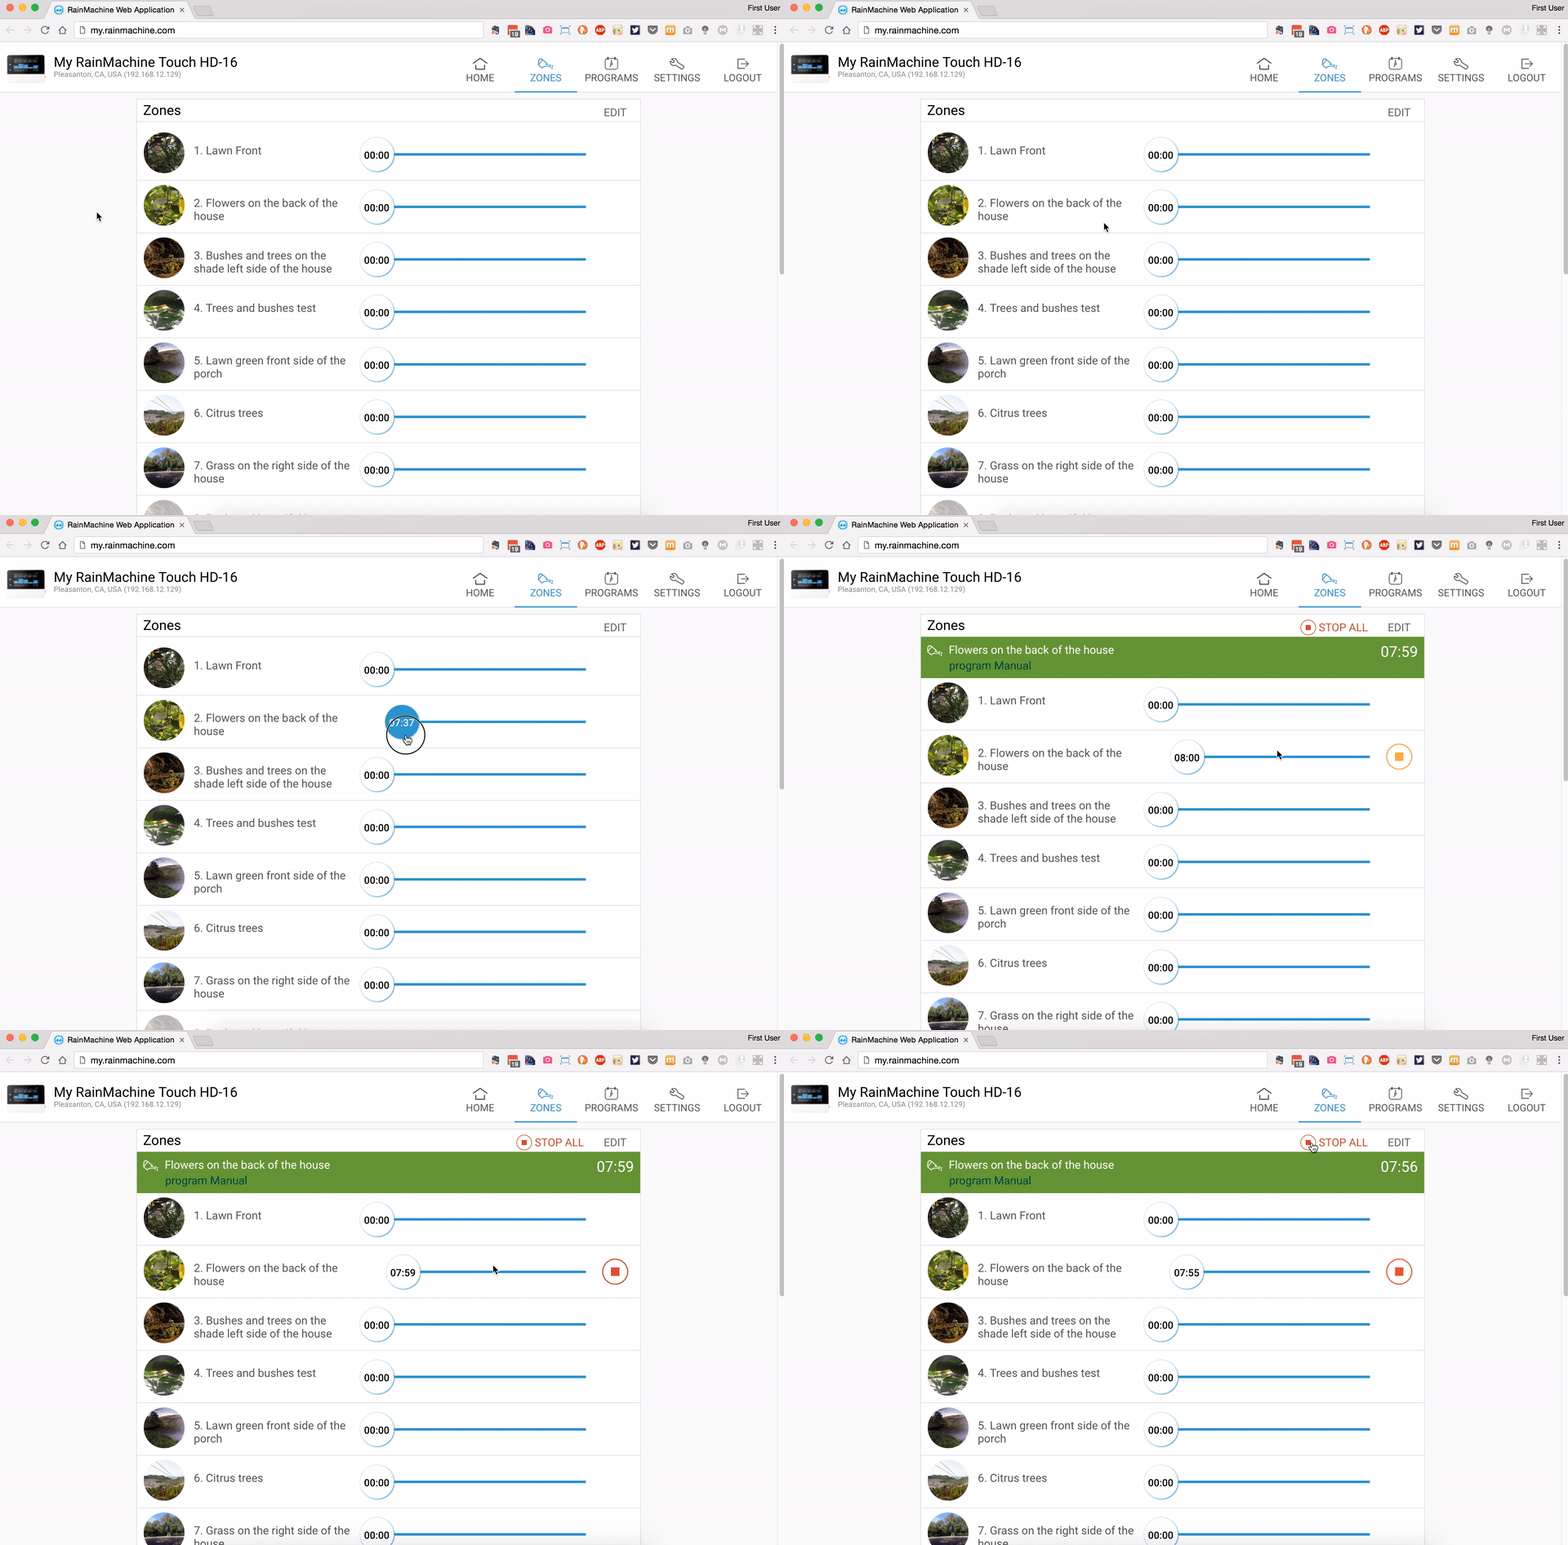
The manual watering interface has changed as well. To manually start to water a zone, simply pull the slider to the right until the desired amount of time is reached. To cancel, simply press the stop button on the right hand side, or drag the slider back to 0, or just press the STOP ALL button.
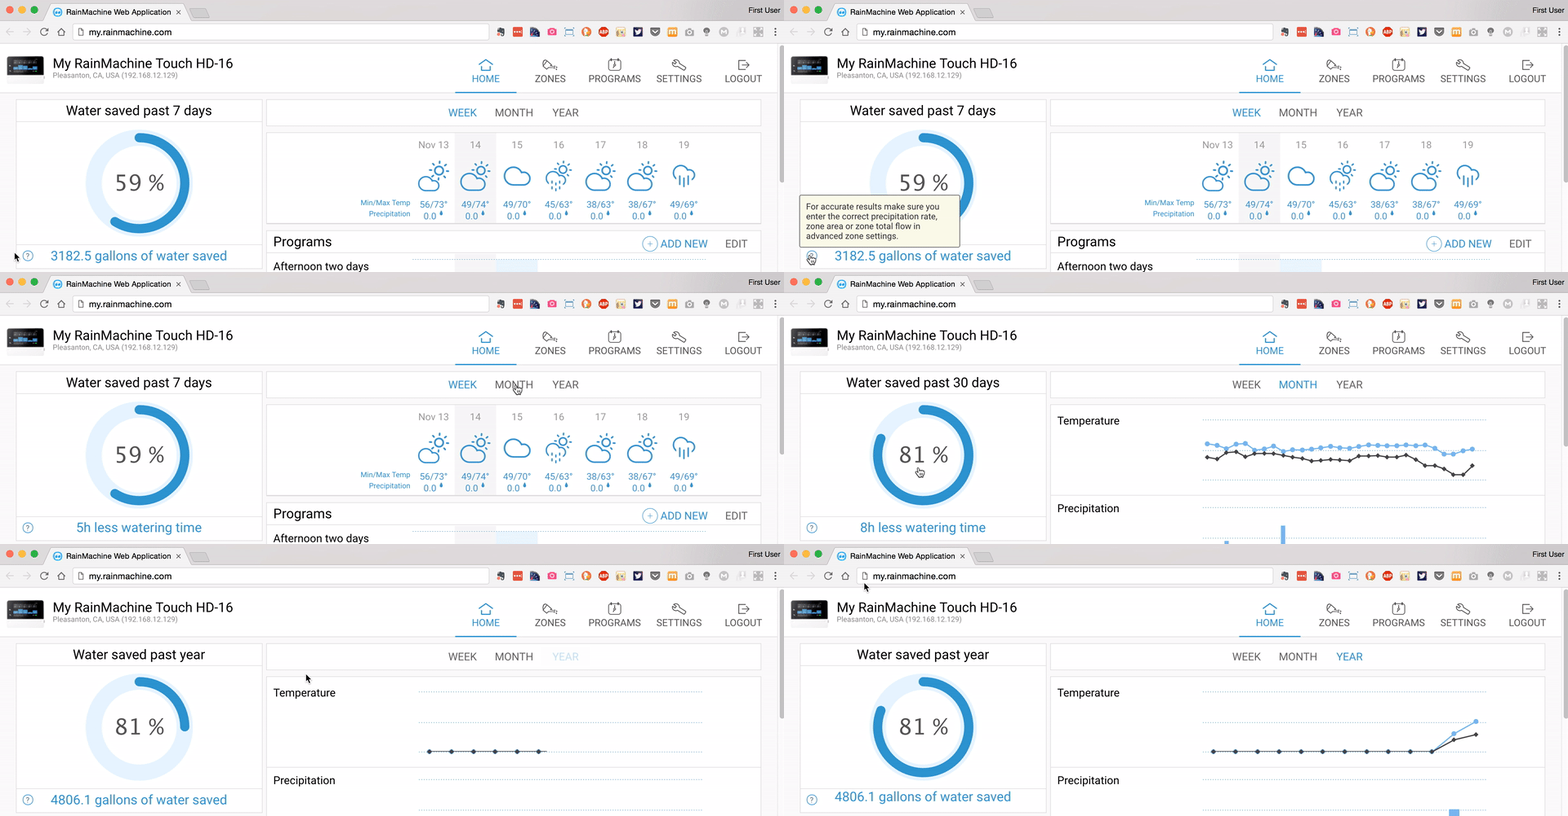
We’ve added a text ticker that shows the water saved in the past 7/30/365 days in gallons and in hours of saved watering time, respectively. We have also introduced the ? help icon; mouse over it you will get detailed info about the feature/option.
Here is the web interface screen capture. All these features also exist on our iOS and Android apps.
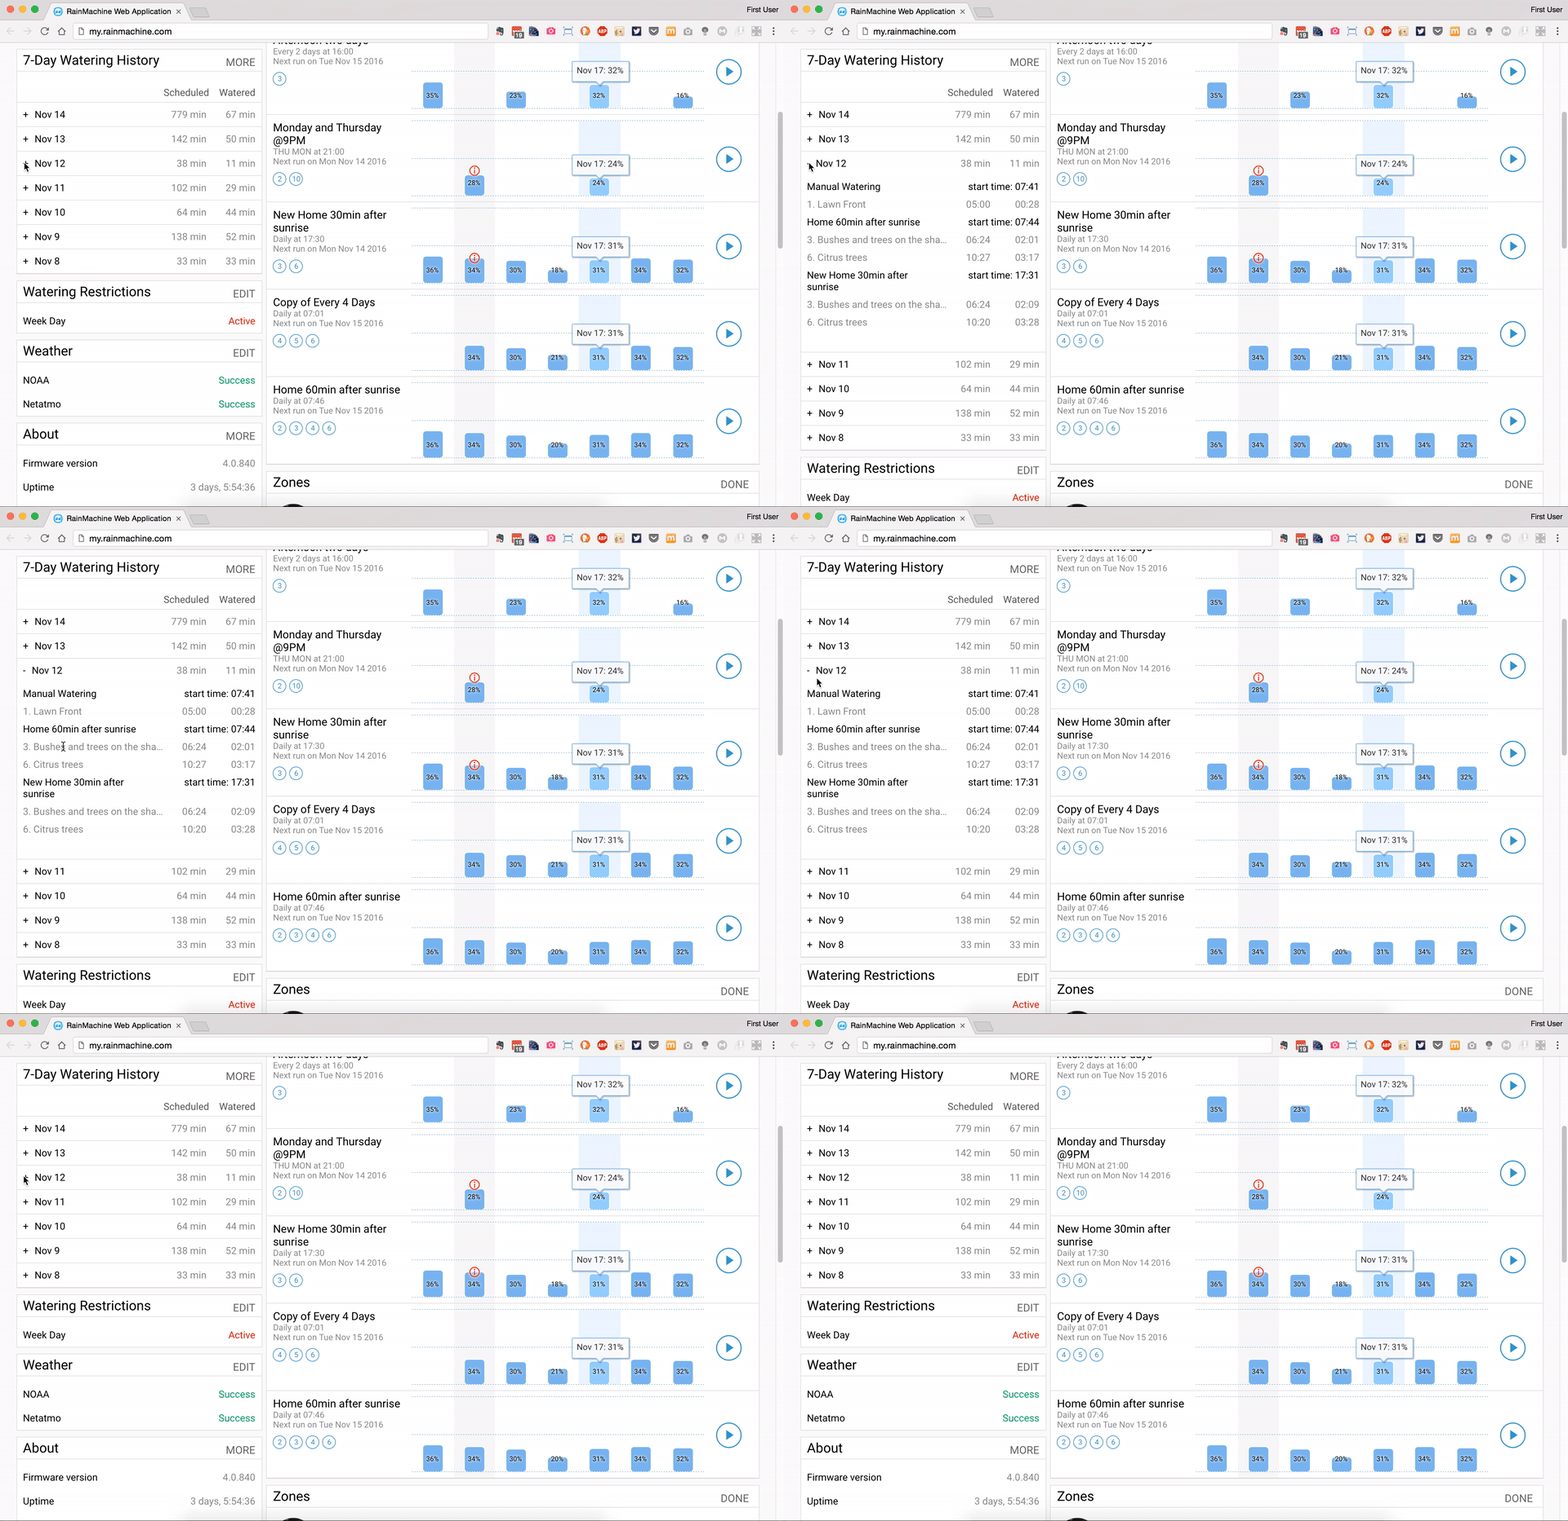
Clicking on the MORE button it will open the SETTINGS - WATERING HISTORY detailed info.
Here you’ll find a 7 day history of all watering activities with their total scheduled and watered times. Click on the “+” next to each day to see details and restriction alerts.
Here is the web app screen capture. All these features also exist on our iOS and Android apps.
If there are any watering restrictions you've set under SETTINGS - RESTRICTIONS they will be displayed ‘as they occur’ on this graph. To edit or to remove a certain restriction, click on the EDIT button.
This tab lists all weather services you may have selected under SETTINGS - WEATHER and displays their status. Click the EDIT button to go directly to the Weather section and view detailed info and graphs for each service.
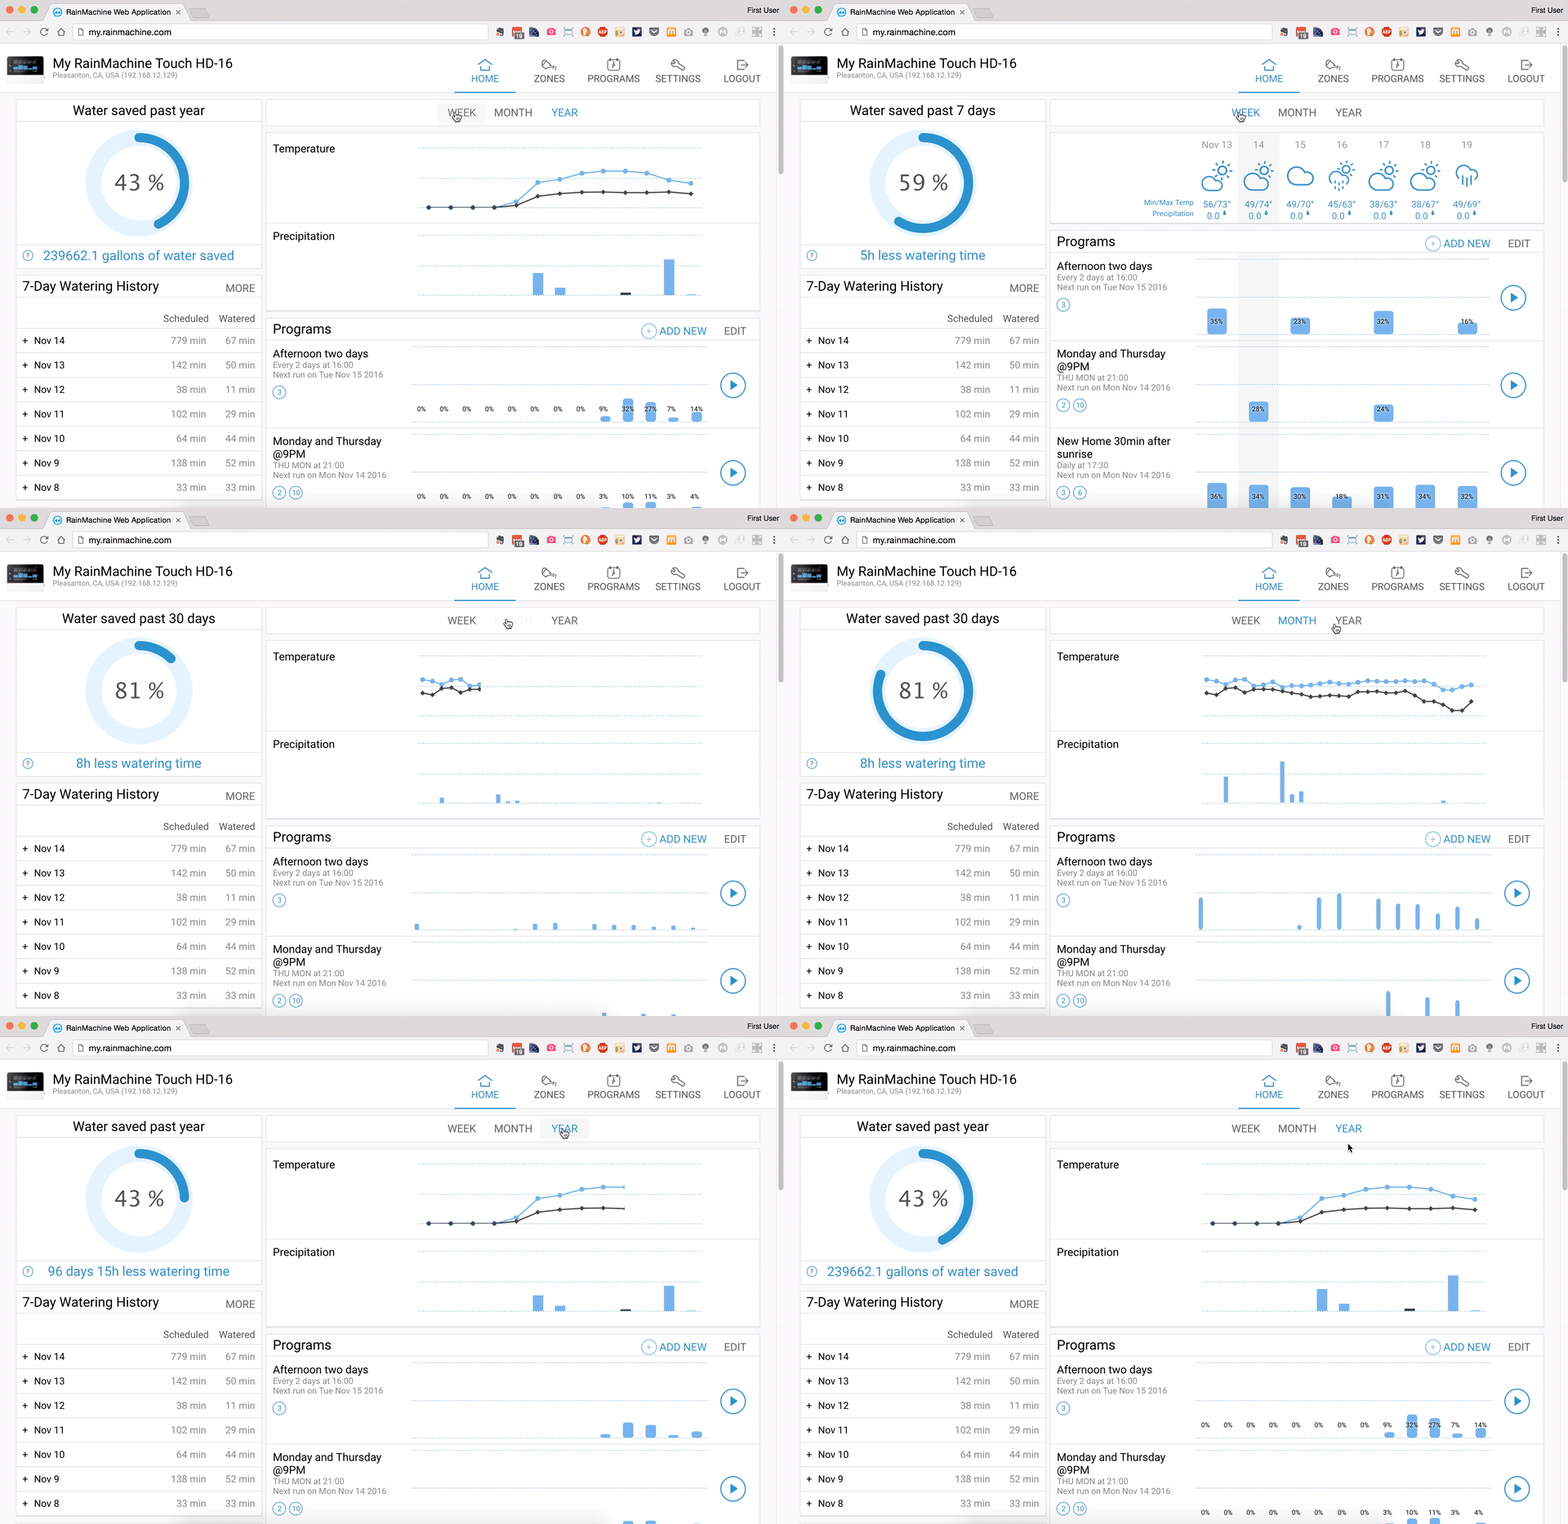
Clicking on these tabs will change graphs according to the timespan selected. The affected graphs are: left sidebar “Water saved” and the main card “Programs”.
Here is the web app screen capture. All these features also exist on our iOS and Android apps.
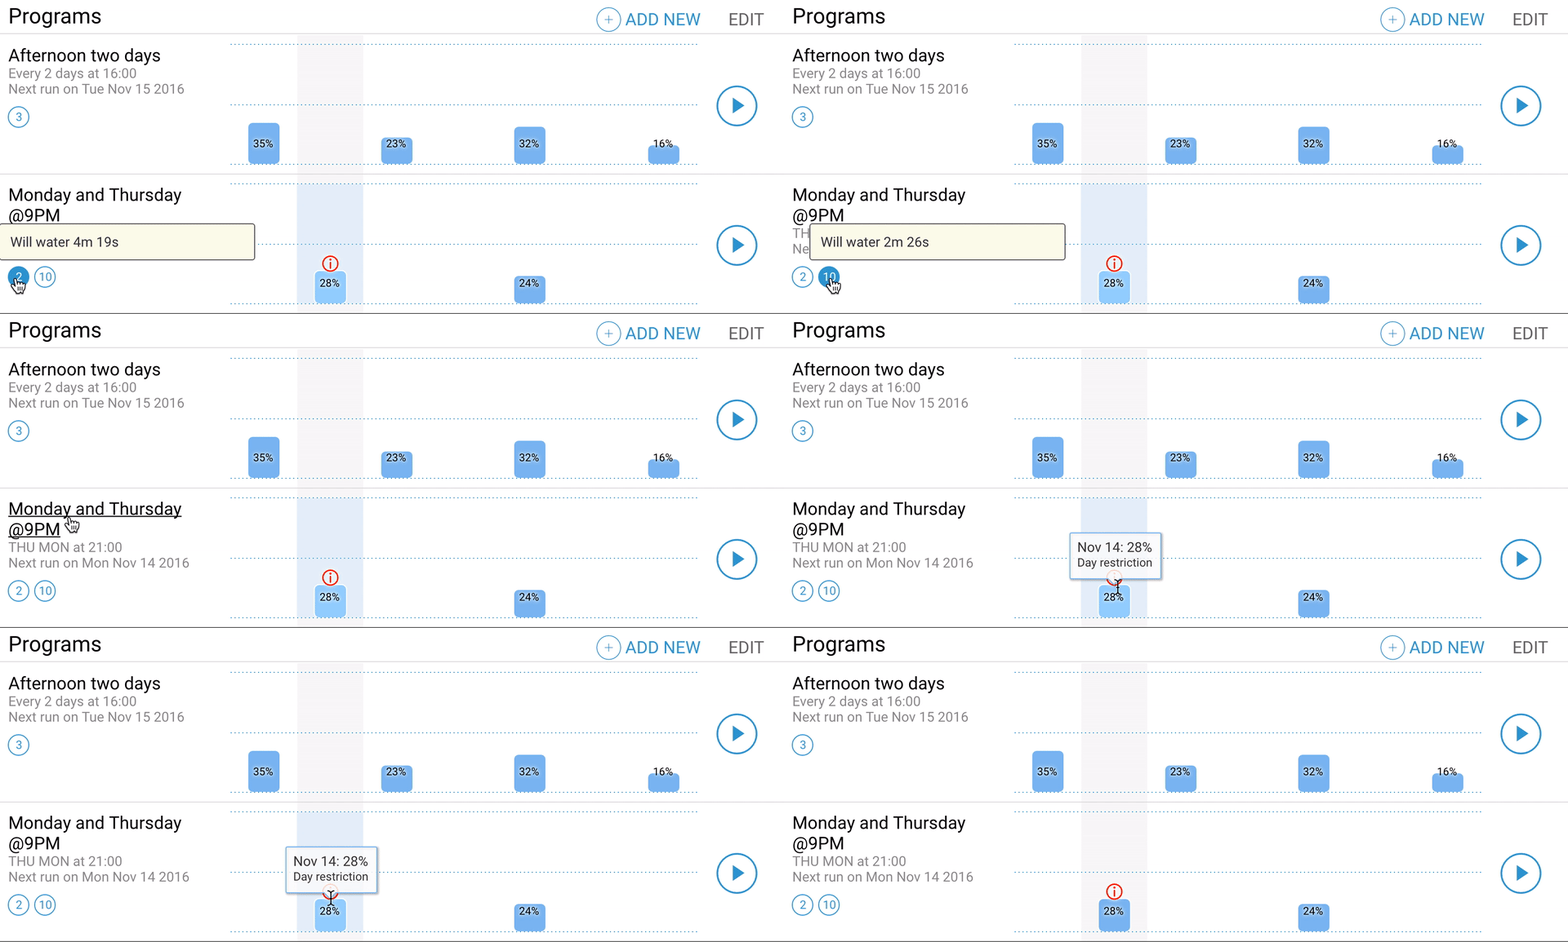
Each program graph (depending on the timespan view) will show the consumed water as a percentage for each day.
Under each program name there will be listed the program frequency, the “Next run” date and the watering zones included in that program. Mouse over each program zone number and the tooltip will list how much that zone will water on that program.
If there is any kind of watering restriction the red i symbol will show on that day. Mouse over this symbol and the tooltip will have the corresponding restriction for that day, or the reason why there is a restriction. For detailed info view the SETTINGS - WATERING HISTORY screen.
The RainMachine team has been working hard to bring new and exciting features to our 2017 software release. We have been listening to our user’s feedback on our forums and through our support staff, and have implemented features that will make your RainMachine a more user friendly, efficient, and personalized controller. Some new features include images for zones, advanced zone attributes, suggested watering times, automatic cycle and soak, and a streamlined interface.
This update will be available Jan-2017, but for those who are curious or just can’t wait, here is how you can enroll in our beta channel for iOS or Android and RainMachine firmware. Feedback will be much appreciated it!
This update will be available for all RainMachines made during the 2015-2017 period. Earlier Rainmachine models will get only partial updates via the iOS and Android applications.
Check out the new featuresTo update your RainMachine firmware, all you will need to do is navigate to Settings > System Settings > Enable Beta Quality Updates. Update your RainMachine software and you’re now ready to go.
We will be releasing more detailed information about these updates and changes in the coming days, so stay tuned.
Here is a preview of our upcoming blog articles:
Thank you
RainMachine has multiple weather services which have global coverage. We even tested it for Antarctica (where the freeze protect feature would definitely be useful). Simply go and open "Settings" on the RainMachine Touch HD device or mobile apps and then go to "Weather" settings and turn off "NOAA (US Weather)" and turn on "Metno (Global)", or "WUnderground" (includes personal weather stations), or another weather service you think may better suit your region.
That's it! We will continue to add more weather services into the future.
Read more about following this link.
Currently RainMachine only supports only English language, but as interest outside the US continues to grow, we will make more languages available for users. Also, RainMachine only ships within the US, so to ship to another country the customer would need to take care of the additional costs.
For electrical compatibility, RainMachine has a standard US transformer rated for 120V 60Hz outlets. Before using in Europe or another region, make sure you have the correct adapter before plugging the unit in to avoid overloading it.
1. Please login or create a free IFTTT account here.
2. To allow IFTTT to access your RainMachine, click on Channels and search for RainMachine channel.
3. Follow on screen instruction to login on the RainMachine using your email address and RainMachine password (those are the remote access credentials).
4. Click on ACCEPT button.
5. After the RainMachine channel is connected you can define your own trigger recipes, as in the example below, or you can use predefined users public trigger recipes.
Trigger recipe example:
6. Go to RainMachine ifttt channel and scroll down to the Triggers section.
7. There are 9 RainMachine triggers that you can choose from.
8. For our example we will choose the first trigger: "Zone has started". Click on it
9. Then click on the button Create a new recipe
10. Press "this" text button
11. Search for “RainMachine” channel, and click on it.
12. Choose the first trigger Zone has started1.
13. The next step is to choose one zone from the dropdown zone list.
This list will be populated with all zones from all your RainMachine devices associated with the remote access credentials.
14. After you selected a zone, click on Create Trigger button
15. Click on "that" text button
16. Search the channel of the IoT service provider you want. We choose Gmail
17. Click “Gmail” channel and if you are not connected to your gmail account it will ask you to login and to grant IFTTT access.
Do that by entering you gmail credentials and choose Accept.
18. Choose the action Send an email available for this Gmail channel.
19. Next you have to fill the form fields with your gmail email address (that's more important) and how the subject and email body will look2.
20. Attachment URL field can be empty or can be filled with an image url of your zone3.
21. Click on the Create Action
22. If everything is in order then click on the final Create Recipe button to create your RainMachine IFTTT trigger recipe.
23. After the trigger recipe was saved the edit page will open. Here you can choose to:
- Make it public by clicking on the Publish button so all the other users can use it. Not suitable for this kind of triggers that uses personal email addresses.
- Stop it and it will not trigger anymore, but won't be deleted until you choose to delete it by clicking on Delete button.
- Check the status by clicking on Check now button to see if the connection between RainMachine channel and Gmail channel are ok - you will get a green message if everything it's ok, or a red message when something is wrong and you may need to review the trigger settings once again.
- View the trigger log.
1. Only the scheduled zones or programs can be used as triggers on RainMachine IFTTT channel. If a zone or a program is manually started, the IFTTT trigger will not fire.
2. Do not change/delete the text placed into gray rounded corner square. That will be replaced with the RainMachine Zone number and custom name.
3. Use an online image upload service (like postimage.org) to upload your image and copy and paste the generated link of the image into this field.
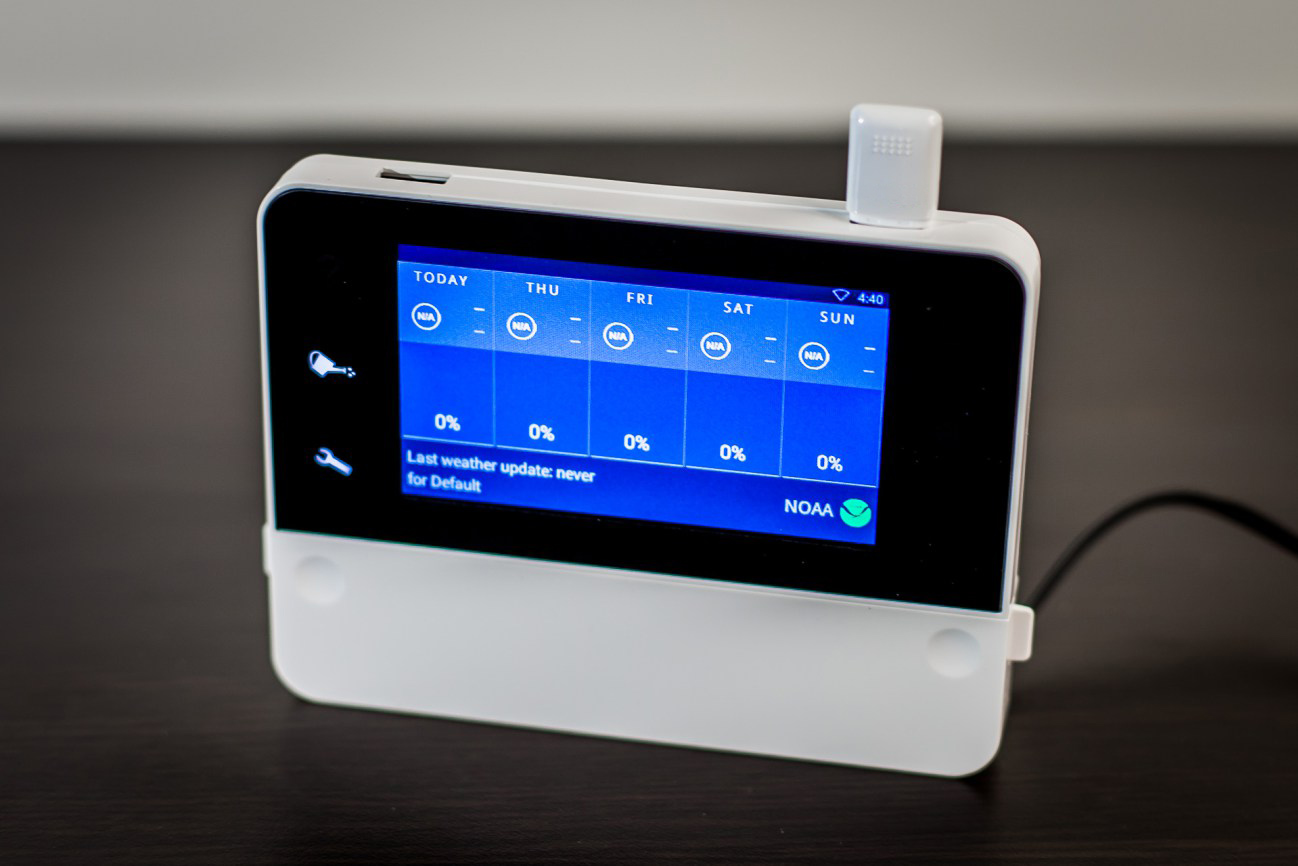
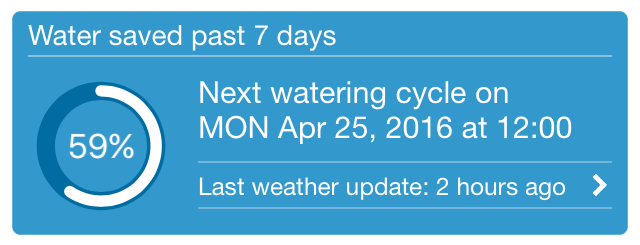
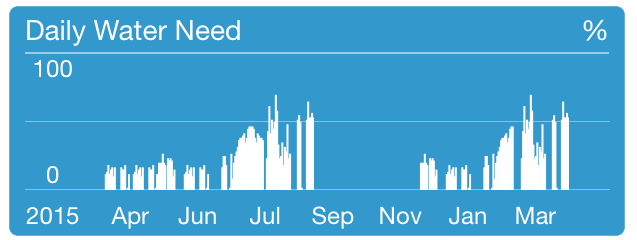
At a glance, on the daily view, you can see how much water RainMachine has saved you, when it will water next, and when the weather data was last updated. Forecast, daily water need, temperature trends, rain amount, and watering program breakdowns are displayed up to 1 year. The yearly view gives a better sense of seasonal trends.
We try and give you as much relevant data as possible so you can make a judgement and adjust accordingly at a glance.
In case you are not interested in a certain data source (let’s say temperature graph) just tap on the temperature graph and select “Do not show on Dashboard”*. Simple!
* this option is available only on iOS mobile application
We tell it like it is, with no sugarcoating or hiding numbers, so you get the full picture, directly from your RainMachine’s weather & evapotranspiration algorithms.
With all this data, our evapotranspiration algorithm makes decisions as to how much, and how long, and when to water your garden. We based our algorithm on research conducted by the American Society of Civil Engineers (ASCE), which you can learn more about here. Our code implementation is fully transparent, open source, and on github; you can check it out here.
People like our device RainMachine Touch HD-12 and RainMachine Touch HD-16 touchscreen dashboard so much, they frequently ask if they can use it inside their living room or kitchen to see the weather at a glance. Still, we believe that the best place for the RainMachine is in your garage. :)
Recently we decided to time how quickly we could unpack and setup the RainMachine smart wifi controller, and found that we could do it comfortably in 10 to 15 minutes from box to complete setup.
First get the app, then power and boot up the device. On your phone (iPhone or Android), go to your WiFi settings and select RainMachine WiFi. You are now connected to the Mini-8 wifi access point. Next step is to connect the device to your home WiFi, enter your network password (if any) and wait for RainMachine Mini-8 to connect. When it's done continue the setup process on your phone - choose a name, a password and enter your location. Mount the unit on the wall and enjoy your new smart irrigation controller.
At this point your RainMachine Mini-8 is available to control only through your own WiFi network. Optionally if you want to remotely access your RainMachine Mini-8 from anywhere, you will need to enter your email address and follow the steps to validate it.
Below you can watch an instructional setup video tutorial for the RainMachine Mini-8.
You can go through the entire setup process from the touch screen on the unit itself. Plug it in, boot it up and give it a name and password. Then get it connected to your home WiFi and input your location. Mount the unit on the wall and you are good to go! Optionally you may want to create a remote access account with your email address and the password you just set. Follow the remote access validation steps and finish the process - your RainMachine Touch HD smart controller will be available from anywhere you go.
Below you can watch an instructional setup video tutorial for the RainMachine Touch HD-12 & RainMachine Touch HD-16.
Please visit our YouTube channel for latest RainMachine videos. Don't forget to subscribe!
NOTE: In the installation process, the most intimidating thing will be the wiring (but it really isn’t). Make sure you take a picture of your old valve wiring so you can refer to it when setting up the RainMachine, and simply match the wires to each zone. Need help? Contact our support team at 844-498-8707 or email us at sales@rainmachine.com. We want this process to be painless, and we are more than happy to help you out!
"The RainMachine HD-12 is a damn fine device. There are so many things I like about it and very few things that are off. It’s beautiful inside and out, so easy to use and works without interruption. I can finally stop worrying about turning the sprinklers off when it rains ..."
In the past few weeks we have quietly pushing out IFTTT functionality to our RainMachine Mini and RainMachine Touch HD 2015 models. This release will allow you to have creative control over the thing you love the most: your garden.
By using public recipes or by creating your own recipes, you will be able to control your RainMachine in more ways than you could do before. You can even talk with your Rainmachine via the IFTTT Alexa channel!.
Enjoy your connected garden!
Before you start, please make sure your RainMachine device has the latest firmware installed.
To do that, check and update your firmware by going to System -> Software Update using the RainMachine mobile iPhone and Android application, locally on the RainMachine Touch HD devices, or using the web application accessible at my.rainmachine.com
A step by step IFTTT how to guide can be found here.
Enjoy IFTTT!
The RainMachine Development team
NOTE: IFTTT trigger support will also be available, release date is March 1st, 2016.