2017 Features, Part 3 - Graphs and Data

Dec 15, 2016, by admin

Information transparency

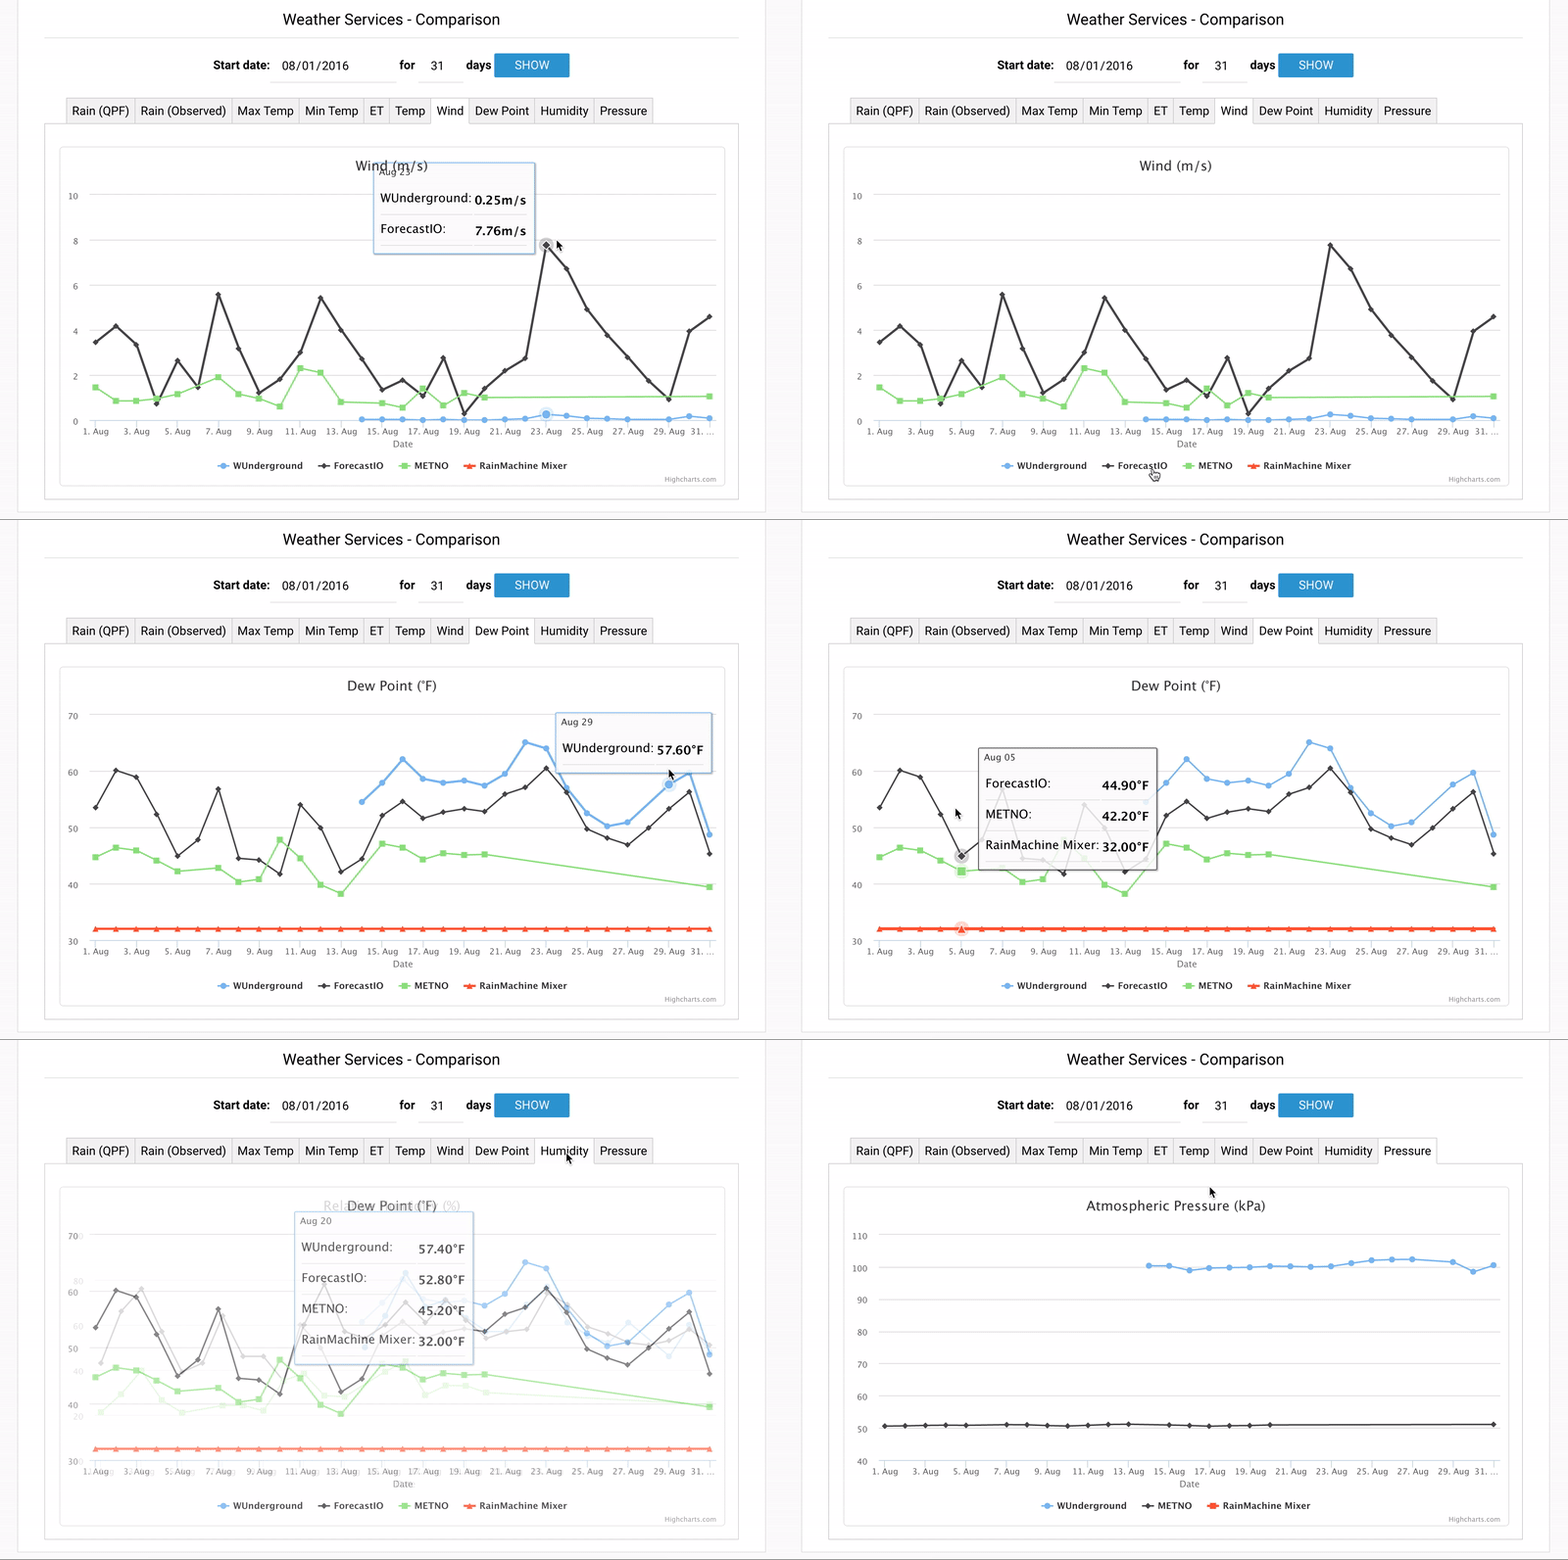
RainMachine has always provided the user with lots of useful data from rainfall and temperature levels to amount of water saved. The goal of this software release is to have information transparency so that you can better understand and program the RainMachine to best fit the needs of your yard. Here is how we display new data elements for weather service comparison graphs, including Dew Point, Humidity, and Pressure.

RainMachine weather services comparision graph


Seasonal adjustments graph

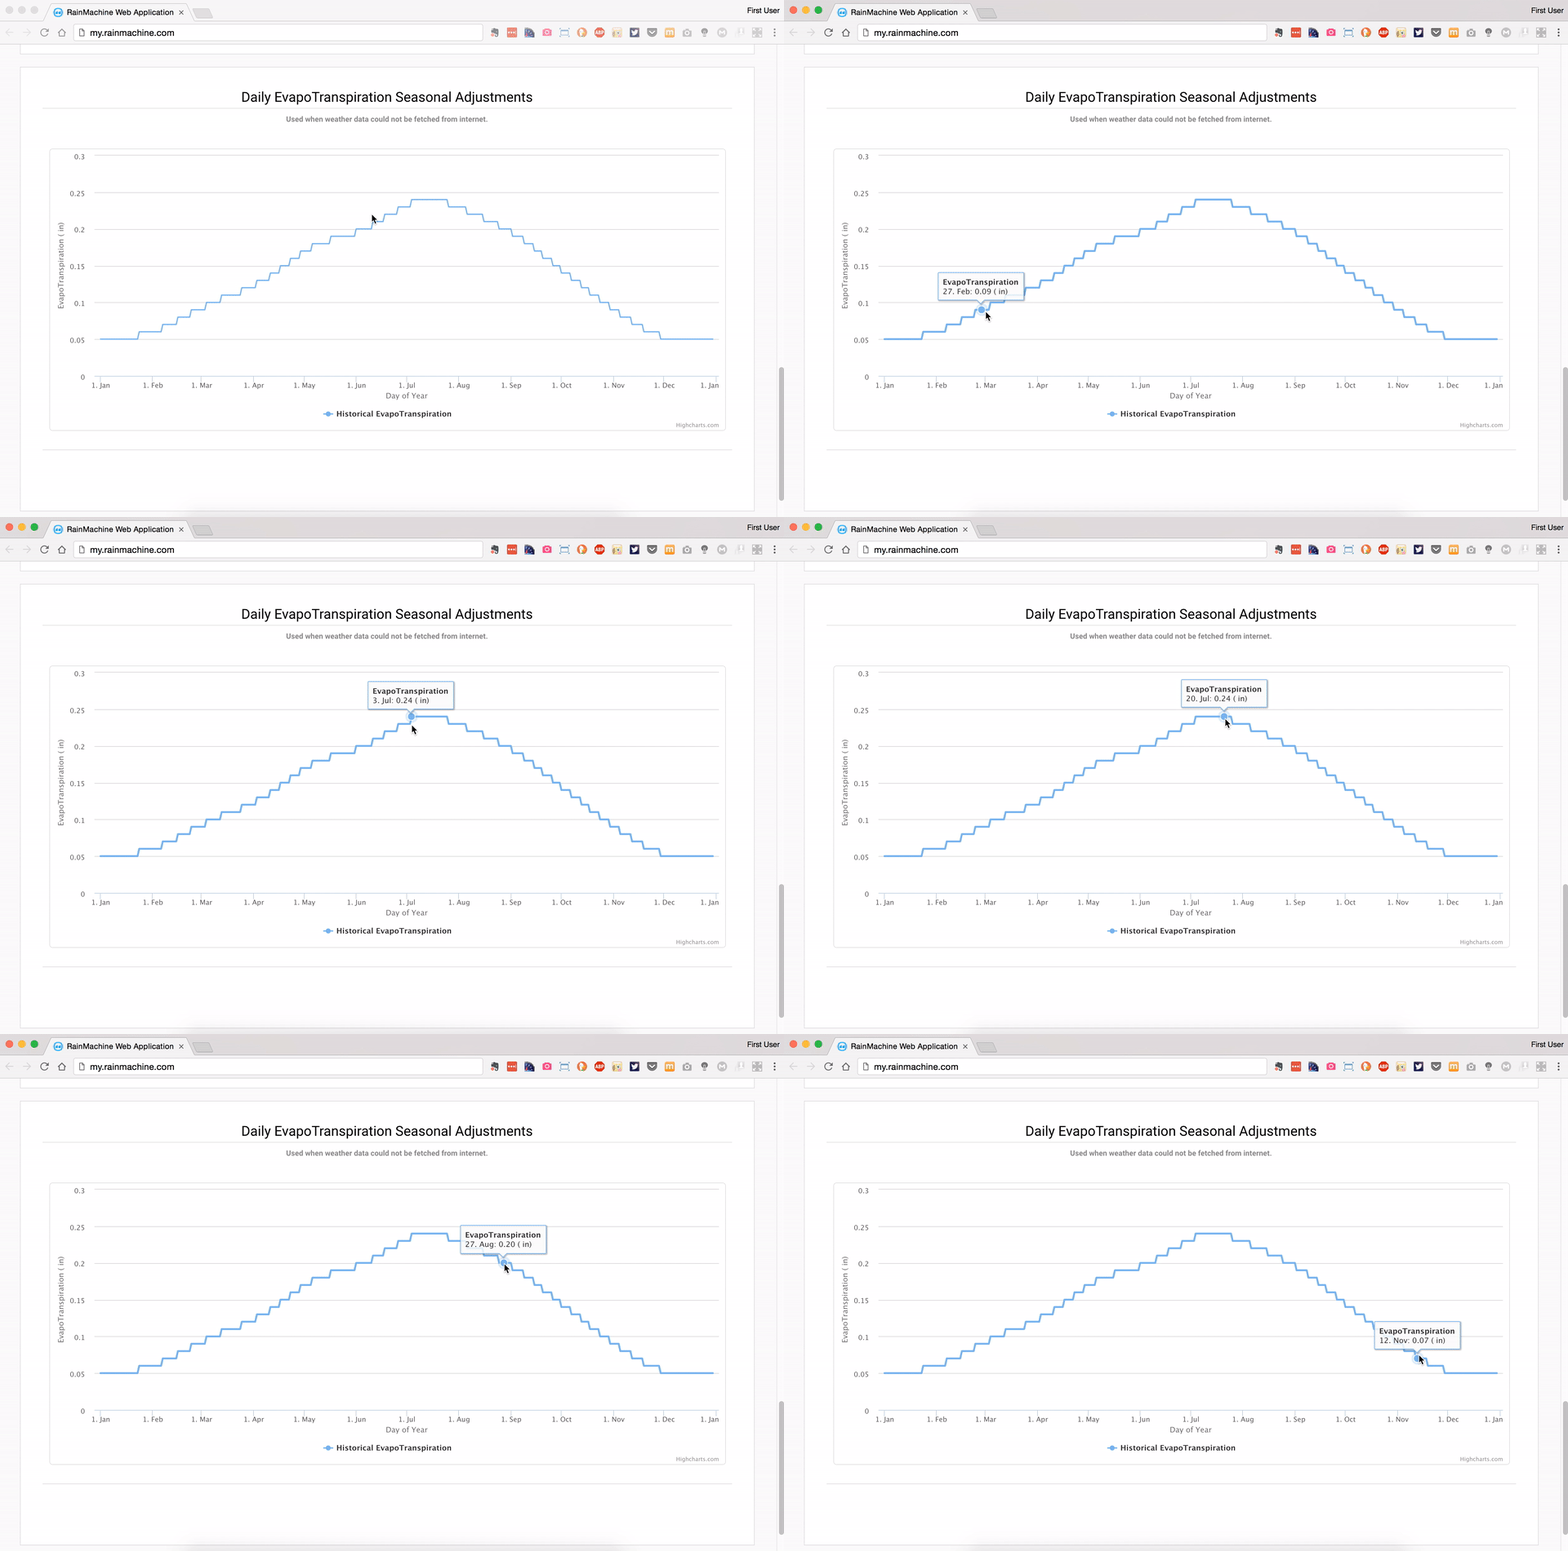
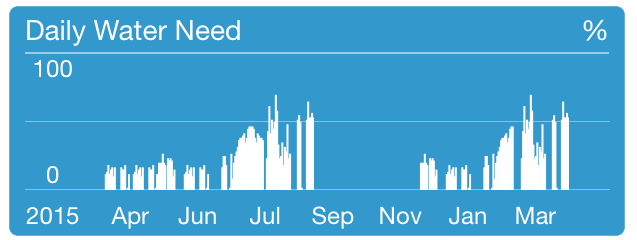
Below is the seasonal adjustments graph, which shows you an average of 10 years of historical water need for your exact address, courtesy of NOAA. Should weather data be unavailable (or you want to averages instead of live weather), you can set the RainMachine to use this data for your water calculations. This is not just another standard 'bell curve', it is actual weather for your location averaged for a period of 10 years!

Seasonal adjustments graph


With these new ways of seeing data, you can really dive into a wealth of new information and fine tune weather on your device.


to be continued...
2017 Features, Part 2 - Advanced Zone Properties, Zone Pictures, New Manual Watering Interface

Dec 08, 2016, by admin

Advaced Zones Settings

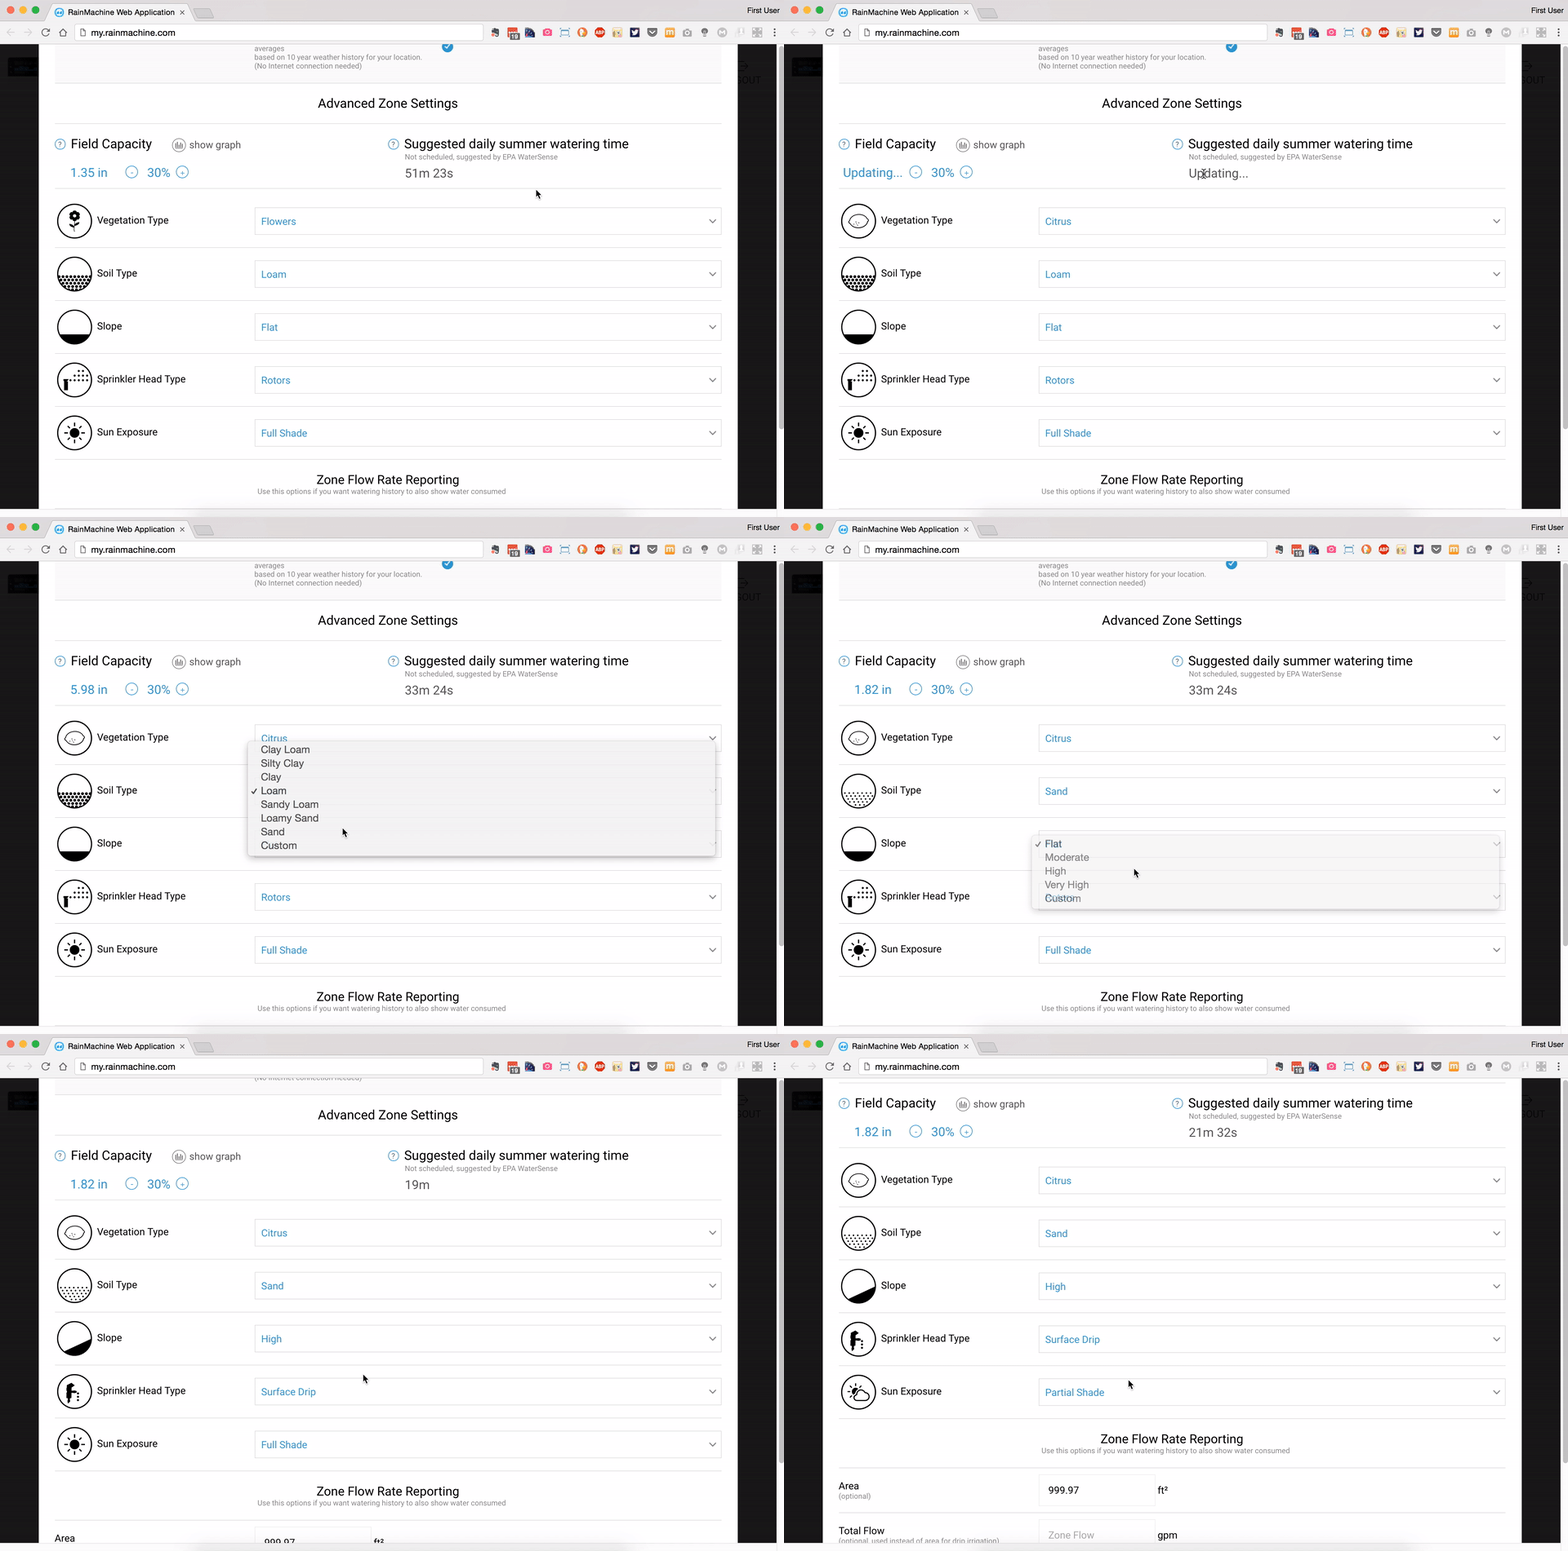
Zones are now highly customisable (via Advaced Zones Settings), allowing you to set Soil and Vegetation type, Sun Exposure, Slope, and Sprinkler Head type to be input by the user with easy pull-down menus.

Example of Advanced Zone Settings from the web interface.
NOTE: Similar views available on the iOS and Android applications.


RainMachine Advanced Zone Settings


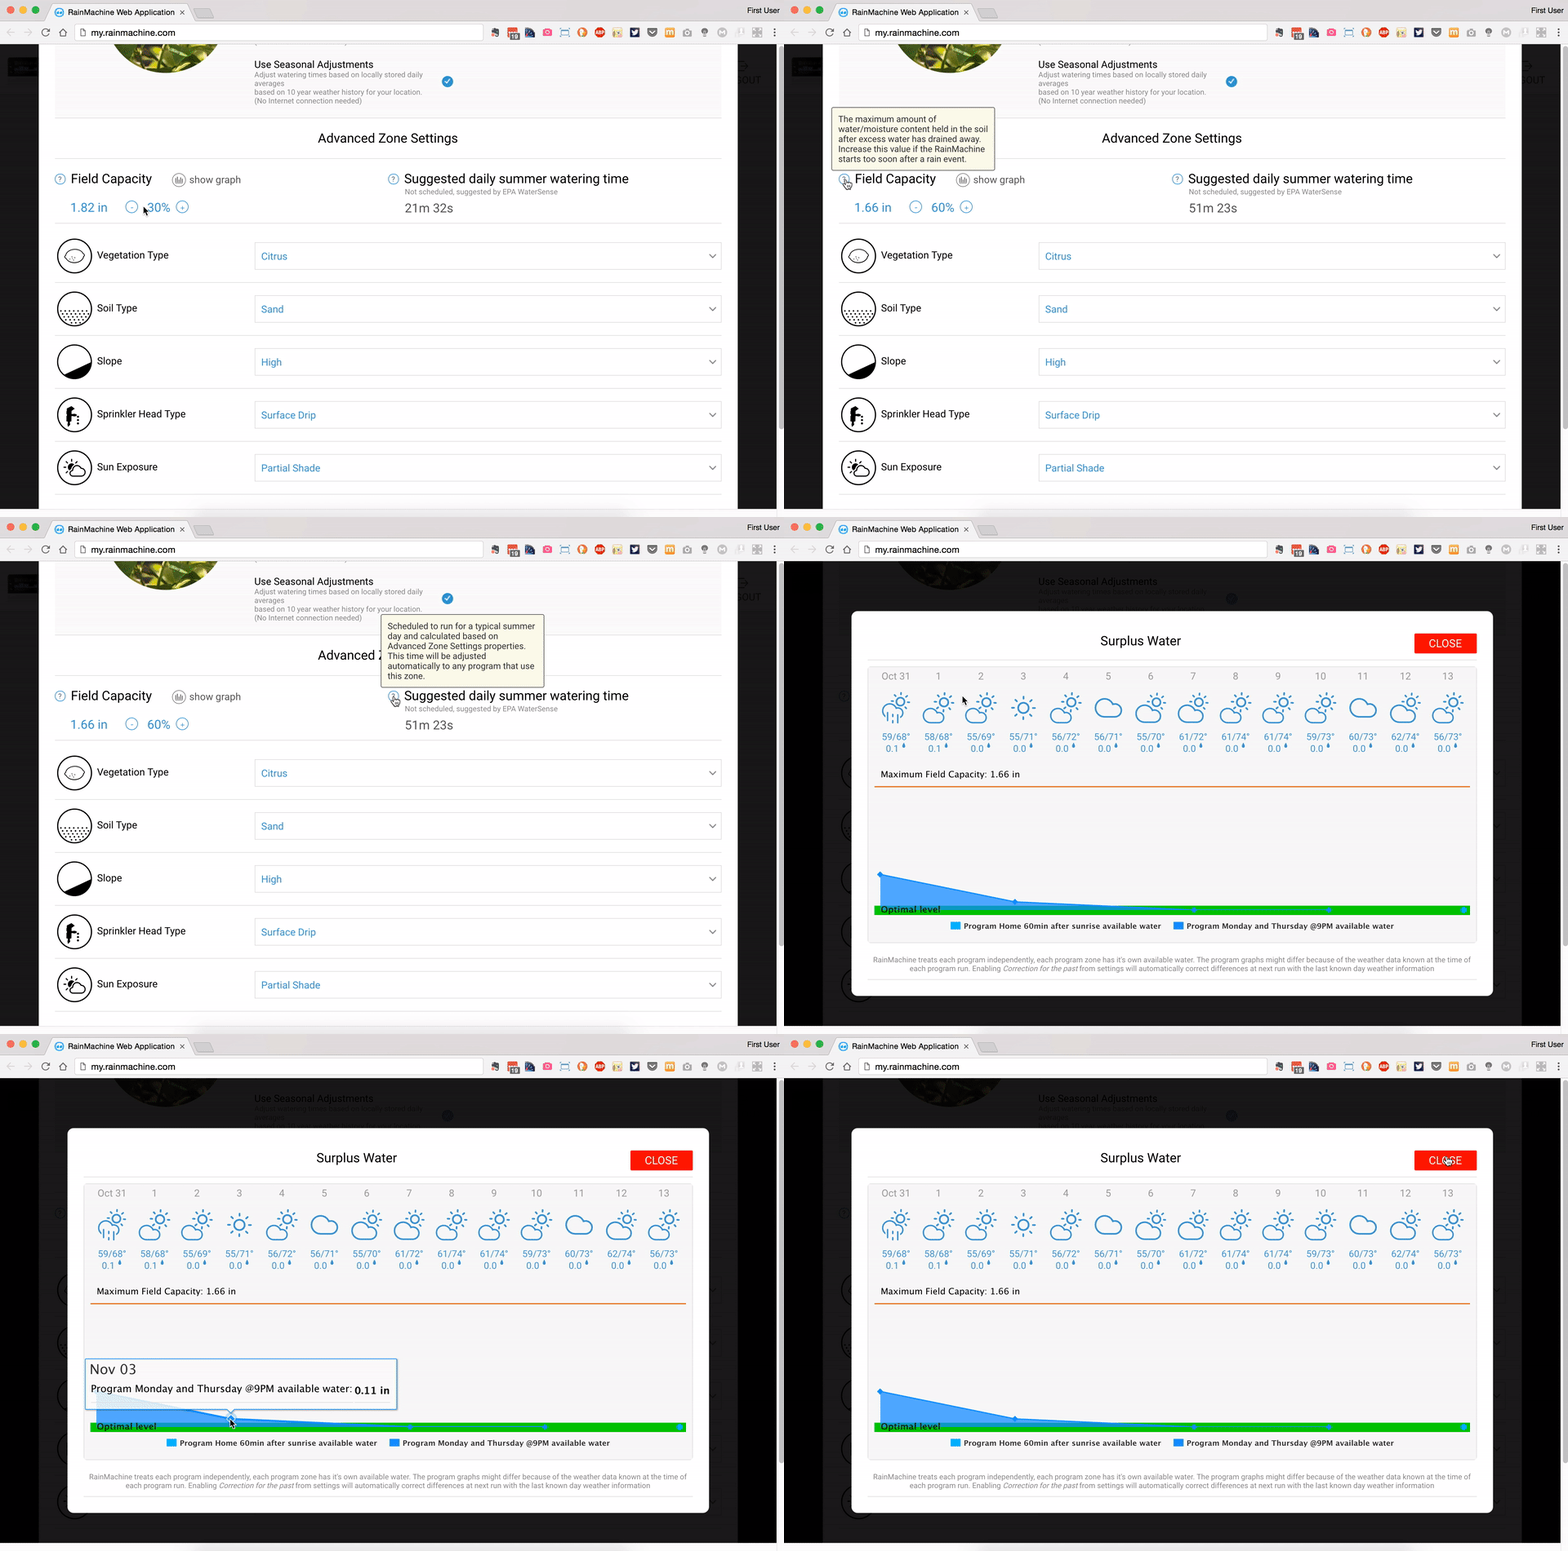
The advanced zone settings are important parameters that influence Field Capacity and Suggested Daily Summer Watering Time which directly impacts water consumption. Furthermore, the Field Capacity can be easily tuned in 10% steps by pressing the +/- buttons in the Field Capacity section.


We also introduced the Zone Flow Rate Reporting options where you can easily define the zone area and total flow for each zone. Use these options if you want watering history to also include water consumed statistics in gallons. See Quantity of Water Saved.


When it rains, you got a Water Surplus

To visualize Surplus Water (surplus water is the amount of water stored in ground after a rain) click on the “show graph” button and the Surplus Water graph will show up.


RainMachine Advanced Zone Settings - Field Capacity and Suggested Daily SUmmer Watering Time


Manually start watering individual zones

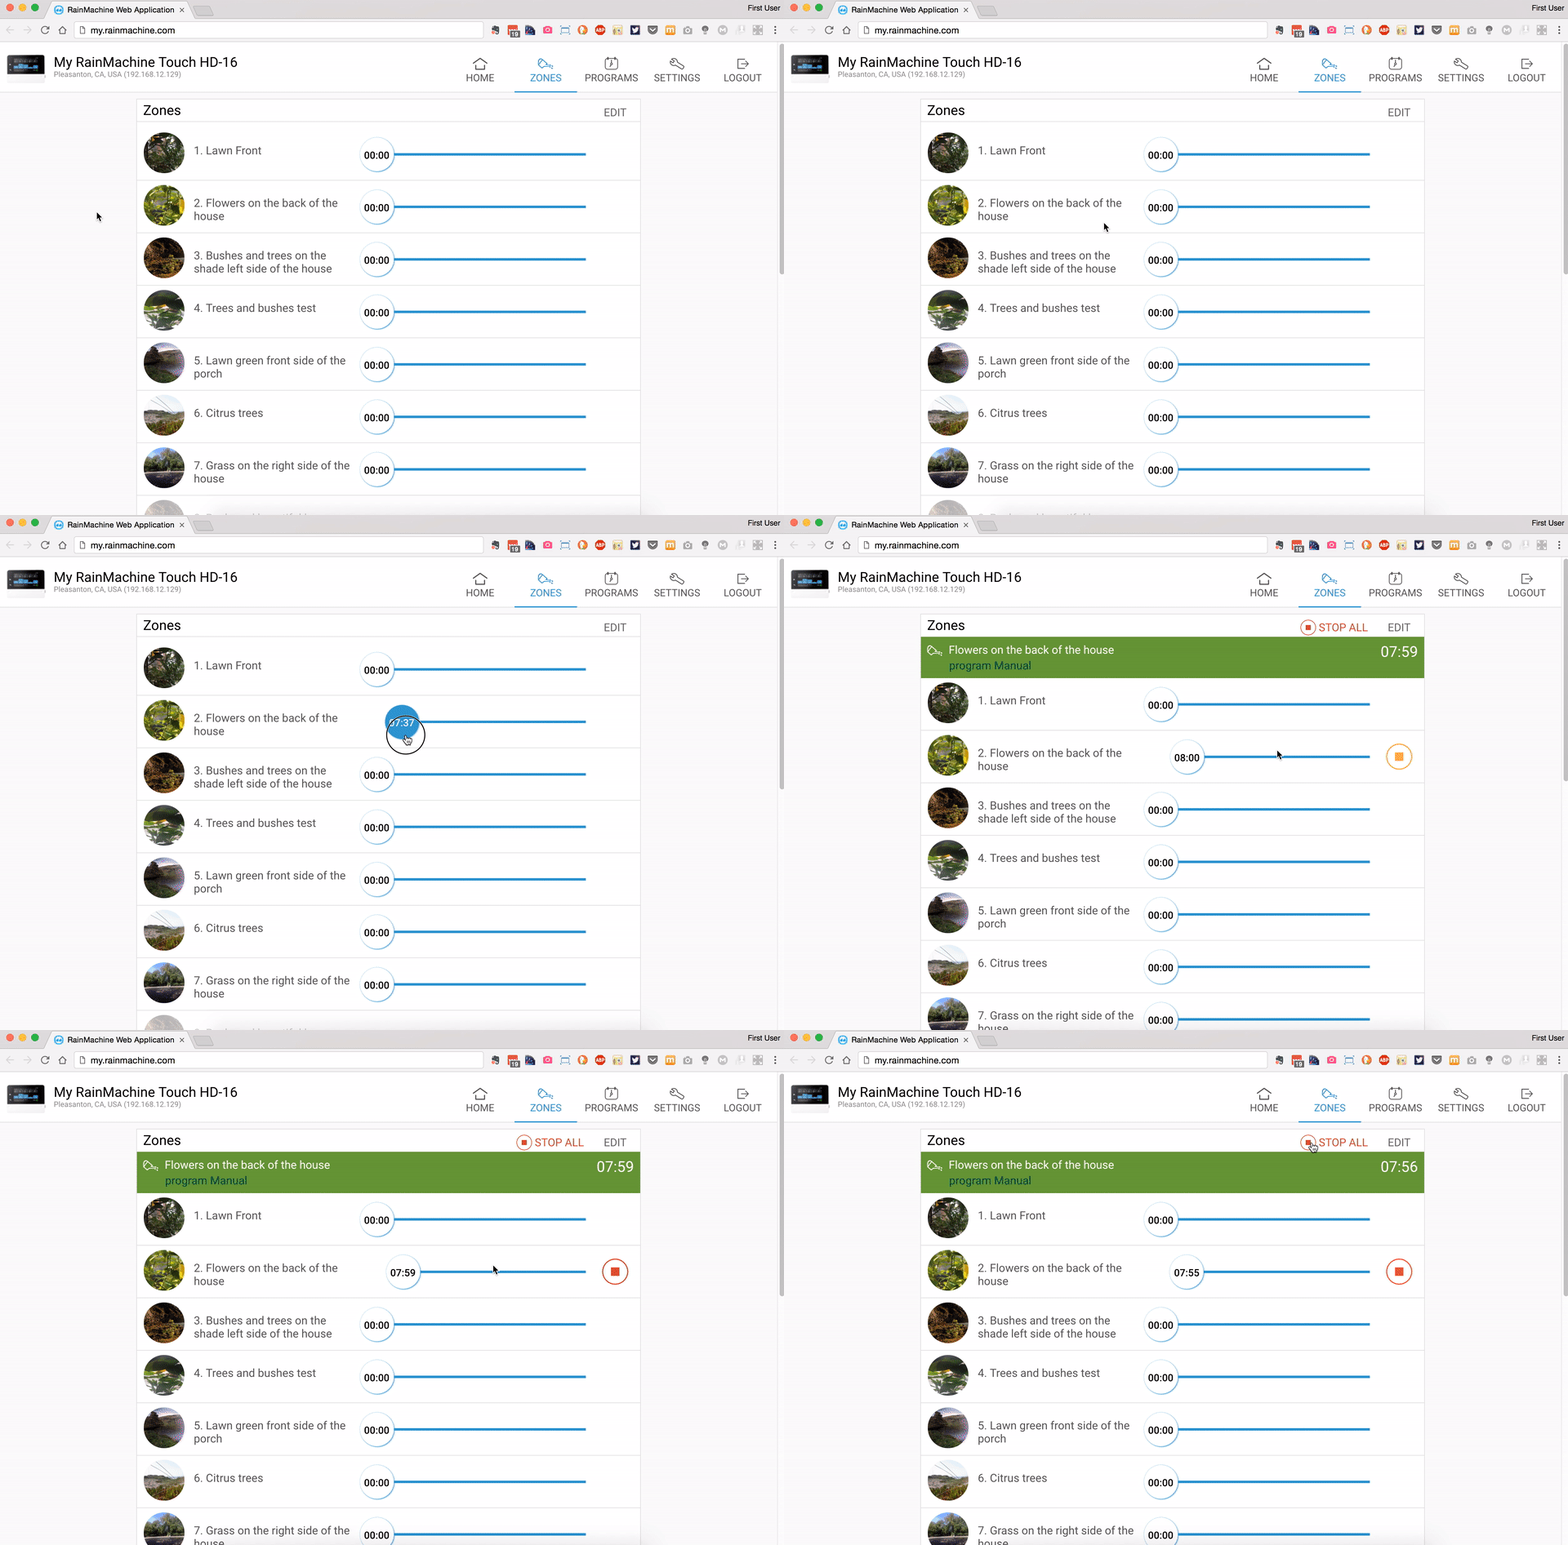
The manual watering interface has changed as well. To manually start to water a zone, simply pull the slider to the right until the desired amount of time is reached. To cancel, simply press the stop button on the right hand side, or drag the slider back to 0, or just press the STOP ALL button.


RainMachine manually start watering individual zones


read more...

2017 Features, Part 1
Water Consumption, Detailed 7 Day Watering History

Dec 05, 2016, by admin

Quantity of water saved

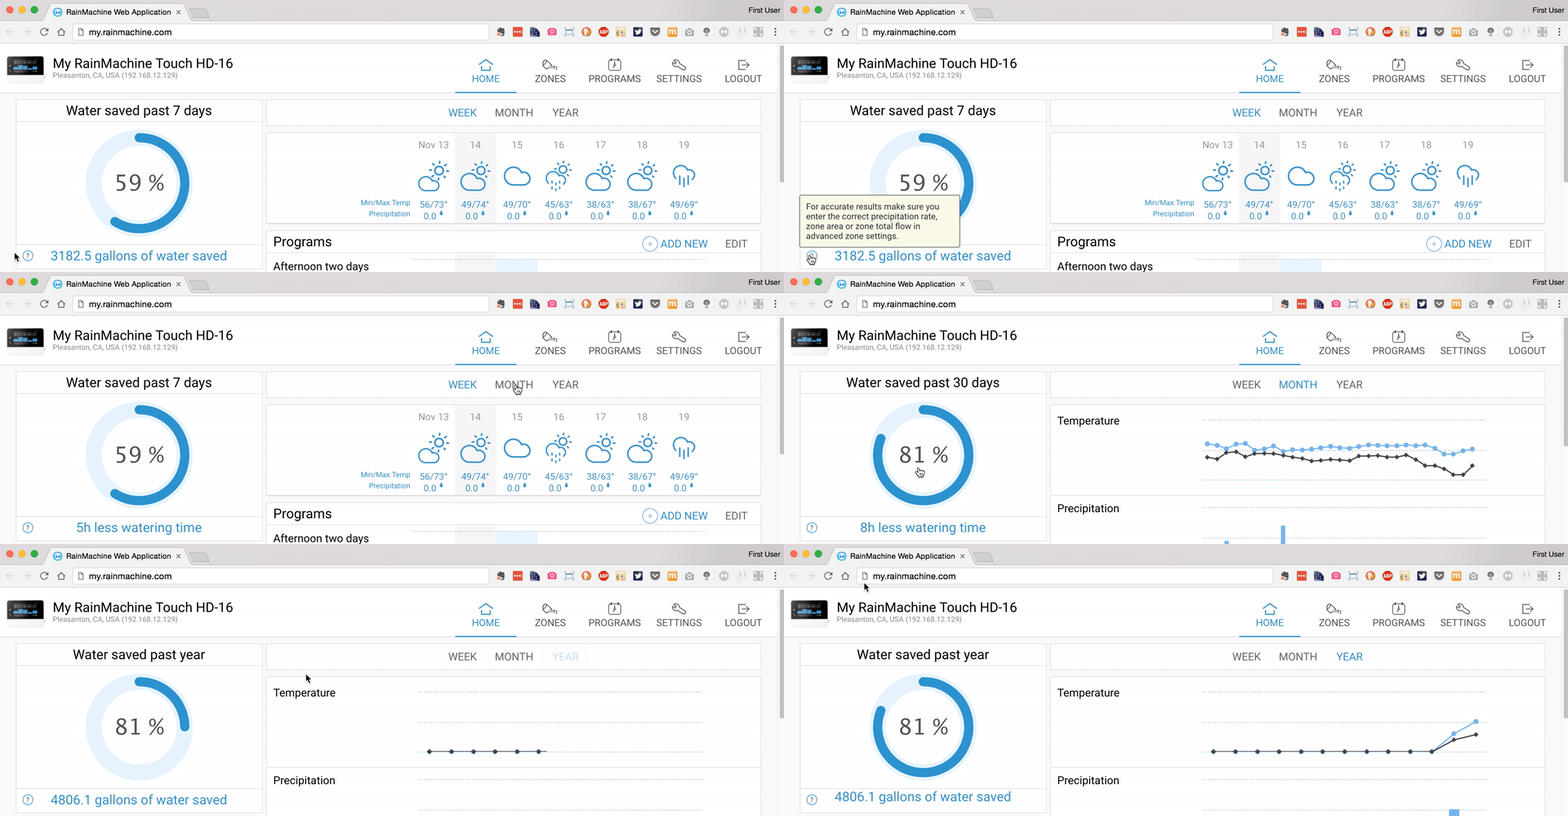
We’ve added a text ticker that shows the water saved in the past 7/30/365 days in gallons and in hours of saved watering time, respectively. We have also introduced the ? help icon; mouse over it you will get detailed info about the feature/option.

Here is the web interface screen capture. All these features also exist on our iOS and Android apps.

RainMachine gallons saved and help text added.


7-Day Watering History

Clicking on the MORE button it will open the SETTINGS - WATERING HISTORY detailed info.
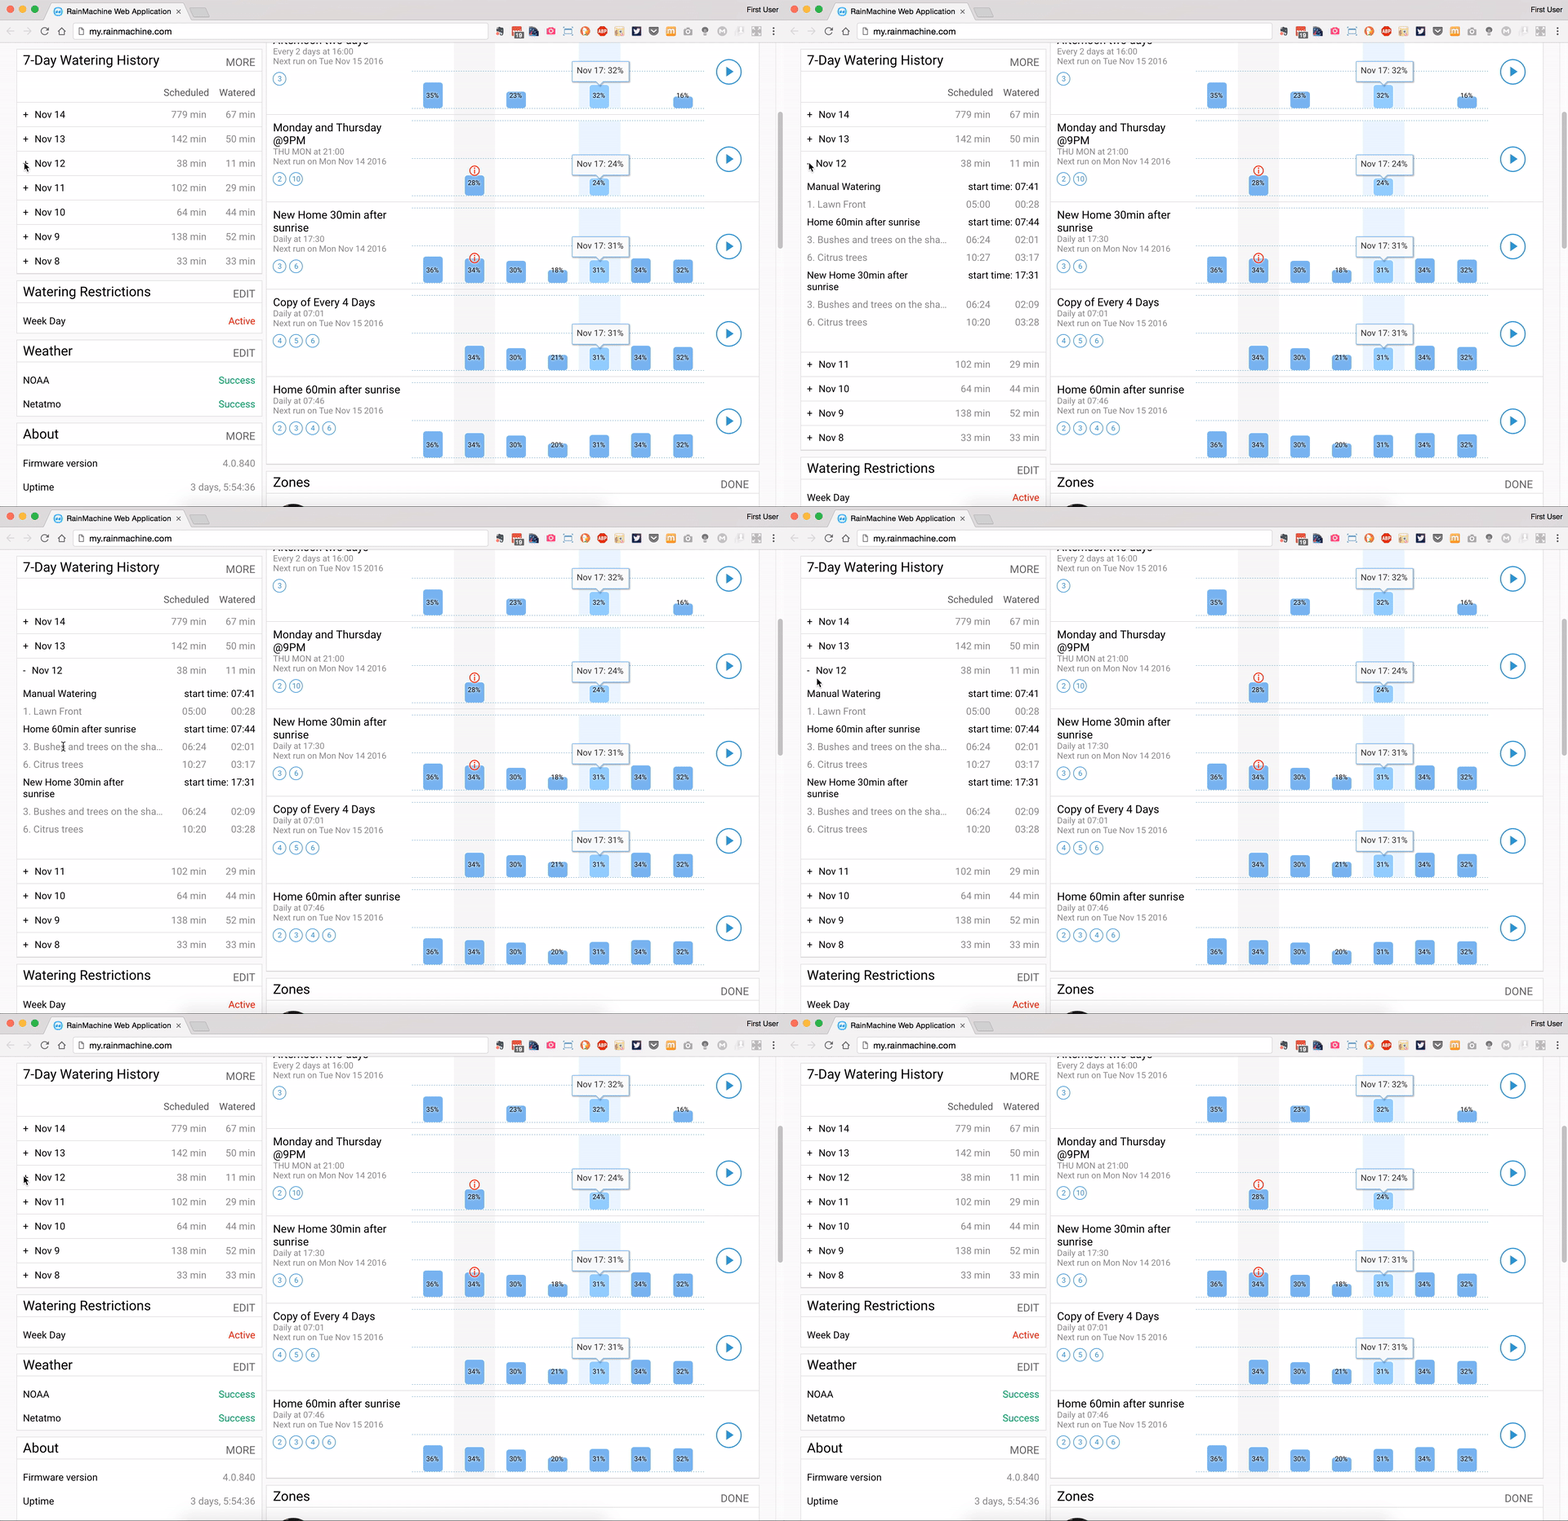
Here you’ll find a 7 day history of all watering activities with their total scheduled and watered times. Click on the “+” next to each day to see details and restriction alerts.

Here is the web app screen capture. All these features also exist on our iOS and Android apps.

Click on + to view all RainMachine watering details.


Watering Restrictions

If there are any watering restrictions you've set under SETTINGS - RESTRICTIONS they will be displayed ‘as they occur’ on this graph. To edit or to remove a certain restriction, click on the EDIT button.

Weather

This tab lists all weather services you may have selected under SETTINGS - WEATHER and displays their status. Click the EDIT button to go directly to the Weather section and view detailed info and graphs for each service.


WEEK | MONTH | YEAR view

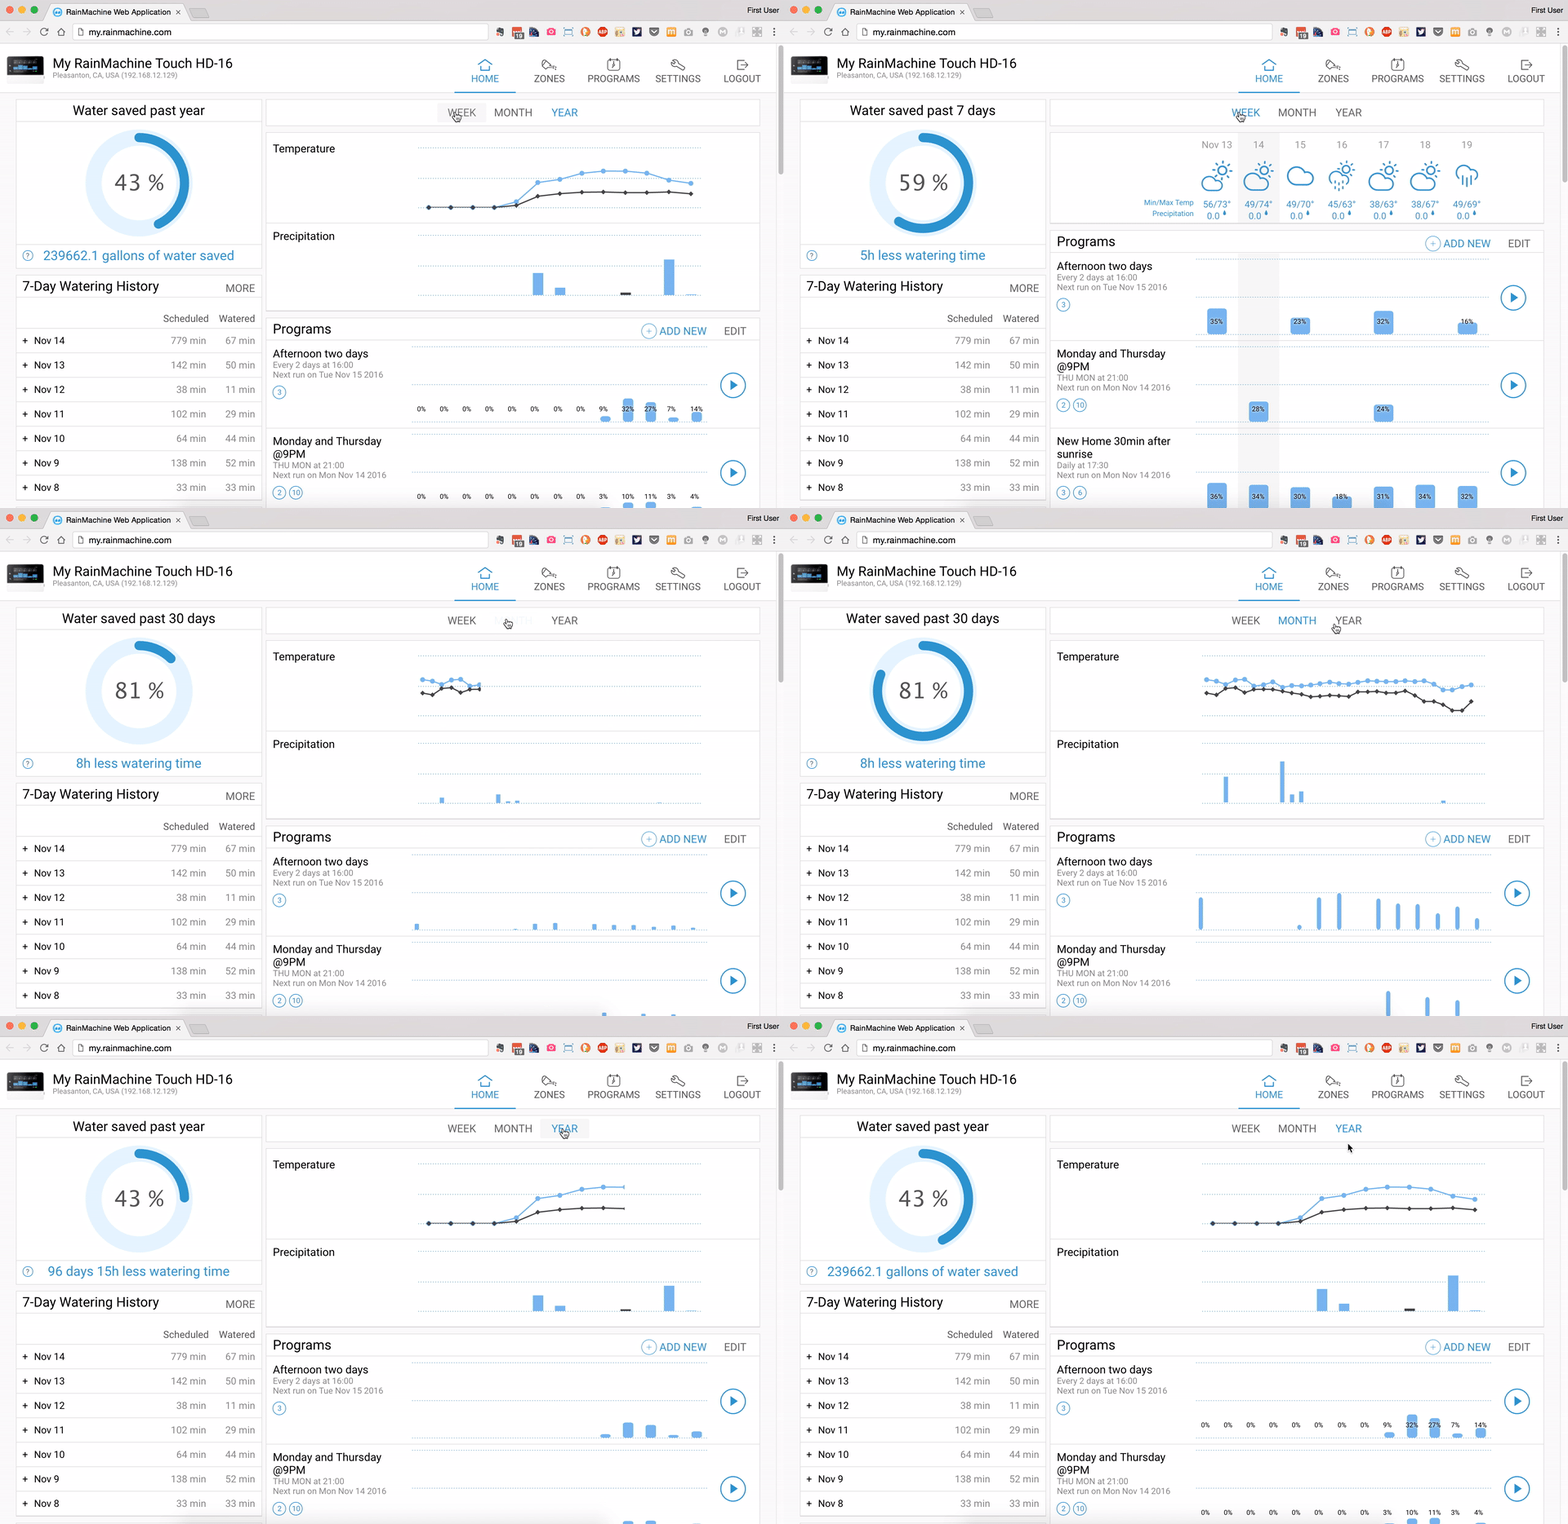
Clicking on these tabs will change graphs according to the timespan selected. The affected graphs are: left sidebar “Water saved” and the main card “Programs”.

Here is the web app screen capture. All these features also exist on our iOS and Android apps.

Click on WEEK, MONTH or YEAR timespan tabs to view the RainMachine watering info.


Programs chart

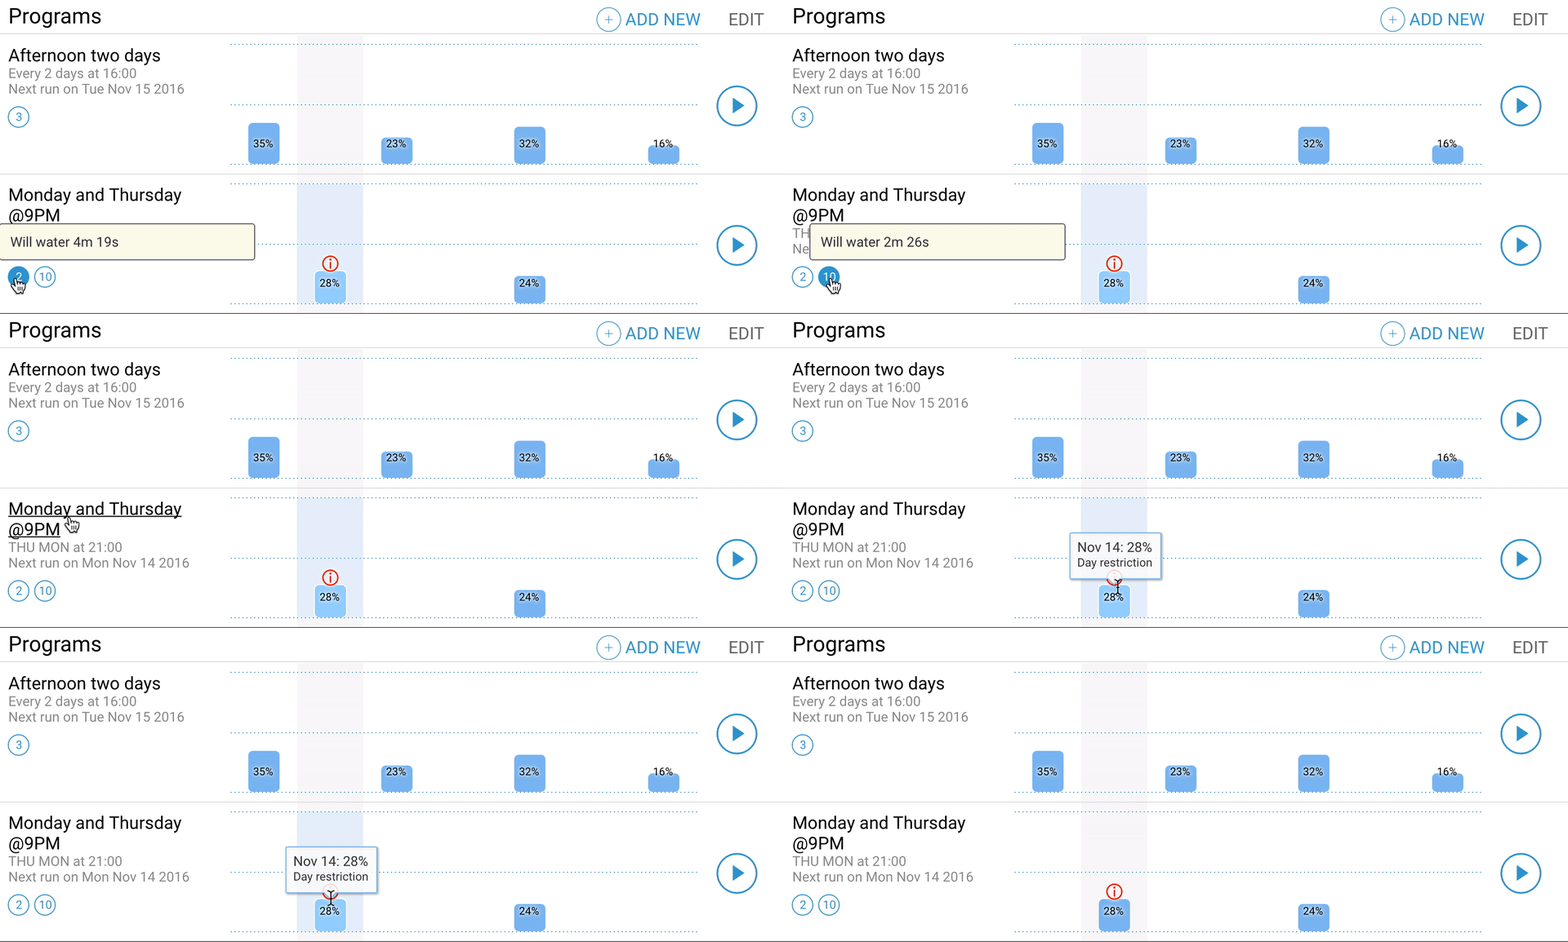
Each program graph (depending on the timespan view) will show the consumed water as a percentage for each day.

Under each program name there will be listed the program frequency, the “Next run” date and the watering zones included in that program. Mouse over each program zone number and the tooltip will list how much that zone will water on that program.

If there is any kind of watering restriction the red i symbol will show on that day. Mouse over this symbol and the tooltip will have the corresponding restriction for that day, or the reason why there is a restriction. For detailed info view the SETTINGS - WATERING HISTORY screen.

Mouse over each program zone number and the tooltip will list how much that zone will water on that program.


read more...

2017 Release Feature Preview

Nov 30, 2016, by admin

Exciting features, faster interface and more efficient watering

The RainMachine team has been working hard to bring new and exciting features to our 2017 software release. We have been listening to our user’s feedback on our forums and through our support staff, and have implemented features that will make your RainMachine a more user friendly, efficient, and personalized controller. Some new features include images for zones, advanced zone attributes, suggested watering times, automatic cycle and soak, and a streamlined interface.

Enroll and test it right now

This update will be available Jan-2017, but for those who are curious or just can’t wait, here is how you can enroll in our beta channel for iOS or Android and RainMachine firmware. Feedback will be much appreciated it!

This update will be available for all RainMachines made during the 2015-2017 period. Earlier Rainmachine models will get only partial updates via the iOS and Android applications.

Check out the new features

Update the firmware

To update your RainMachine firmware, all you will need to do is navigate to Settings > System Settings > Enable Beta Quality Updates. Update your RainMachine software and you’re now ready to go.


Stay tuned

We will be releasing more detailed information about these updates and changes in the coming days, so stay tuned.

Here is a preview of our upcoming blog articles:


Thank you

"I live in another country, will RainMachine still work for me?"

Aug 30, 2016, by admin

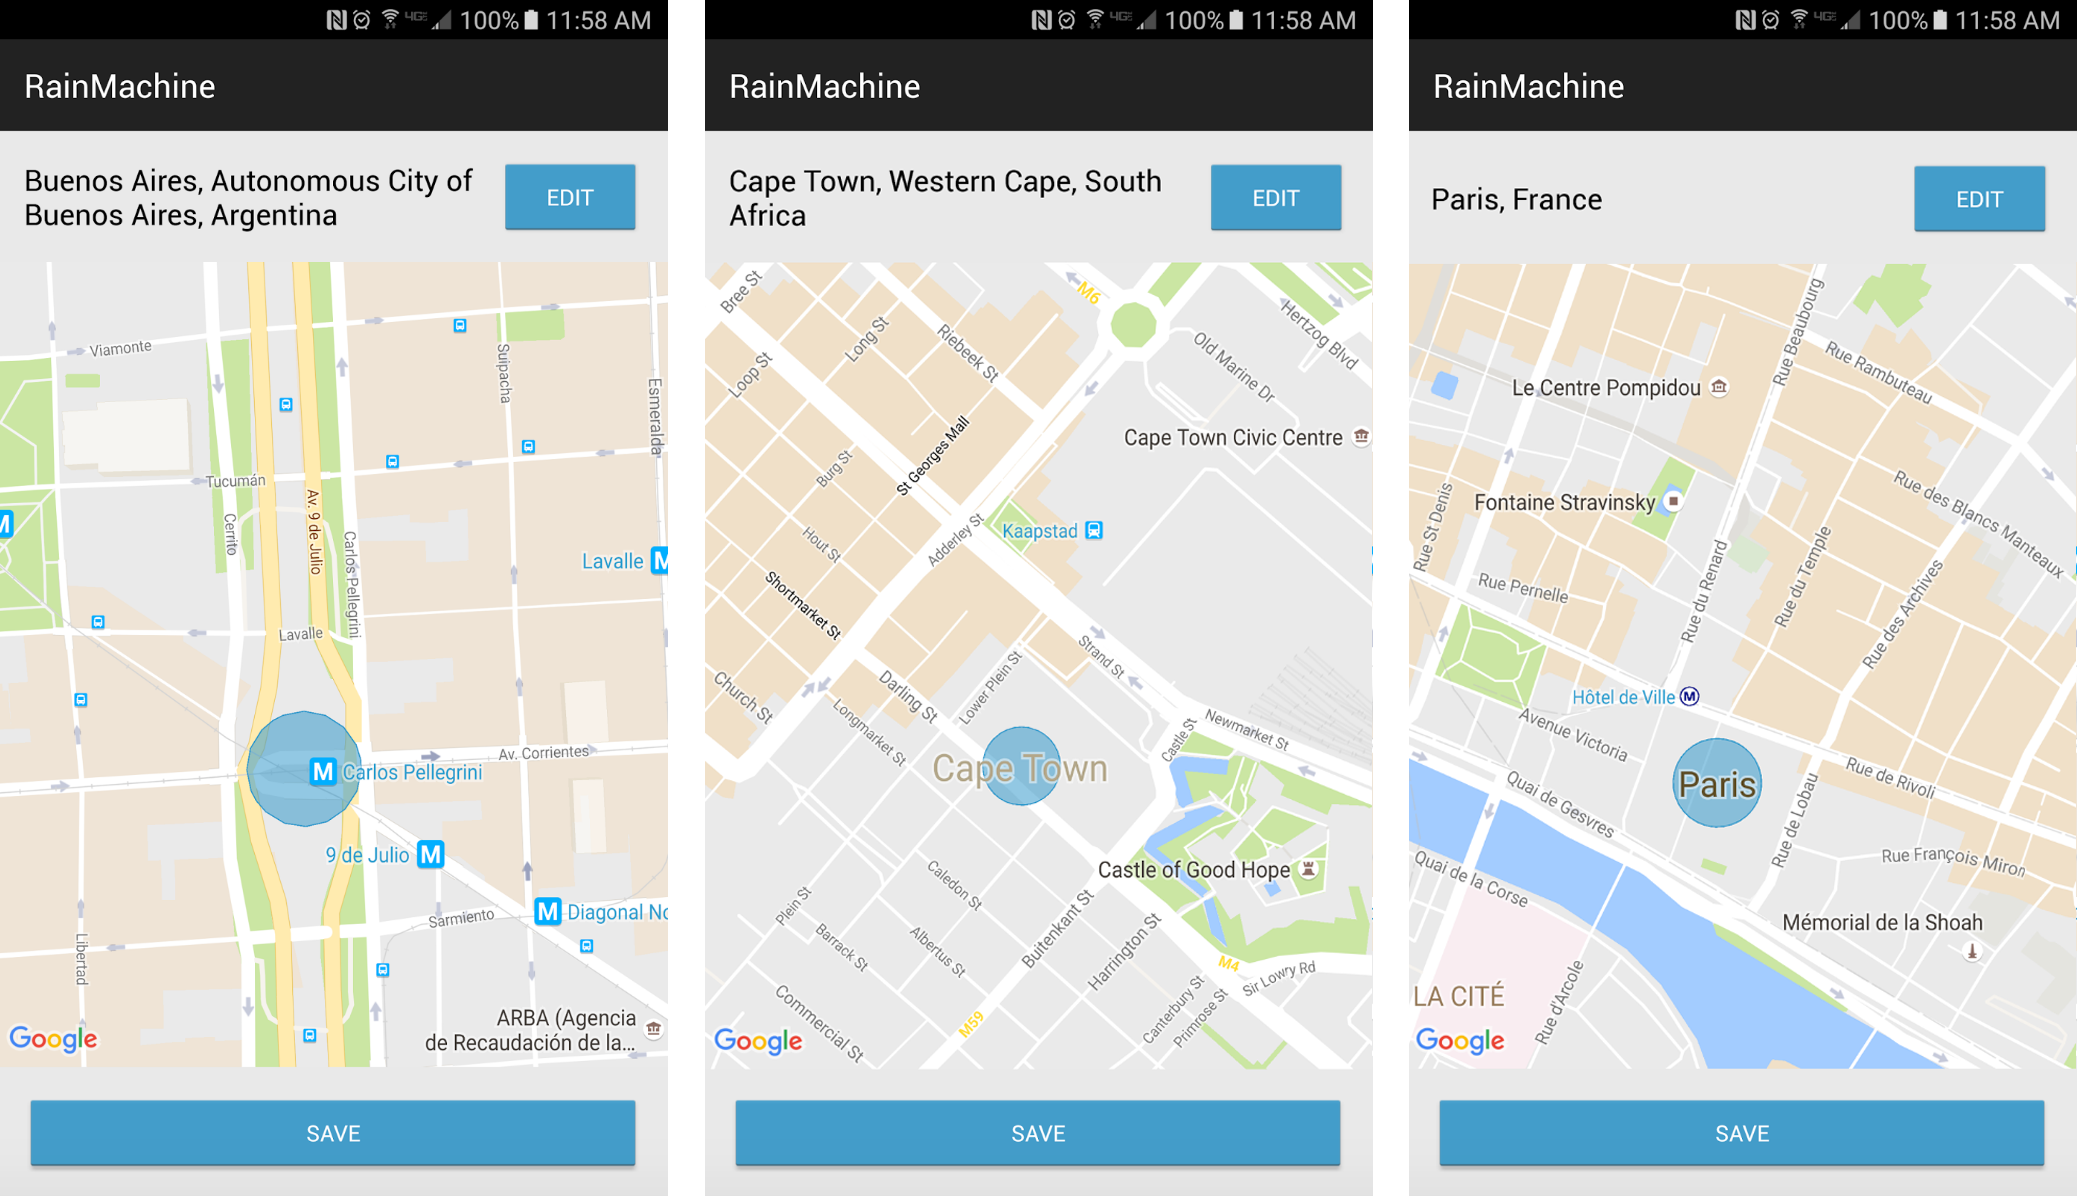
Option to choose RainMachine location by using RainMachine Android mobile application

Yes!

RainMachine has multiple weather services which have global coverage. We even tested it for Antarctica (where the freeze protect feature would definitely be useful). Simply go and open "Settings" on the RainMachine Touch HD device or mobile apps and then go to "Weather" settings and turn off "NOAA (US Weather)" and turn on "Metno (Global)", or "WUnderground" (includes personal weather stations), or another weather service you think may better suit your region.

That's it! We will continue to add more weather services into the future.
Read more about following this link.

Currently RainMachine only supports only English language, but as interest outside the US continues to grow, we will make more languages available for users. Also, RainMachine only ships within the US, so to ship to another country the customer would need to take care of the additional costs.

For electrical compatibility, RainMachine has a standard US transformer rated for 120V 60Hz outlets. Before using in Europe or another region, make sure you have the correct adapter before plugging the unit in to avoid overloading it.

"If RainMachine then IFTTT triggers"

Jul 17, 2016, by admin

If RainMachine then IFTTT triggers


Integrate more then 150 other IoT services with your RainMachine device

1. Please login or create a free IFTTT account here.
2. To allow IFTTT to access your RainMachine, click on Channels and search for RainMachine channel.
3. Follow on screen instruction to login on the RainMachine using your email address and RainMachine password (those are the remote access credentials).
4. Click on ACCEPT button.
5. After the RainMachine channel is connected you can define your own trigger recipes, as in the example below, or you can use predefined users public trigger recipes.

Trigger recipe example:

“If Zone 3 of my RainMachine has started then send me an email on my Gmail address.”

6. Go to RainMachine ifttt channel and scroll down to the Triggers section.
7. There are 9 RainMachine triggers that you can choose from.
8. For our example we will choose the first trigger: "Zone has started". Click on it
9. Then click on the button Create a new recipe
10. Press "this" text button

If Rainmachine then...

11. Search for “RainMachine” channel, and click on it.
12. Choose the first trigger Zone has started1.
13. The next step is to choose one zone from the dropdown zone list.
This list will be populated with all zones from all your RainMachine devices associated with the remote access credentials.
14. After you selected a zone, click on Create Trigger button

If Rainmachine then use this trigger

15. Click on "that" text button
16. Search the channel of the IoT service provider you want. We choose Gmail
17. Click “Gmail” channel and if you are not connected to your gmail account it will ask you to login and to grant IFTTT access.
Do that by entering you gmail credentials and choose Accept.
18. Choose the action Send an email available for this Gmail channel.
19. Next you have to fill the form fields with your gmail email address (that's more important) and how the subject and email body will look2.
20. Attachment URL field can be empty or can be filled with an image url of your zone3.
21. Click on the Create Action
22. If everything is in order then click on the final Create Recipe button to create your RainMachine IFTTT trigger recipe.
23. After the trigger recipe was saved the edit page will open. Here you can choose to:

- Make it public by clicking on the Publish button so all the other users can use it. Not suitable for this kind of triggers that uses personal email addresses.
- Stop it and it will not trigger anymore, but won't be deleted until you choose to delete it by clicking on Delete button.
- Check the status by clicking on Check now button to see if the connection between RainMachine channel and Gmail channel are ok - you will get a green message if everything it's ok, or a red message when something is wrong and you may need to review the trigger settings once again.
- View the trigger log.

Everytime your RainMachine selected zone will start watering on schedule you will get an email to remind you that.
That's how to use the IFTTT RainMachine triggers recipes.


1. Only the scheduled zones or programs can be used as triggers on RainMachine IFTTT channel. If a zone or a program is manually started, the IFTTT trigger will not fire.
2. Do not change/delete the text placed into gray rounded corner square. That will be replaced with the RainMachine Zone number and custom name.
3. Use an online image upload service (like postimage.org) to upload your image and copy and paste the generated link of the image into this field.

RainMachine Touch HD-12 review by gardeningproductsreview.com

May 22, 2016, by admin

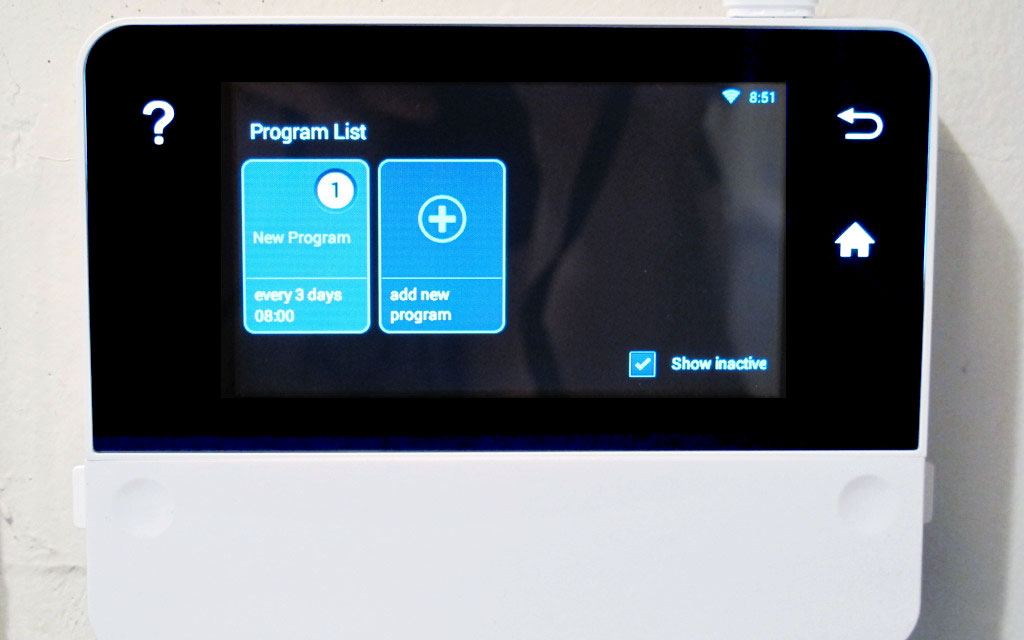
RainMachine Touch HD-12 review by gardeningproductsreview.com - Add new Program screen


Surprisingly Easy Installation and Setup

"Setting up a basic program is really simple. Touch the Settings icon, then select Programs, then Add New Program. You can name the program (such as Vegetable Garden or Lawn), then set the frequency of watering (every day or every n number of days), the start time, and the base watering duration. The base watering duration is the amount of time to water on a typical summer day, say, five minutes."

read more on gardeningproductsreview.com

RainMachine takes your sprinkler game to the next level

Apr 13, 2016, by admin

Newegg.com review: RainMachine takes your sprinkler game to the next level


What makes it so smart?

"It isn’t just the app, which RainMachine does of course have. The intelligence comes from the ability to tap into the local weather forecast and adjust the watering accordingly. This is critical for us in Southern California in the midst of a severe drought, with watering restrictions and unreliable rainfall. The controller taps into the National Oceanic & Atmospheric Administration (NOAA) database for a specific, location-based forecast that updates regularly to account for changes in weather."

read more on Newegg.com

Say Hello to the new Rainmachine Dashboard

Mar 23, 2016, by admin

More Than Just a Pretty Screen


In addition to good design, a dashboard must be easy to navigate and understand. RainMachine gives you the best of both with a clean user interface full of useful data, putting you in total control of your garden.

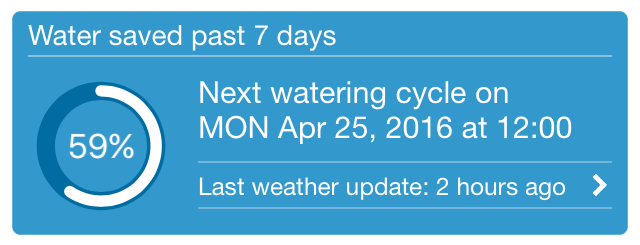
At a glance, on the daily viewRainMachine iOS mobile application Dashboard Daily zoom screenshot, you can see how much water RainMachine has saved you, when it will water next, and when the weather data was last updated. Forecast, daily water need, temperature trends, rain amount, and watering program breakdowns are displayed up to 1 year. The yearly viewRainMachine iOS mobile application Dashboard Yearly zoom screenshot gives a better sense of seasonal trends.


We try and give you as much relevant data as possible so you can make a judgement and adjust accordingly at a glance. In case you are not interested in a certain data source (let’s say temperature graph) just tap on the temperature graph and select “Do not show on Dashboard”*. Simple!

* this option is available only on iOS mobile application


Transparent, Reliable Data, Always.


We tell it like it is, with no sugarcoating or hiding numbers, so you get the full picture, directly from your RainMachine’s weather & evapotranspiration algorithms.

With all this data, our evapotranspiration algorithm makes decisions as to how much, and how long, and when to water your garden. We based our algorithm on research conducted by the American Society of Civil Engineers (ASCE), which you can learn more about here. Our code implementation is fully transparent, open source, and on github; you can check it out here.


Beautiful data on bright screens.

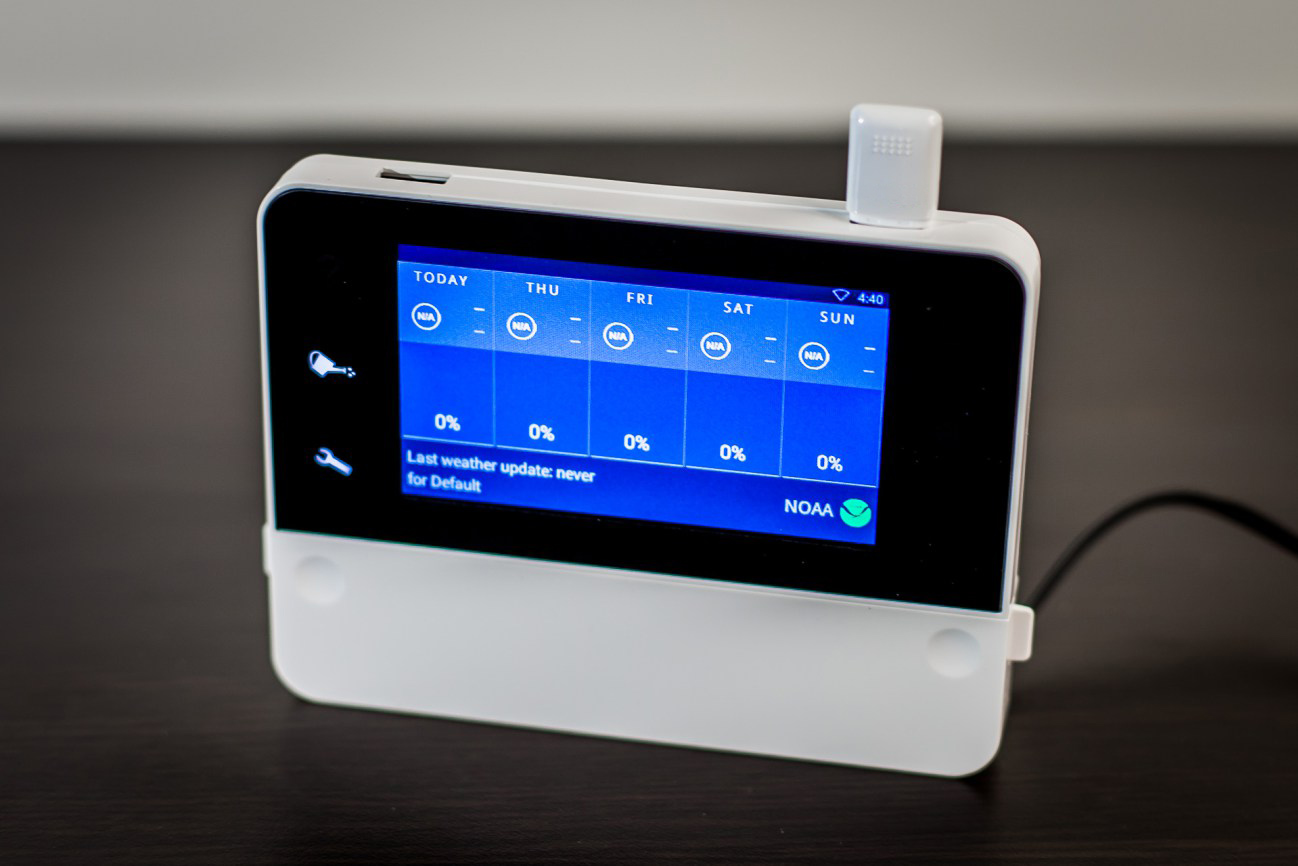
  RainMachine Touch HD Dashboard Daily main screen

People like our device RainMachine Touch HD-12 and RainMachine Touch HD-16 touchscreen dashboard so much, they frequently ask if they can use it inside their living room or kitchen to see the weather at a glance. Still, we believe that the best place for the RainMachine is in your garage. :)

We Timed Installation: RainMachine Setup Takes Just Over 10 Minutes

Mar 07, 2016, by admin

Fear not, It’s easier than you think


Recently we decided to time how quickly we could unpack and setup the RainMachine smart wifi controller, and found that we could do it comfortably in 10 to 15 minutes from box to complete setup.


RainMachine Mini-8 Setup


First get the app, then power and boot up the device. On your phone (iPhone or Android), go to your WiFi settings and select RainMachine WiFi. You are now connected to the Mini-8 wifi access point. Next step is to connect the device to your home WiFi, enter your network password (if any) and wait for RainMachine Mini-8 to connect. When it's done continue the setup process on your phone - choose a name, a password and enter your location. Mount the unit on the wall and enjoy your new smart irrigation controller.
At this point your RainMachine Mini-8 is available to control only through your own WiFi network. Optionally if you want to remotely access your RainMachine Mini-8 from anywhere, you will need to enter your email address and follow the steps to validate it.

Below you can watch an instructional setup video tutorial for the RainMachine Mini-8.


RainMachine Touch HD-12 and RainMachine Touch HD-16 Setup


You can go through the entire setup process from the touch screen on the unit itself. Plug it in, boot it up and give it a name and password. Then get it connected to your home WiFi and input your location. Mount the unit on the wall and you are good to go! Optionally you may want to create a remote access account with your email address and the password you just set. Follow the remote access validation steps and finish the process - your RainMachine Touch HD smart controller will be available from anywhere you go.

Below you can watch an instructional setup video tutorial for the RainMachine Touch HD-12 & RainMachine Touch HD-16.


Please visit our YouTube channel for latest RainMachine videos. Don't forget to subscribe!


NOTE: In the installation process, the most intimidating thing will be the wiring (but it really isn’t). Make sure you take a picture of your old valve wiring so you can refer to it when setting up the RainMachine, and simply match the wires to each zone. Need help? Contact our support team at 844-498-8707 or email us at sales@rainmachine.com. We want this process to be painless, and we are more than happy to help you out!

RainMachine & IFTTT: the power of Internet Of Things

Jan 18, 2016, by admin
RainMachine & IFTTT: the power of Internet Of Things

In the past few weeks we have quietly pushing out IFTTT functionality to our RainMachine Mini and RainMachine Touch HD 2015 models. This release will allow you to have creative control over the thing you love the most: your garden.

By using public recipes or by creating your own recipes, you will be able to control your RainMachine in more ways than you could do before. You can even talk with your Rainmachine via the IFTTT Alexa channel!.


Enjoy your connected garden!


Unleash the power of Internet of Things (IoT)
by integrating your RainMachine with IFTTT


Before you start, please make sure your RainMachine device has the latest firmware installed.
To do that, check and update your firmware by going to System -> Software Update using the RainMachine mobile iPhone and Android application, locally on the RainMachine Touch HD devices, or using the web application accessible at my.rainmachine.com

A step by step IFTTT how to guide can be found here.


Enjoy IFTTT!
The RainMachine Development team


NOTE: IFTTT trigger support will also be available, release date is March 1st, 2016.